This is the multi-page printable view of this section. Click here to print.
Customize vSphere
1 - Import OVAs
If you want to specify an OVA template, you will need to import OVA files into vSphere before you can use it in your EKS Anywhere cluster. This guide was written using VMware Cloud on AWS, but the VMware OVA import guide can be found here.
Note
If you don’t specify a template in the cluster spec file, EKS Anywhere will use the proper default one for the Kubernetes minor version and OS family you specified in the spec file. If the template doesn’t exist, it will import the appropriate OVA into vSphere and add the necessary tags.
The default OVA for a Kubernetes minor version + OS family will change over time, for example, when a new EKS Distro version is released. In that case, new clusters will use the new OVA (EKS Anywhere will import it automatically).
Warning
Do not power on the imported OVA directly as it can cause some undesired configurations on the OS template and affect cluster creation. If you want to explore or modify the OS, please follow the instructions to customize the OVA.EKS Anywhere supports the following operating system families
- Bottlerocket (default)
- Ubuntu
- RHEL
A list of OVAs for this release can be found on the artifacts page.
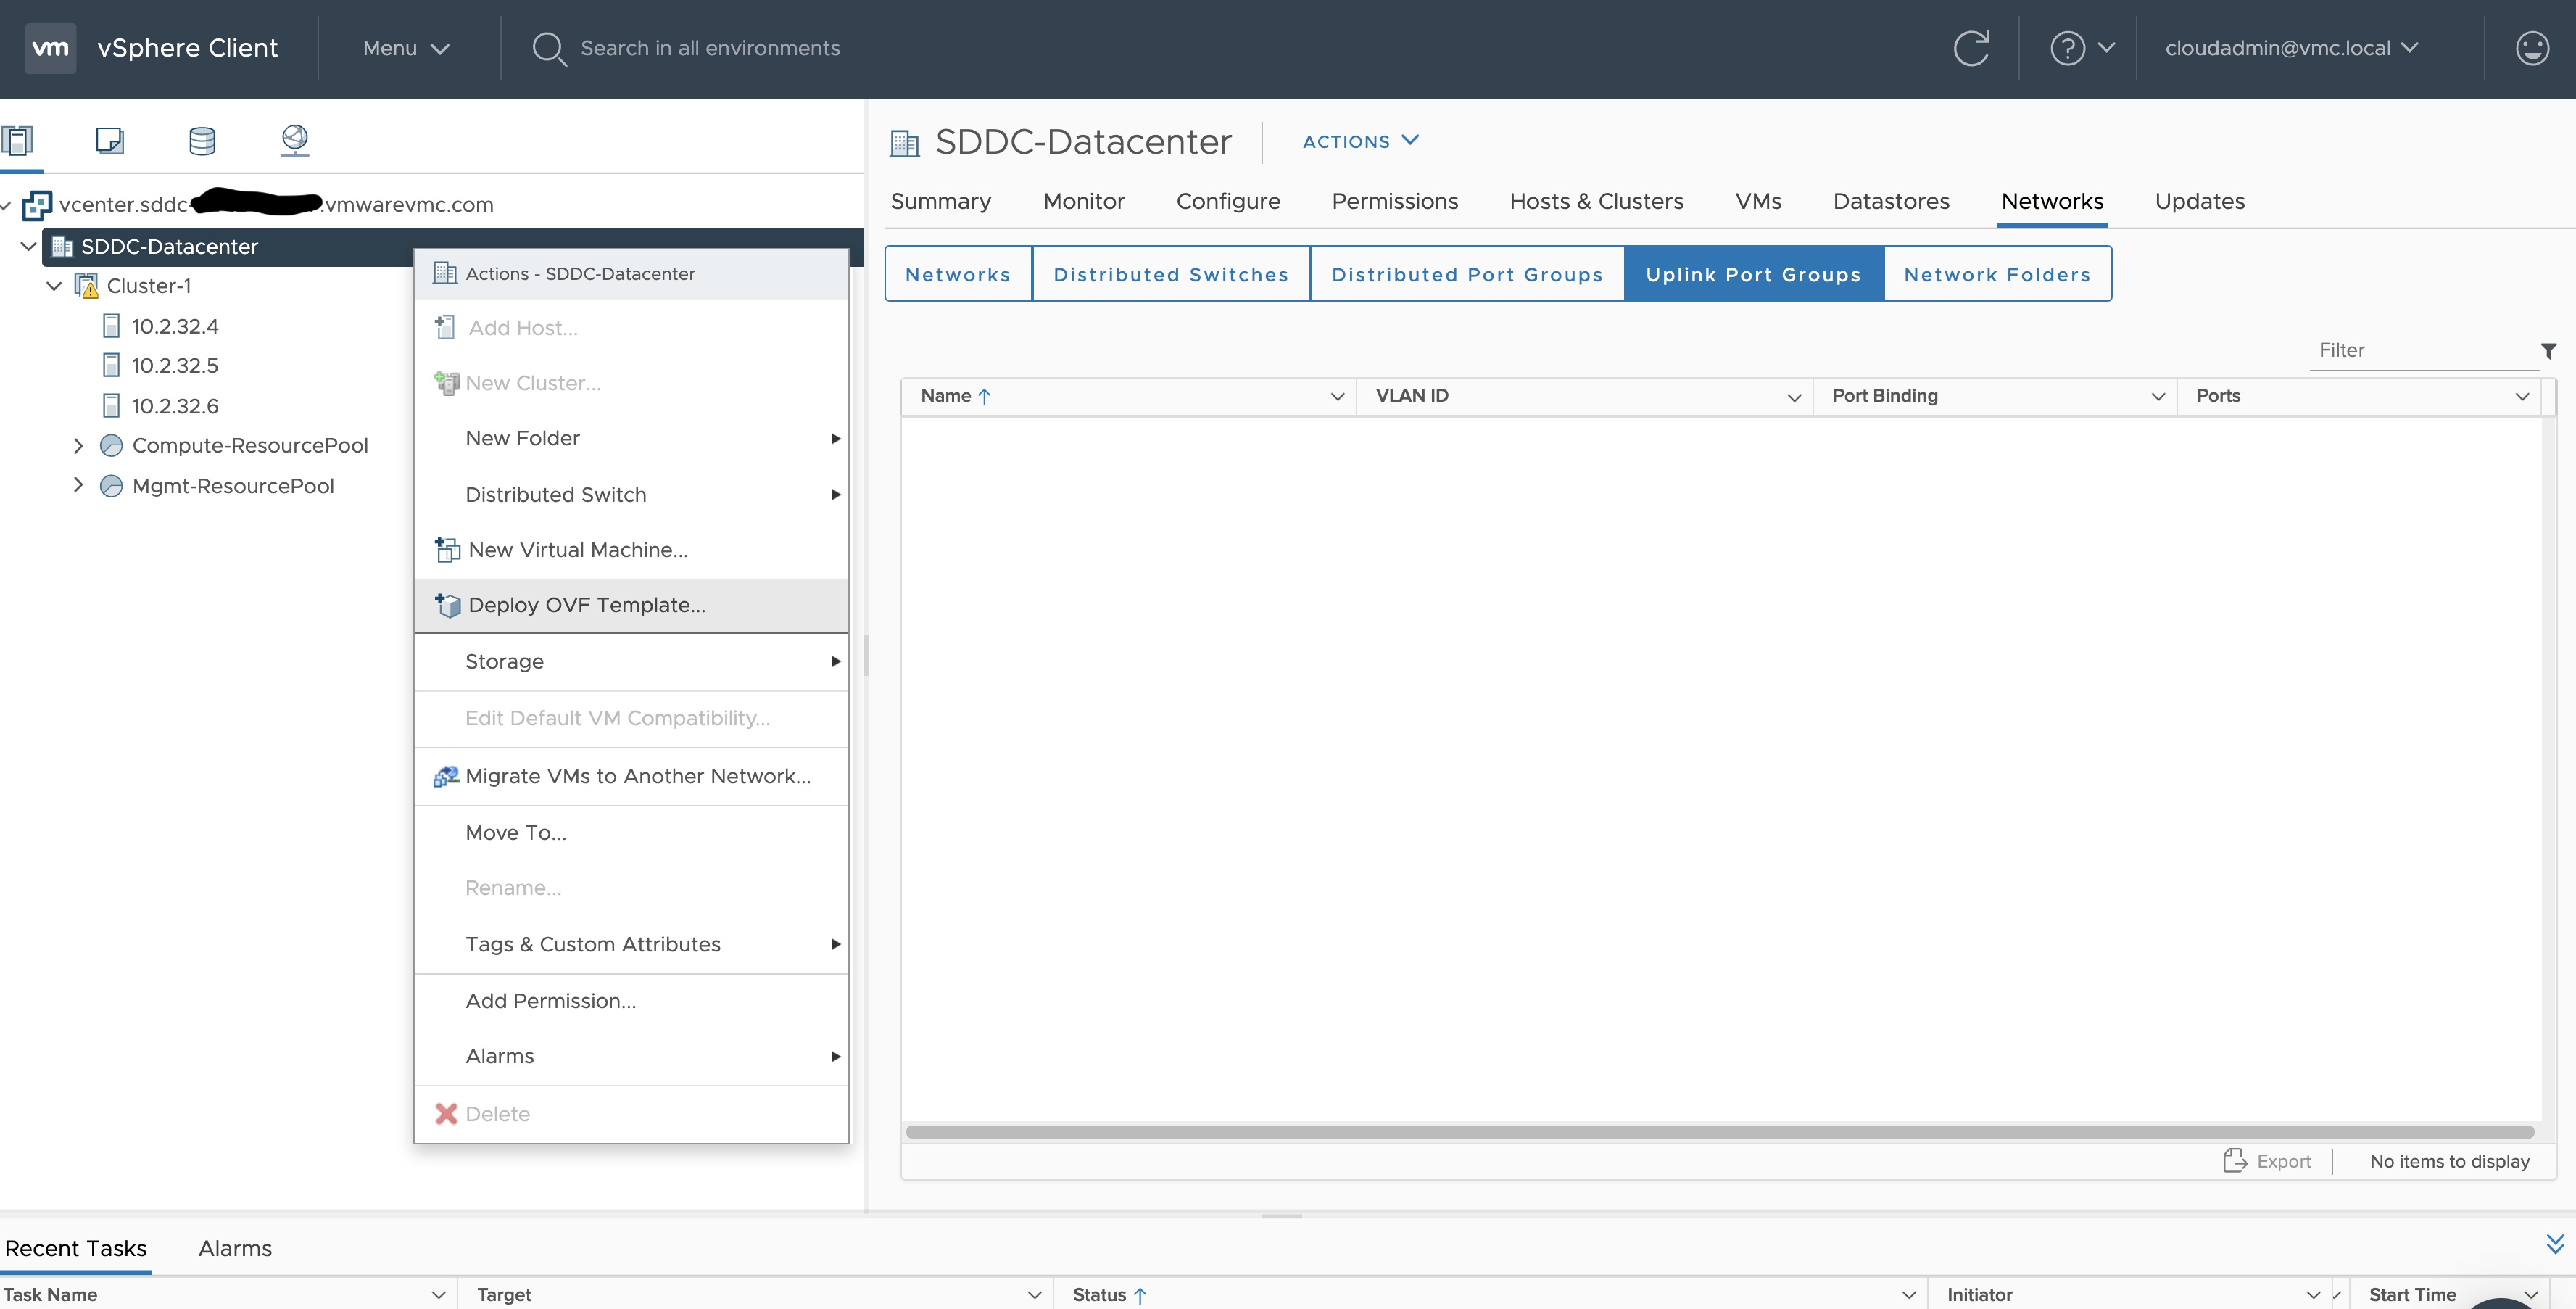
Using vCenter Web User Interface
-
Right click on your Datacenter, select Deploy OVF Template
-
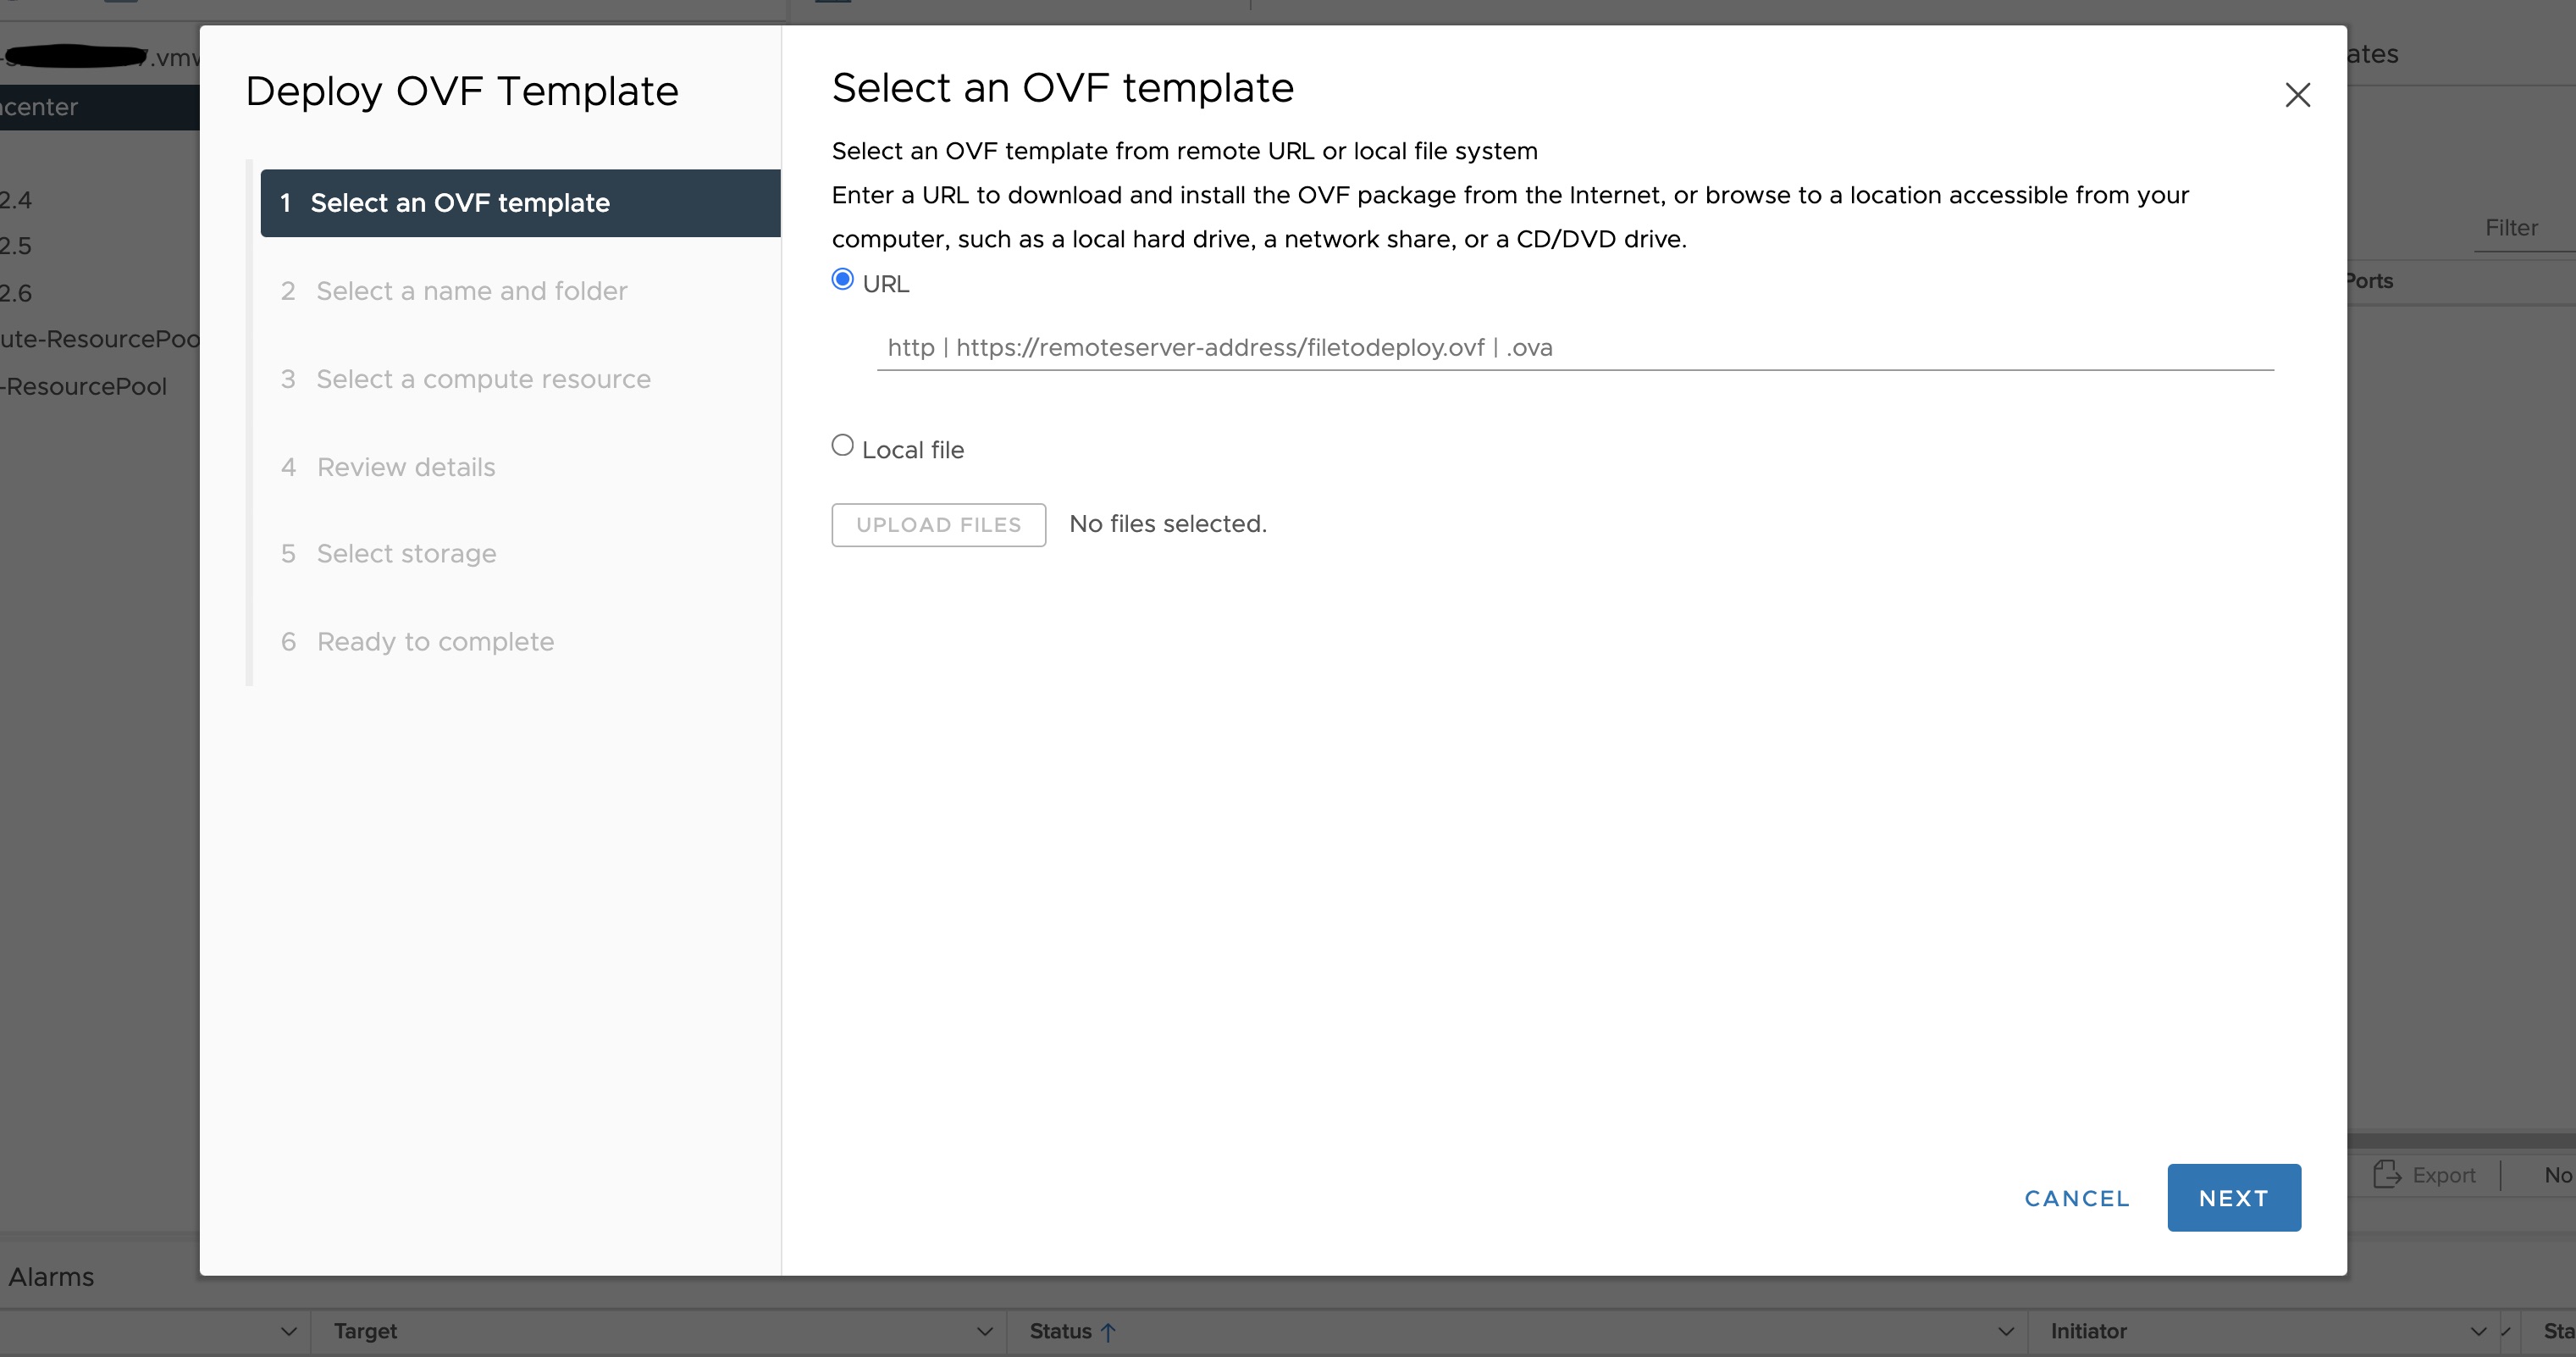
Select an OVF template using URL or selecting a local OVF file and click on Next. If you are not able to select an OVF template using URL, download the file and use Local file option.
Note: If you are using Bottlerocket OVAs, please select local file option.
-
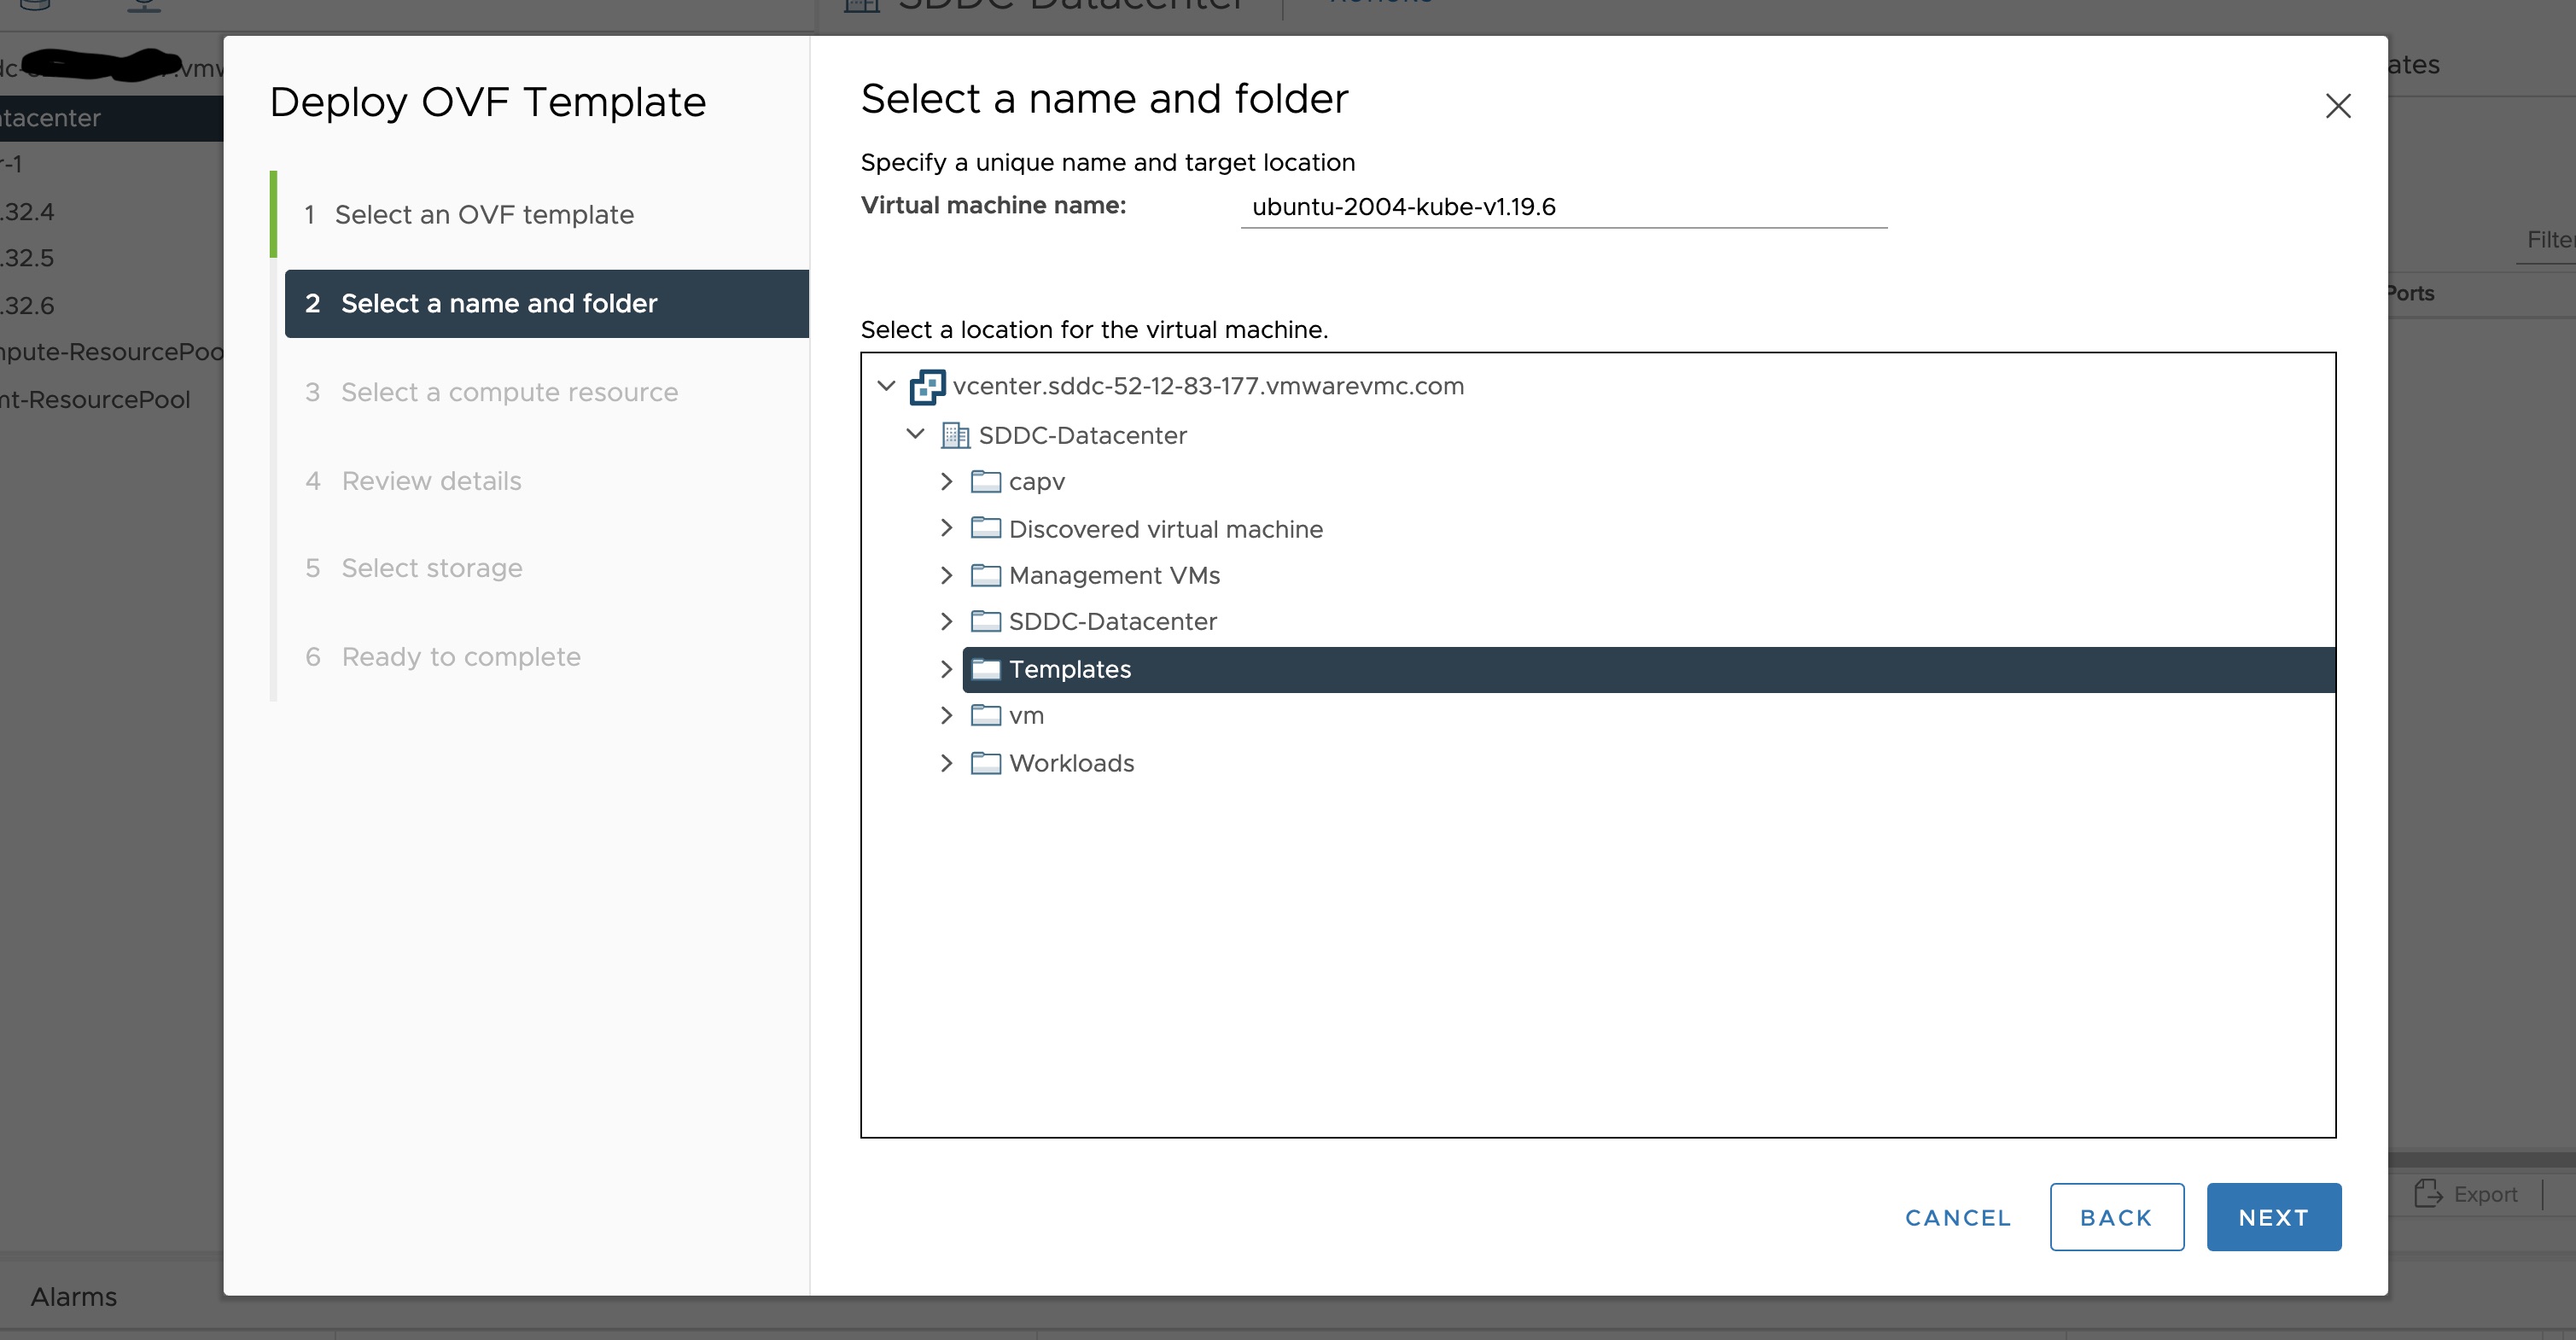
Select a folder where you want to deploy your OVF package (most of our OVF templates are under SDDC-Datacenter directory) and click on Next. You cannot have an OVF template with the same name in one directory. For workload VM templates, leave the Kubernetes version in the template name for reference. A workload VM template will support at least one prior Kubernetes major versions.
-
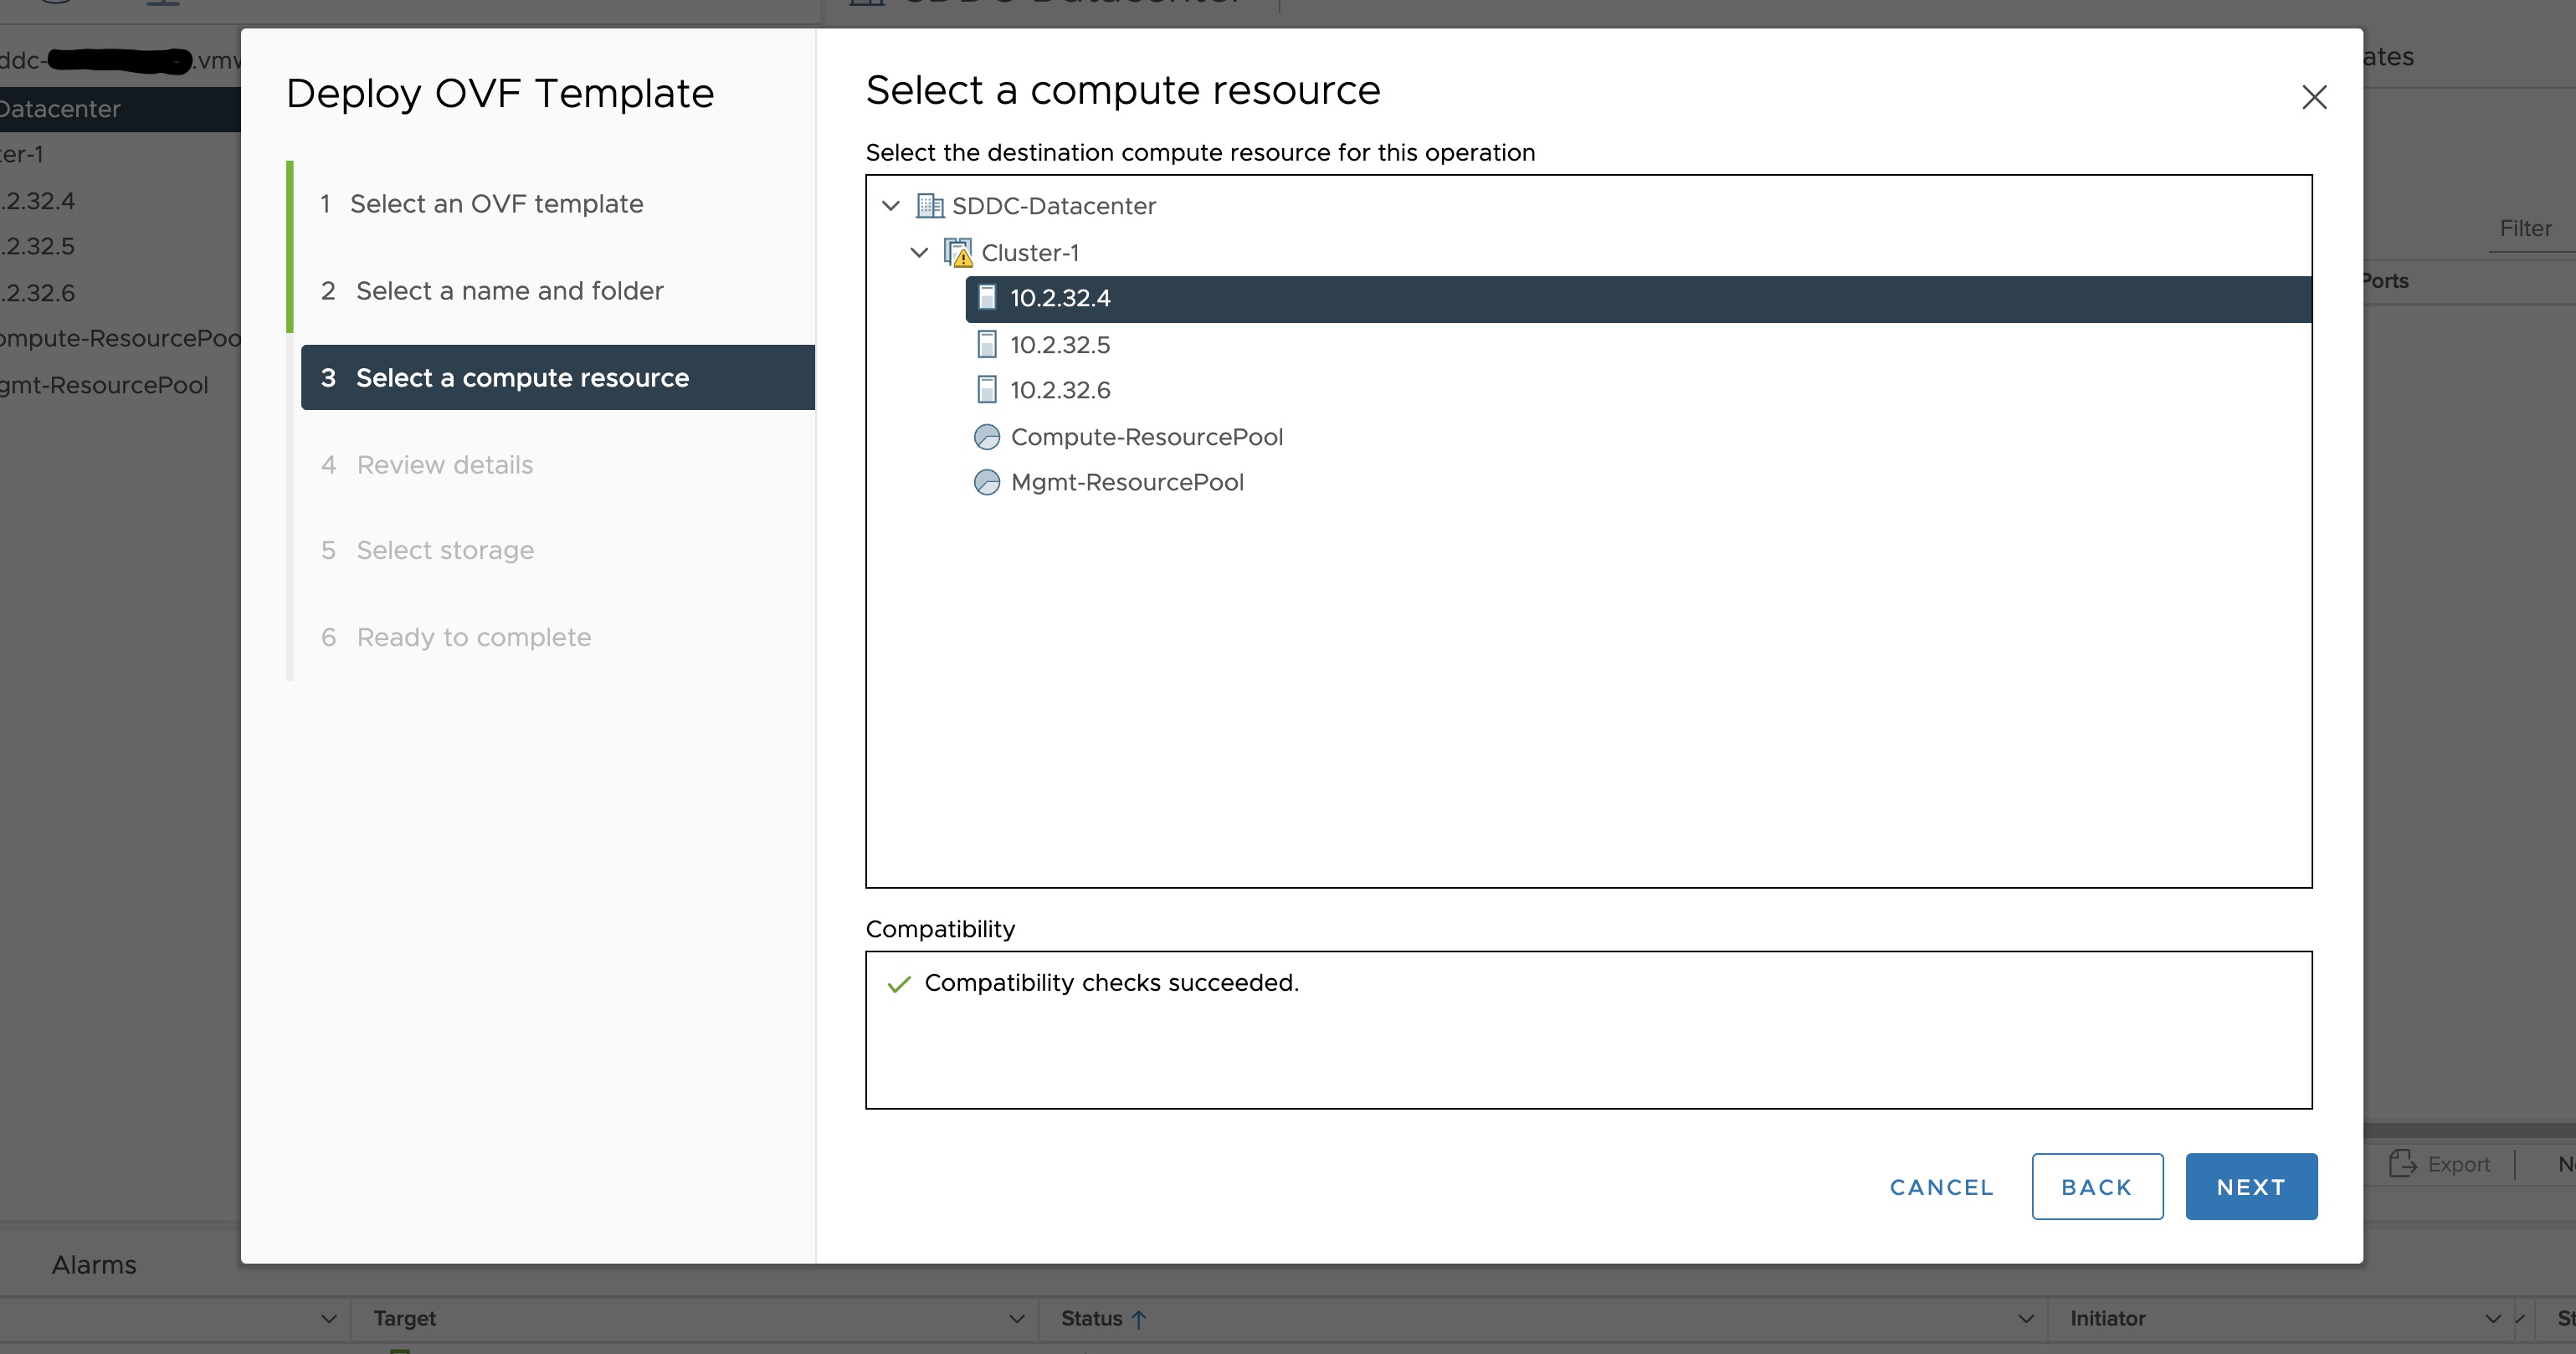
Select any compute resource to run (from cluster-1, 10.2.34.5, etc..) the deployed VM and click on Next
-
Review the details and click Next.
-
Accept the agreement and click Next.
-
Select the appropriate storage (e.g. “WorkloadDatastore“) and click Next.
-
Select destination network (e.g. “sddc-cgw-network-1”) and click Next.
-
Finish.
-
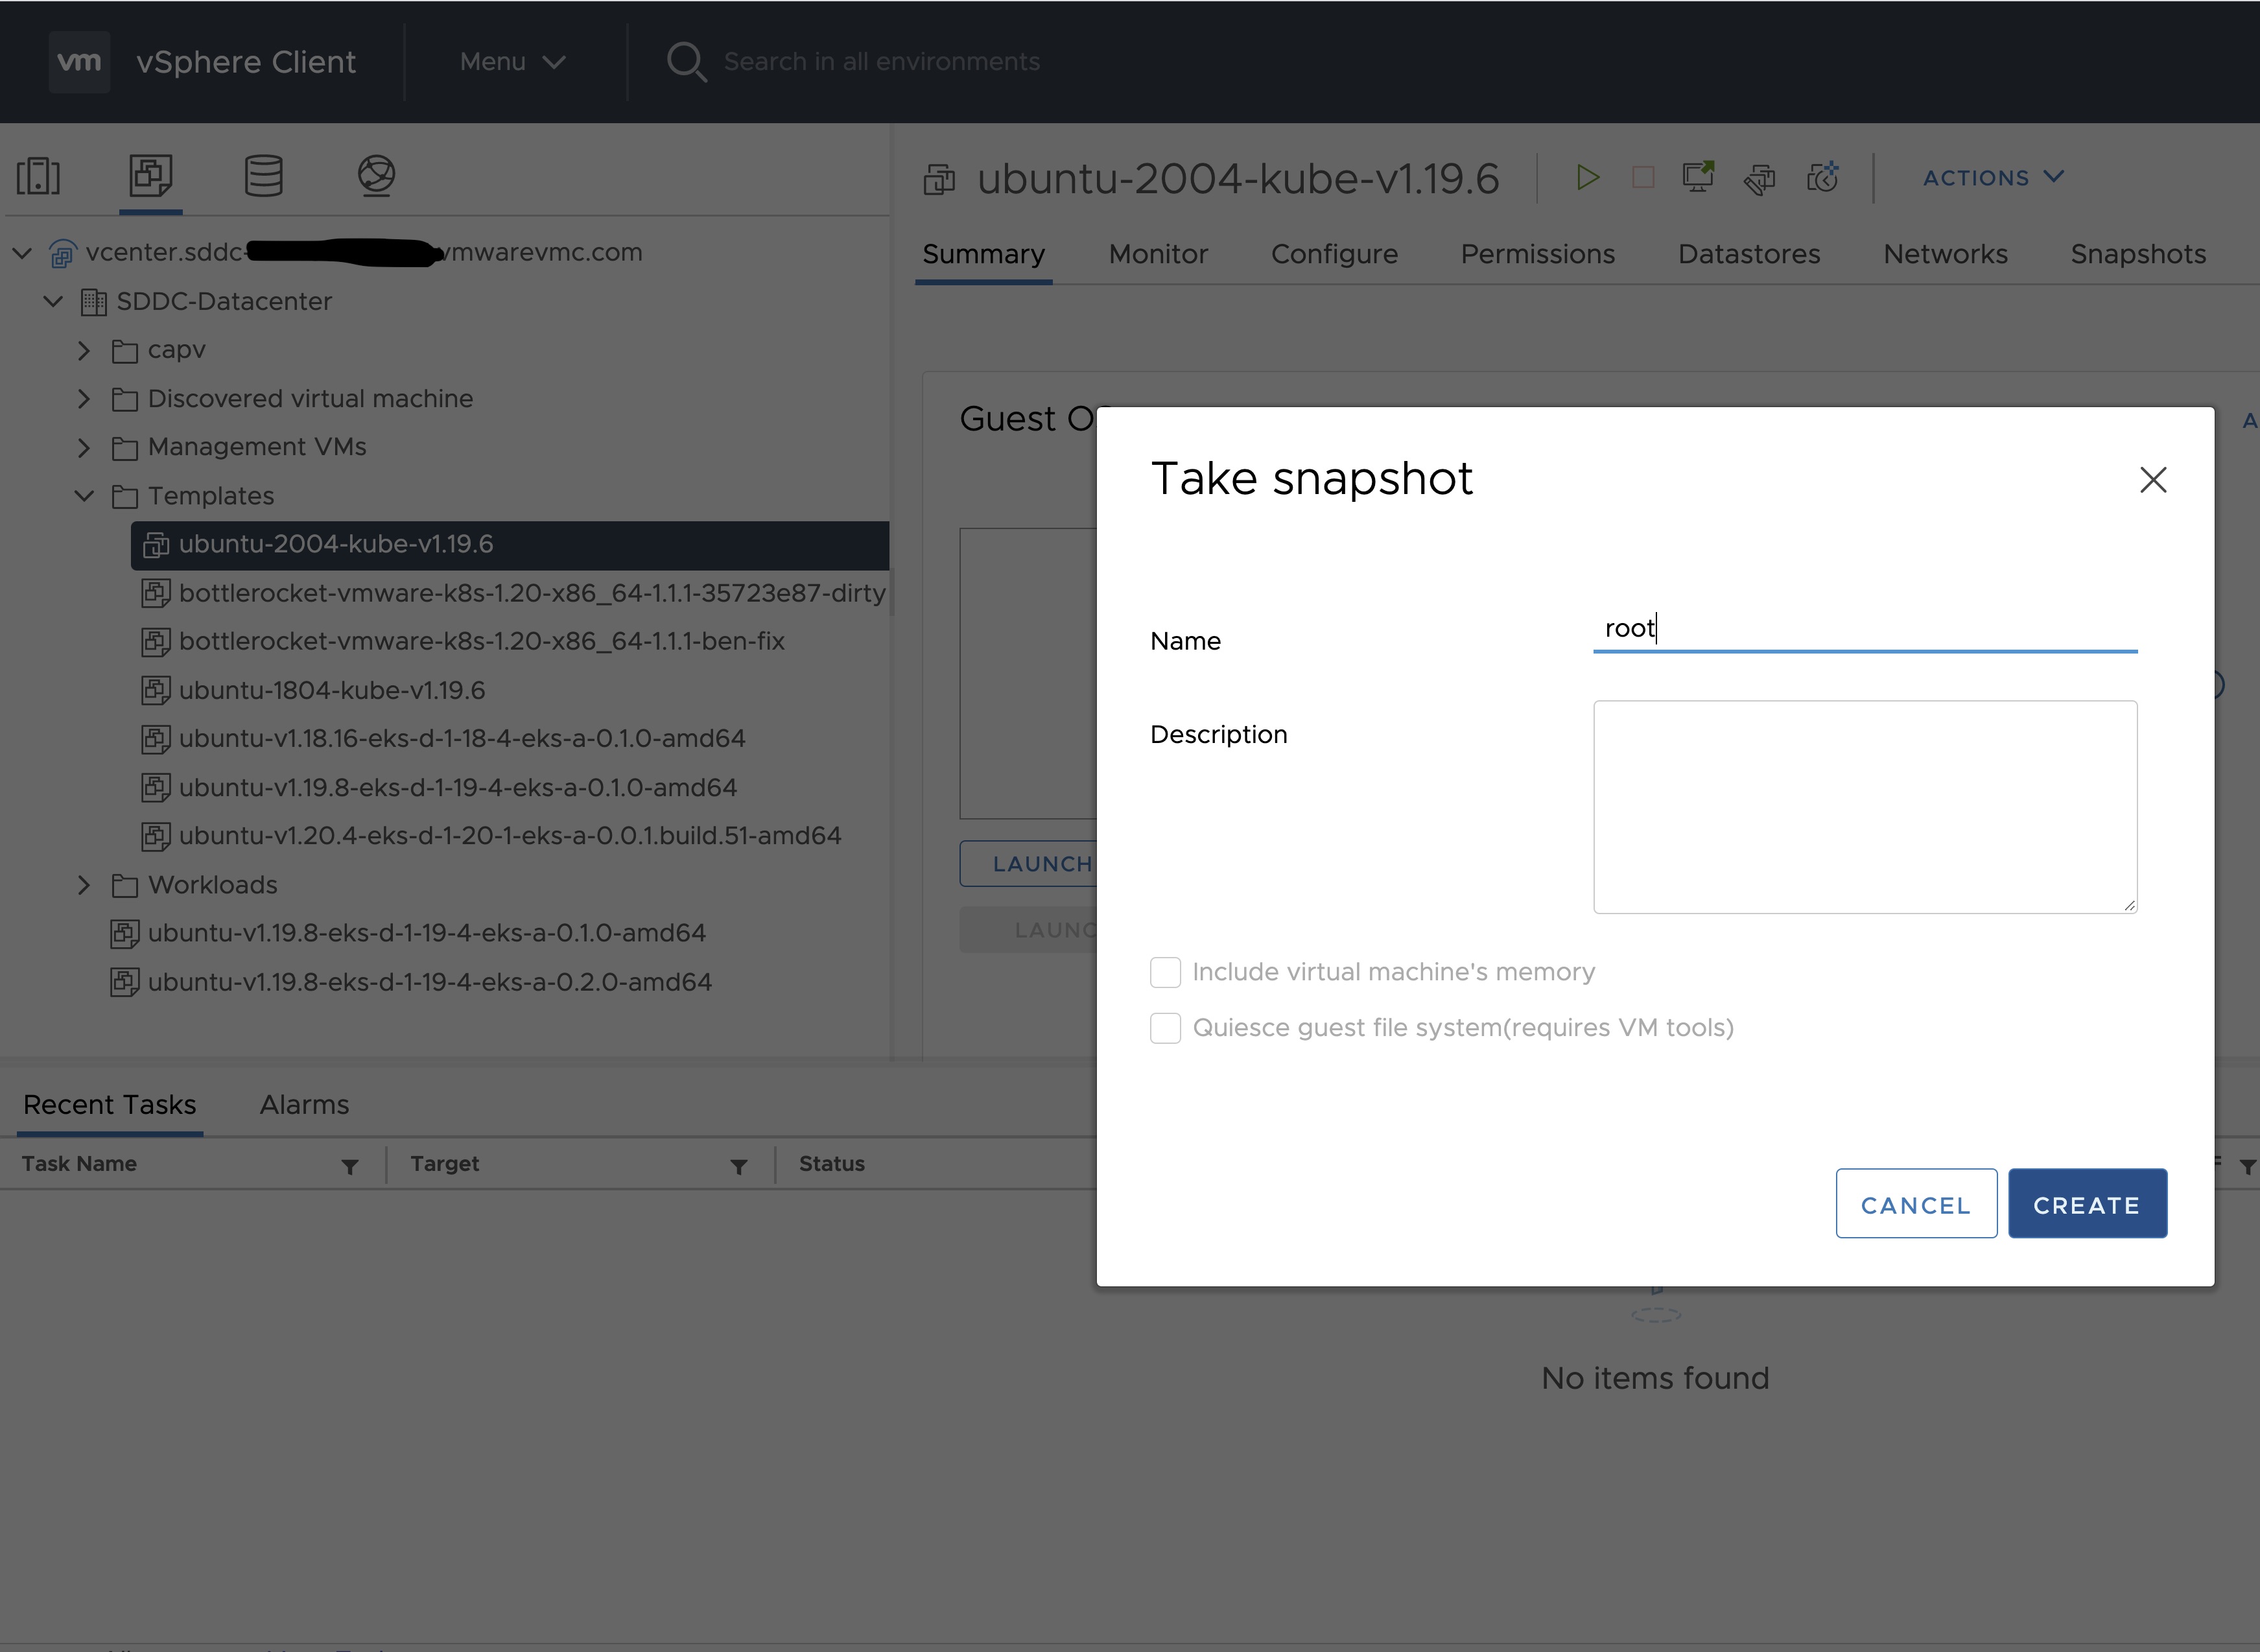
Snapshot the VM. Right click on the imported VM and select Snapshots -> Take Snapshot… (It is highly recommended that you snapshot the VM. This will reduce the time it takes to provision machines and cluster creation will be faster. If you prefer not to take snapshot, skip to step 13)

-
Name your template (e.g. “root”) and click Create.
-
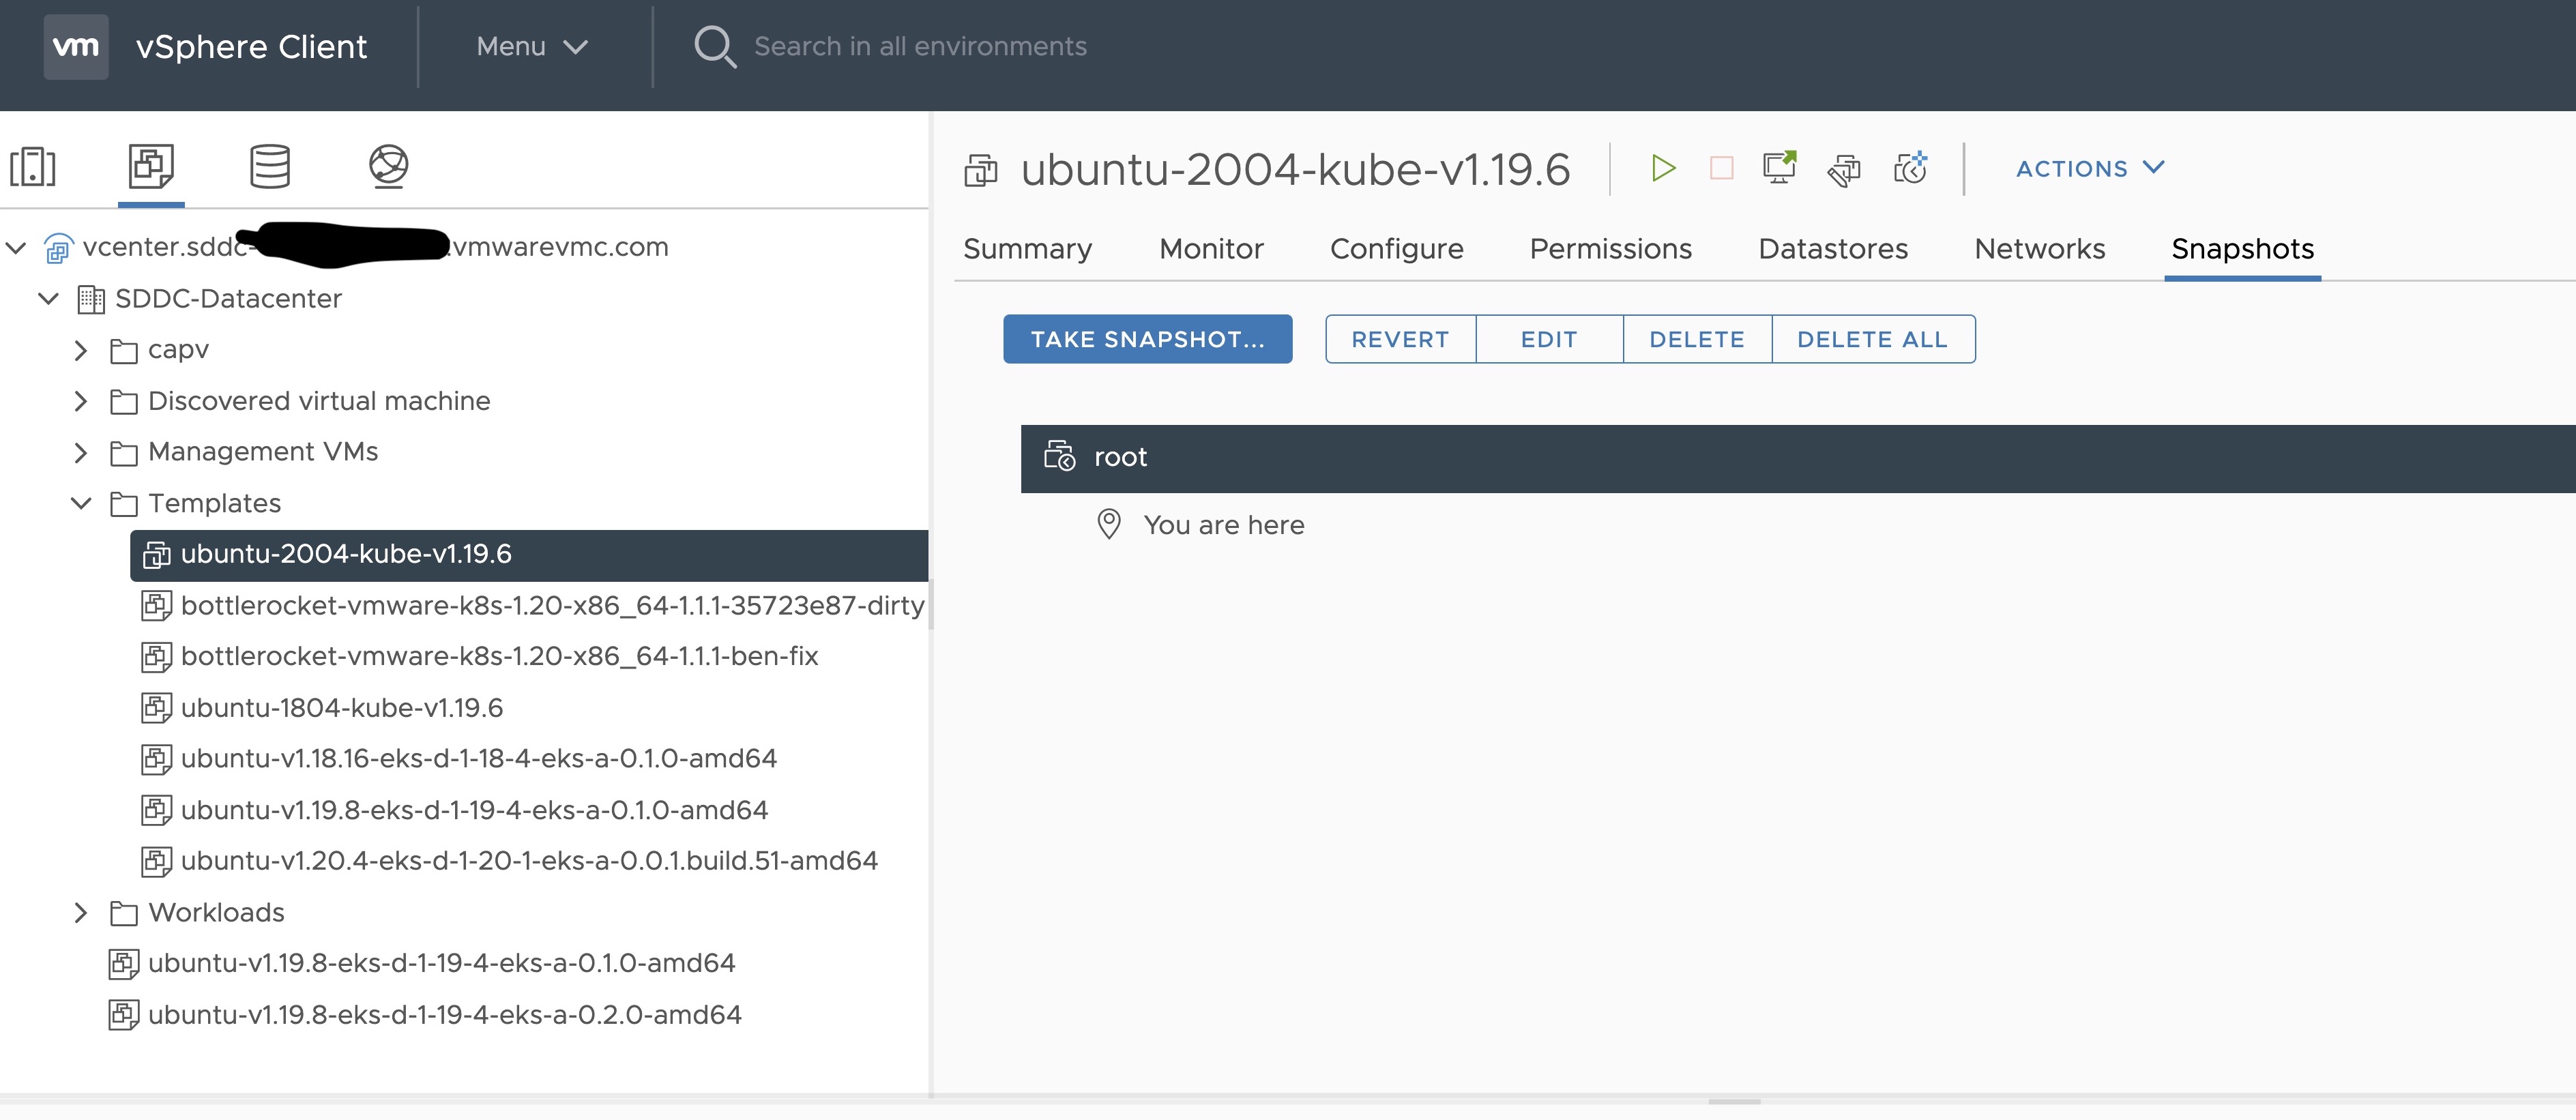
Snapshots for the imported VM should now show up under the Snapshots tab for the VM.
-
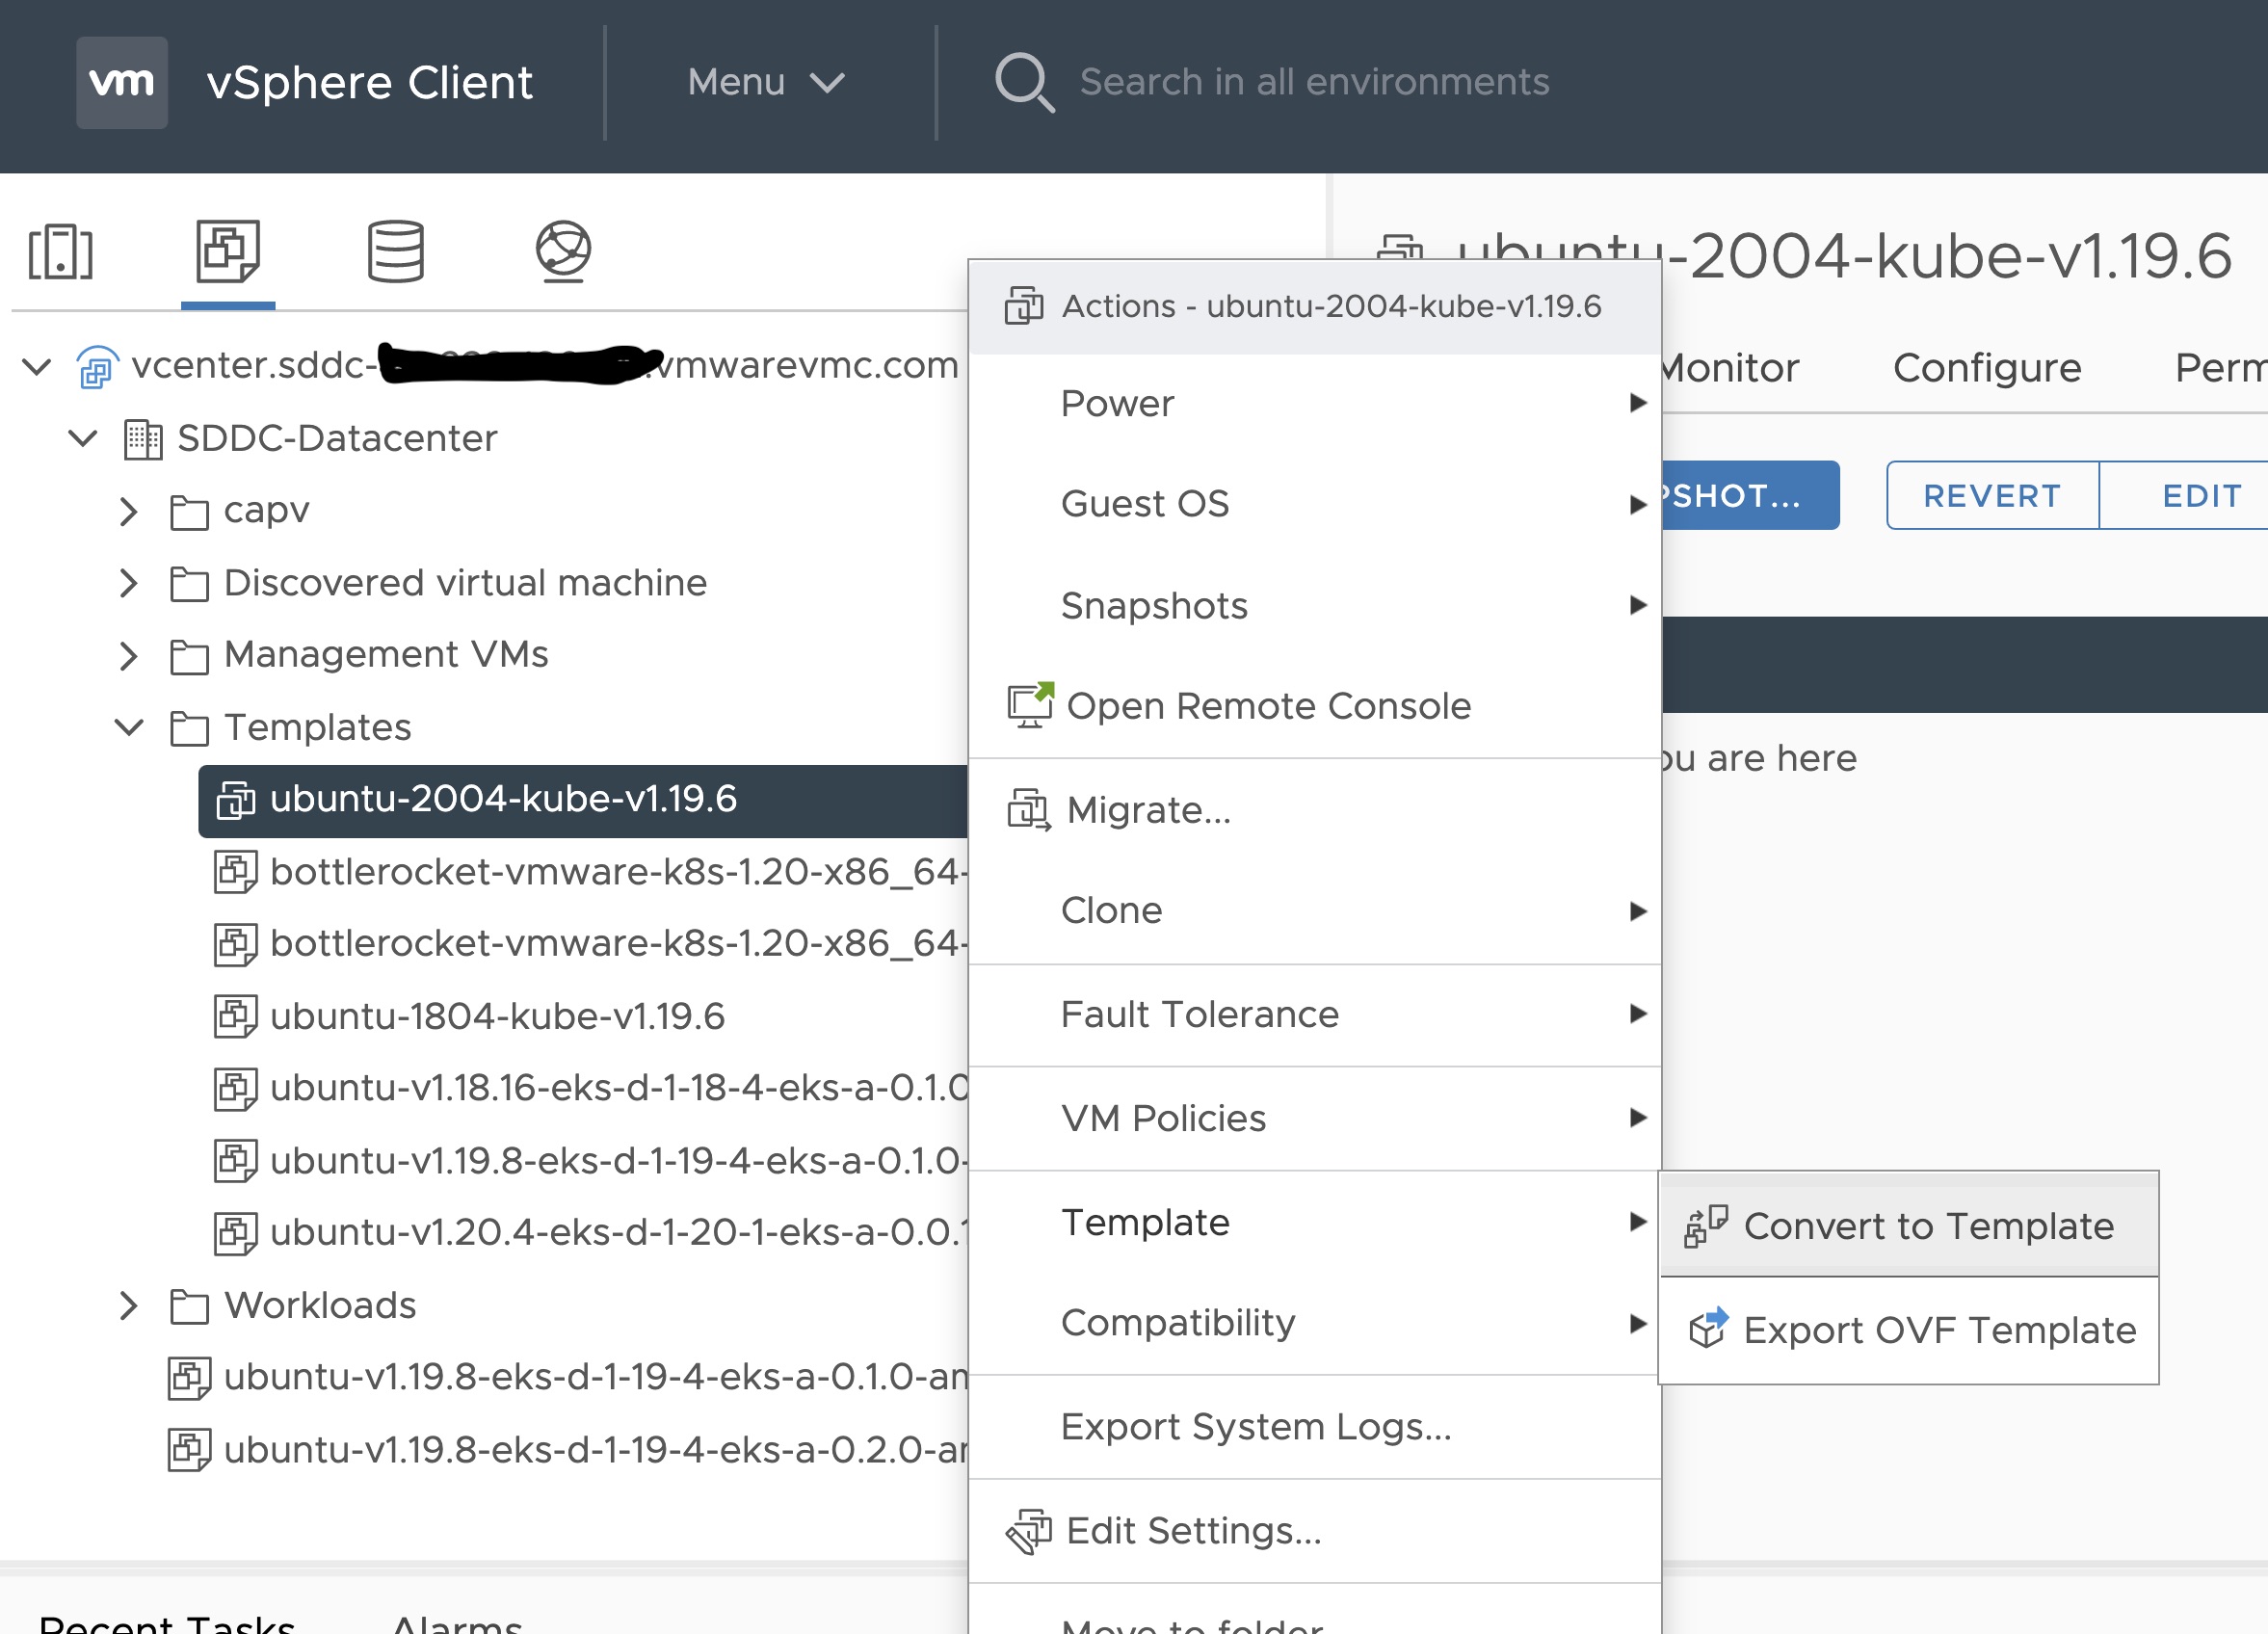
Right click on the imported VM and select Template and Convert to Template
Steps to deploy a template using GOVC (CLI)
To deploy a template using govc, you must first ensure that you have
GOVC installed
. You need to set and export three
environment variables to run govc GOVC_USERNAME, GOVC_PASSWORD and GOVC_URL.
-
Import the template to a content library in vCenter using URL or selecting a local OVA file
Using URL:
govc library.import -k -pull <library name> <URL for the OVA file>Using a file from the local machine:
govc library.import <library name> <path to OVA file on local machine> -
Deploy the template
govc library.deploy -pool <resource pool> -folder <folder location to deploy template> /<library name>/<template name> <name of new VM>2a. If using Bottlerocket template for newer Kubernetes version than 1.21, resize disk 1 to 22G
govc vm.disk.change -vm <template name> -disk.label "Hard disk 1" -size 22G2b. If using Bottlerocket template for Kubernetes version 1.21, resize disk 2 to 20G
govc vm.disk.change -vm <template name> -disk.label "Hard disk 2" -size 20G -
Take a snapshot of the VM (It is highly recommended that you snapshot the VM. This will reduce the time it takes to provision machines and cluster creation will be faster. If you prefer not to take snapshot, skip this step)
govc snapshot.create -vm ubuntu-2004-kube-v1.25.6 root -
Mark the new VM as a template
govc vm.markastemplate <name of new VM>
Important Additional Steps to Tag the OVA
Using vCenter UI
Tag to indicate OS family
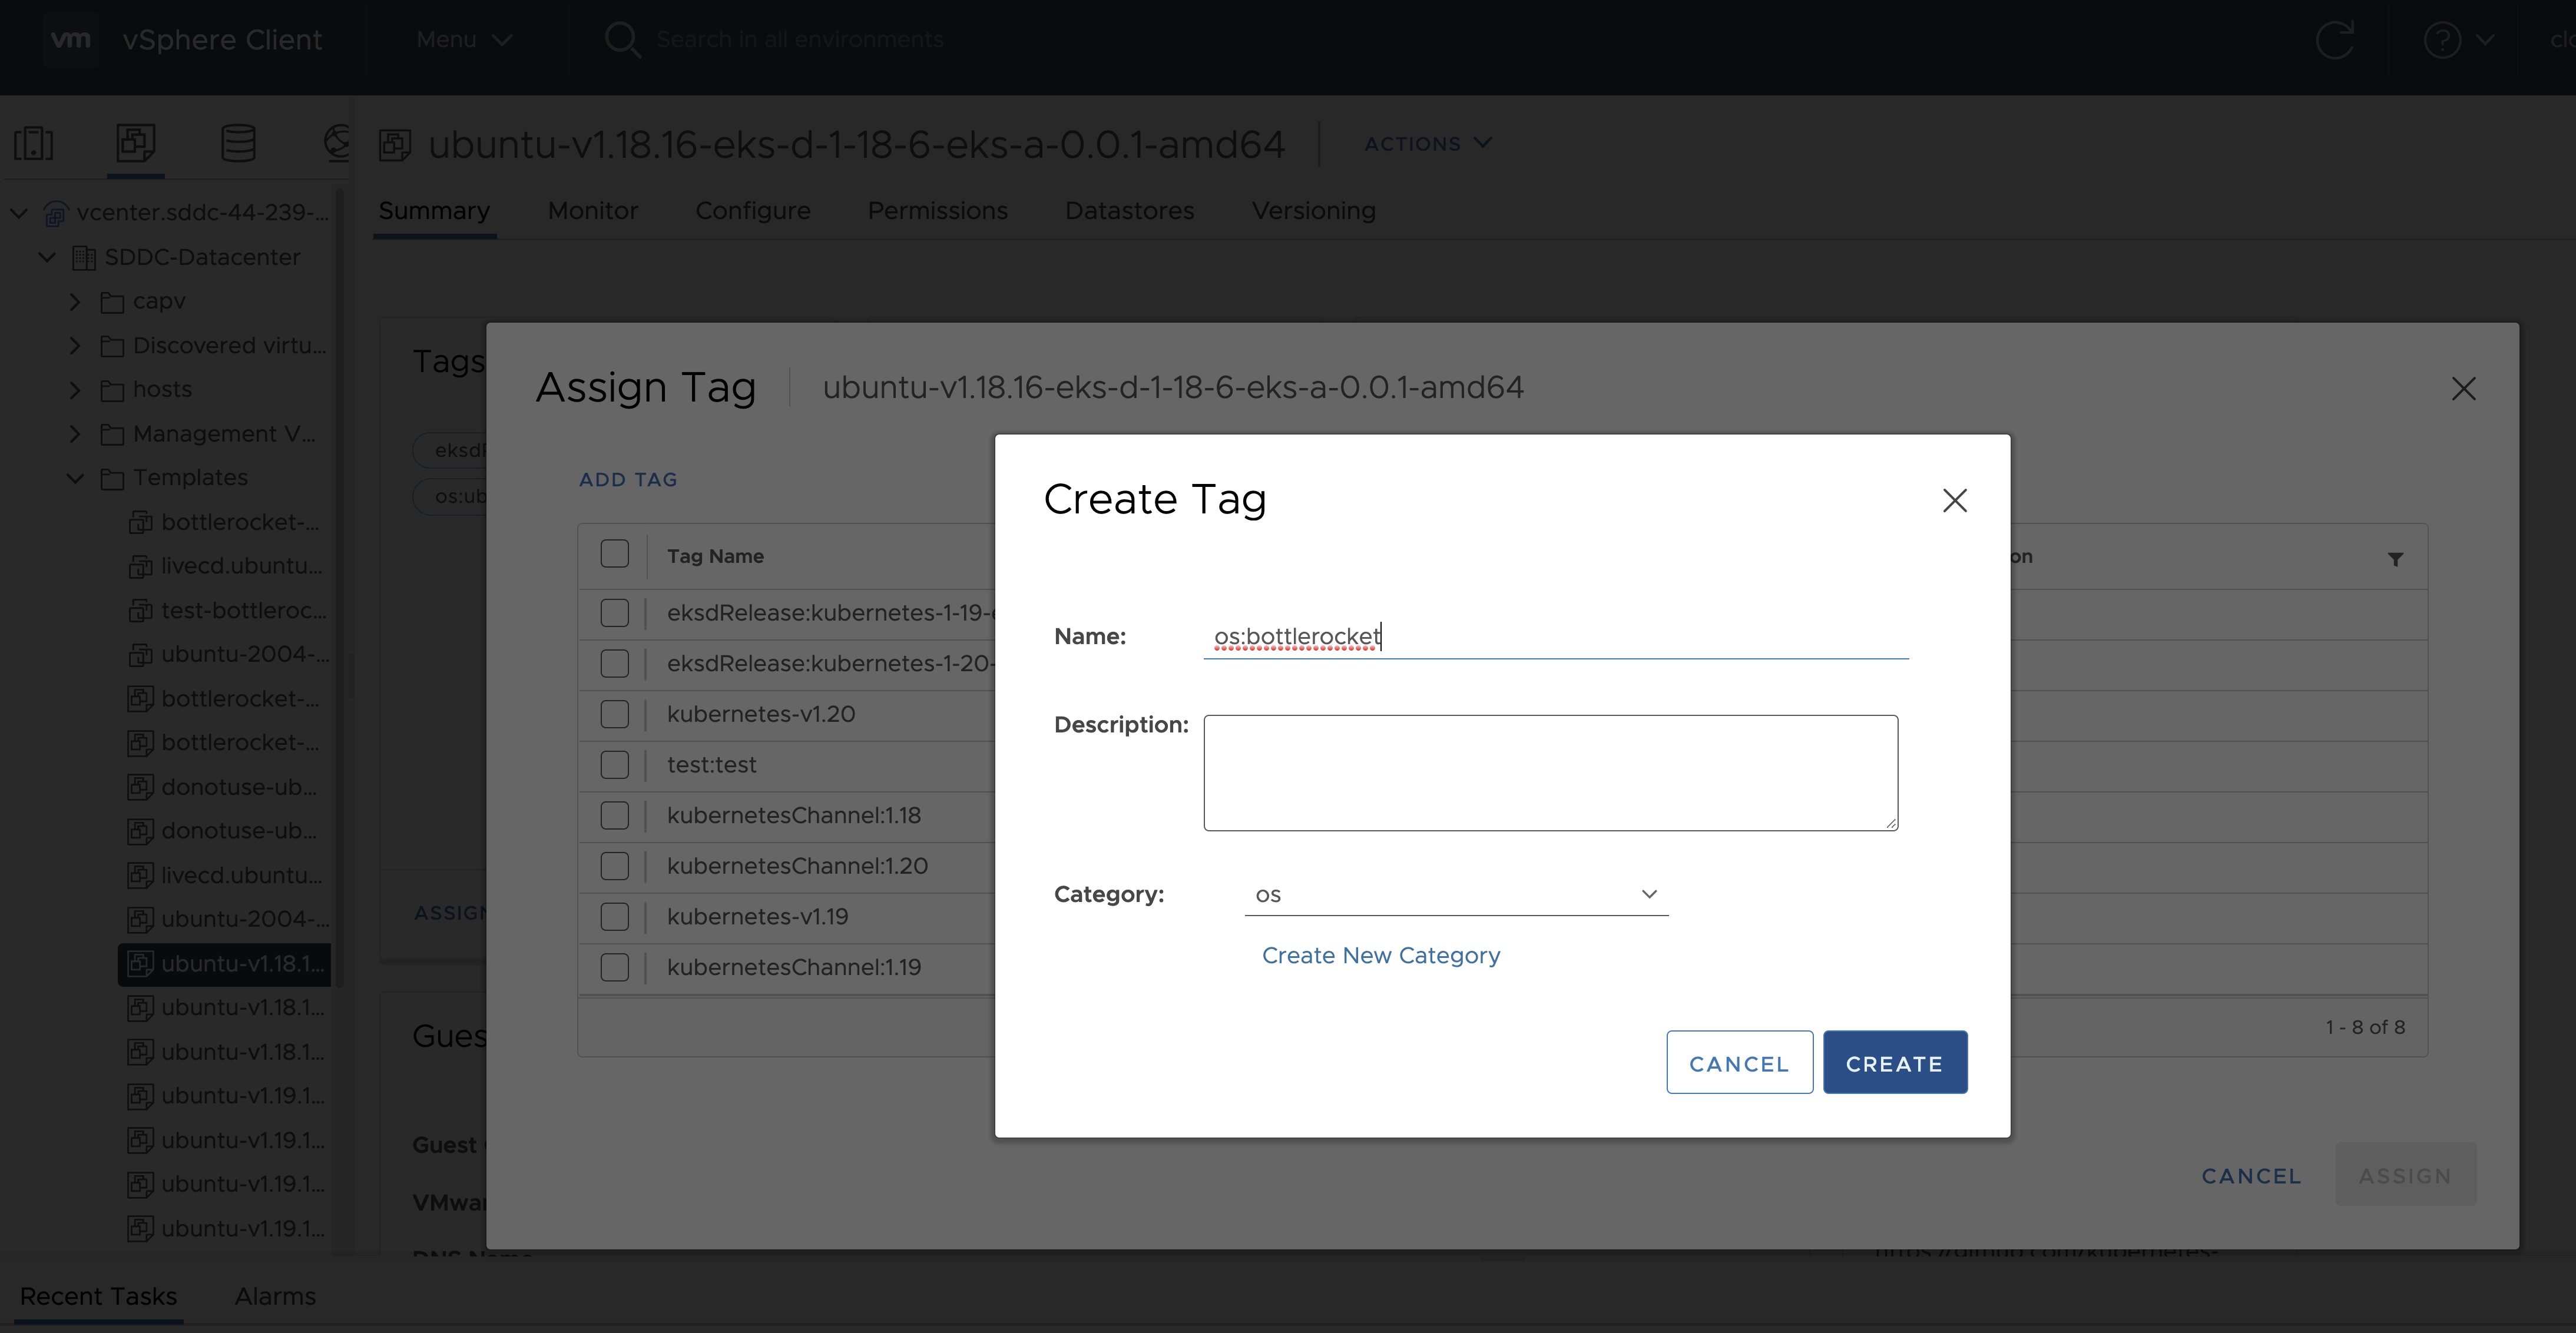
- Select the template that was newly created in the steps above and navigate to Summary -> Tags.
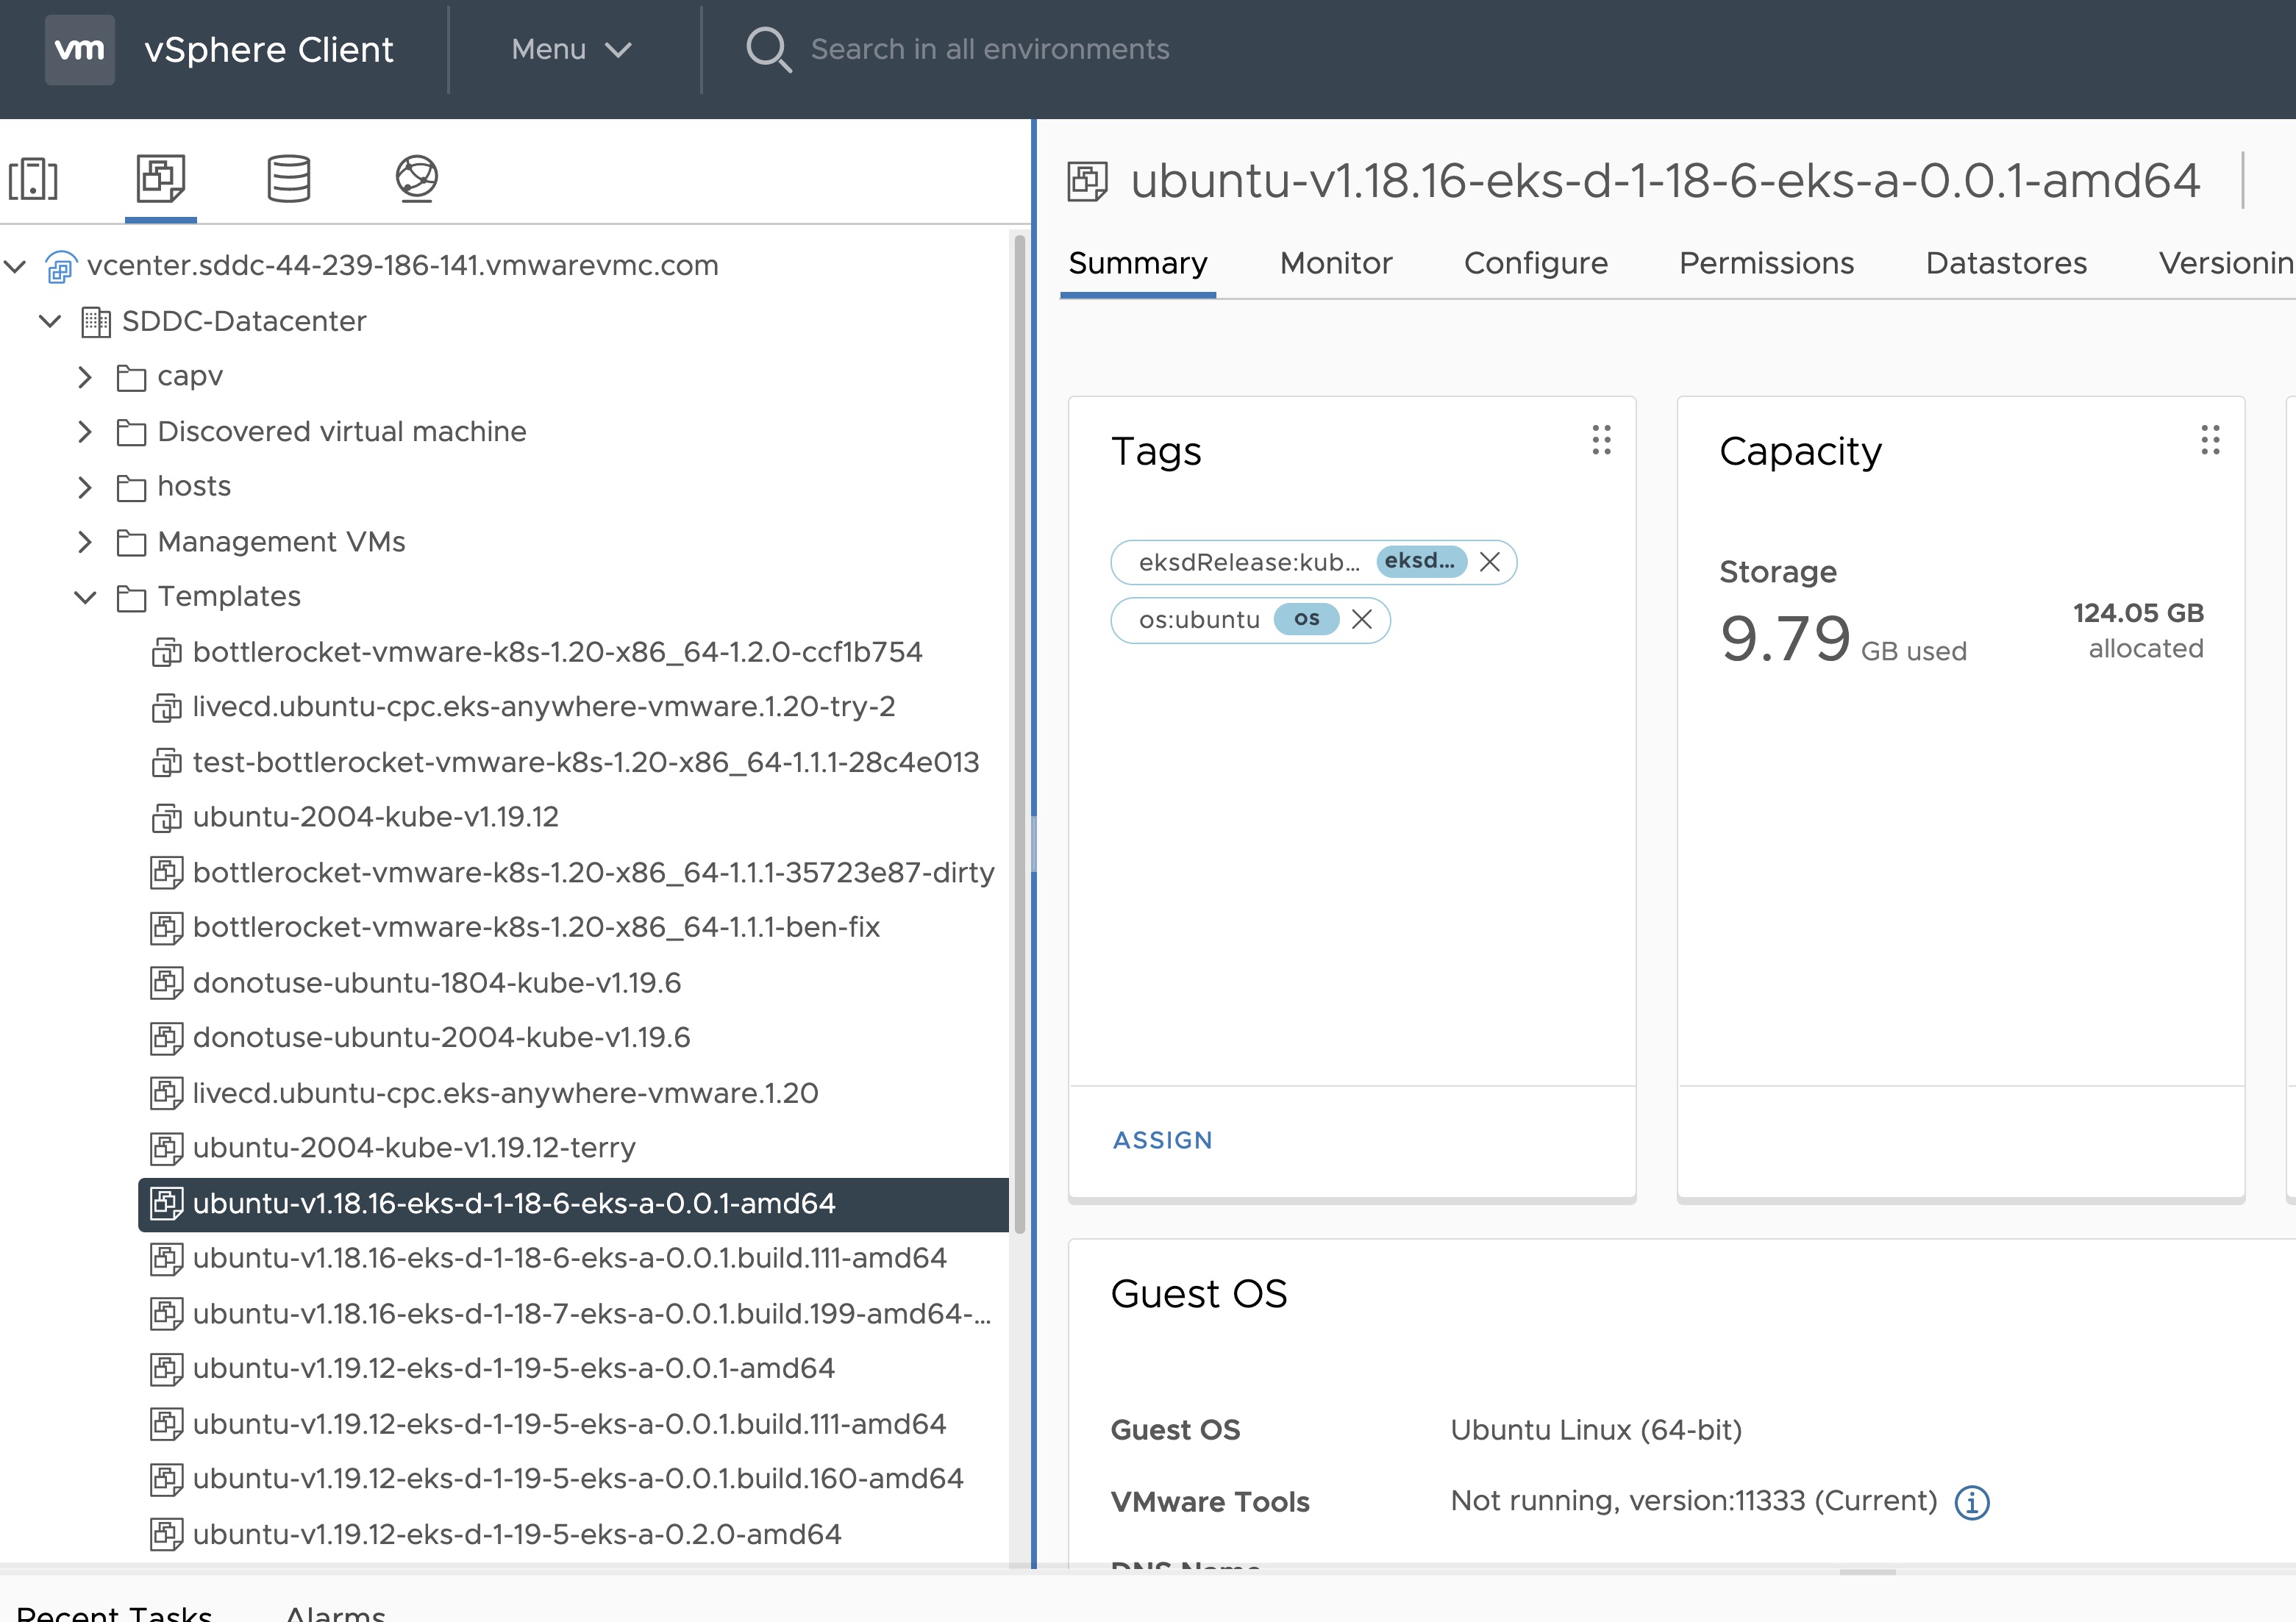
- Click Assign -> Add Tag to create a new tag and attach it
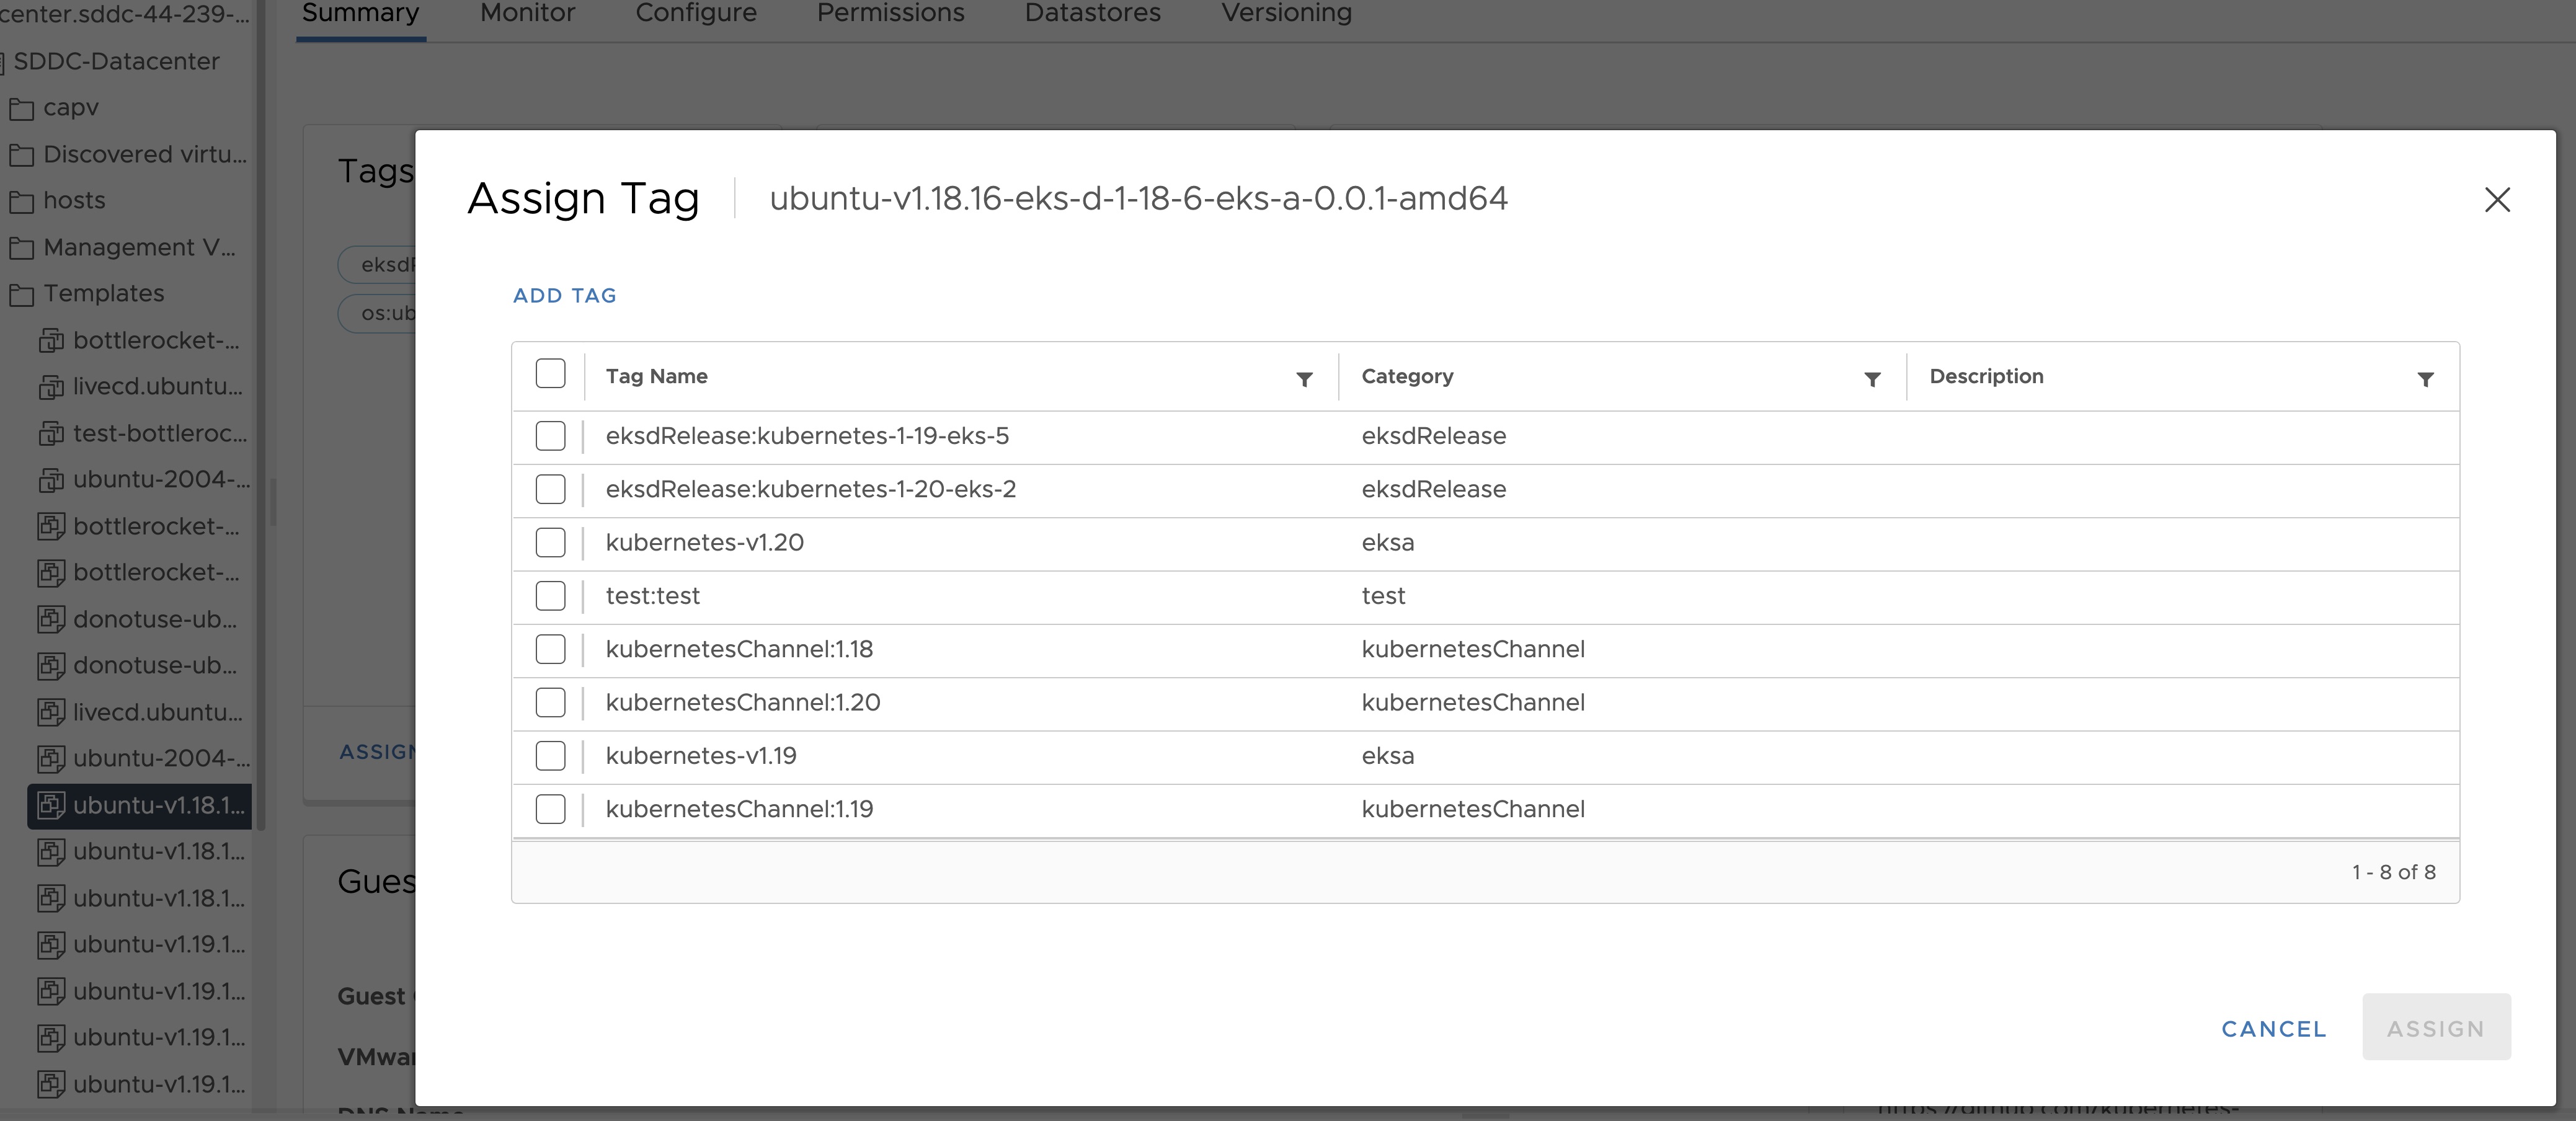
- Name the tag os:ubuntu or os:bottlerocket
Tag to indicate eksd release
- Select the template that was newly created in the steps above and navigate to Summary -> Tags.
- Click Assign -> Add Tag to create a new tag and attach it
- Name the tag eksdRelease:{eksd release for the selected ova}, for example eksdRelease:kubernetes-1-25-eks-5 for the 1.25 ova. You can find the rest of eksd releases in the previous section
. If it’s the first time you add an
eksdReleasetag, you would need to create the category first. Click on “Create New Category” and name iteksdRelease.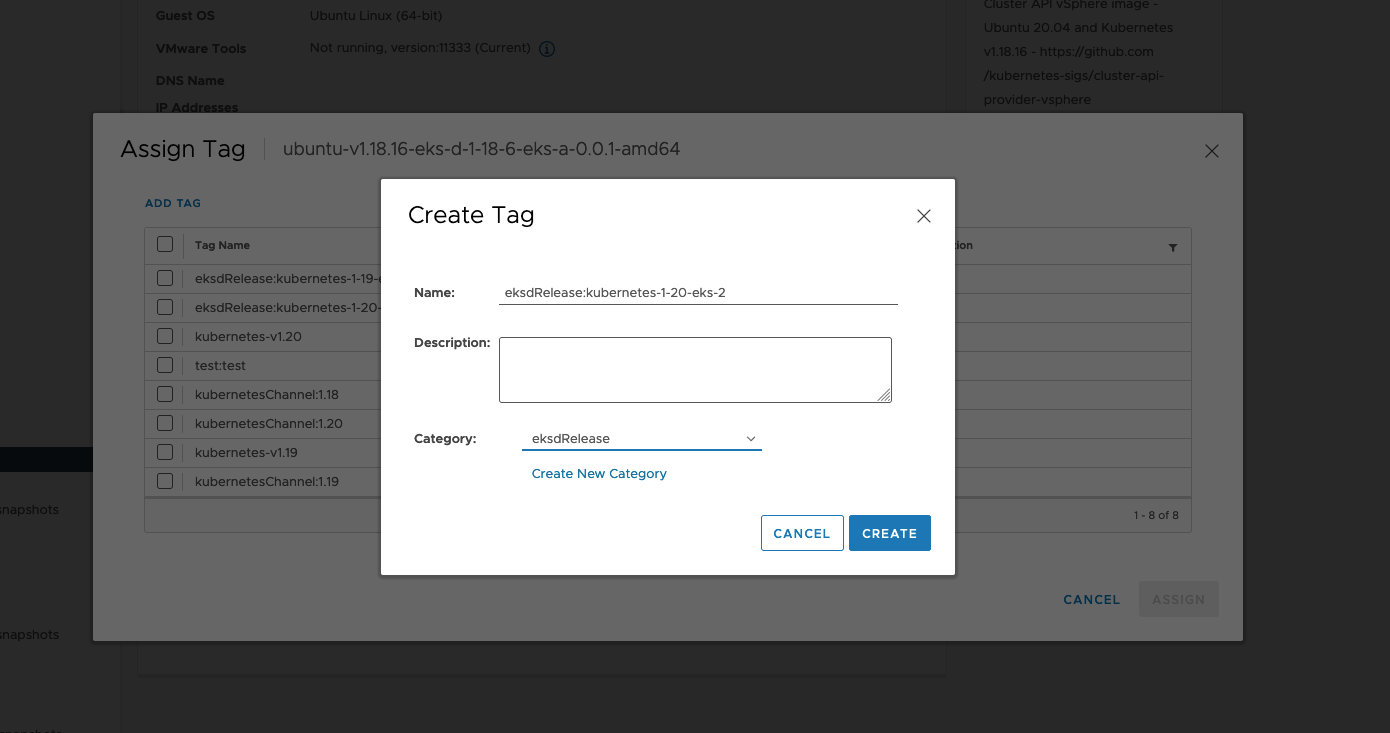
Using govc
Tag to indicate OS family
- Create tag category
govc tags.category.create -t VirtualMachine os
- Create tags os:ubuntu and os:bottlerocket
govc tags.create -c os os:bottlerocket
govc tags.create -c os os:ubuntu
- Attach newly created tag to the template
govc tags.attach os:bottlerocket <Template Path>
govc tags.attach os:ubuntu <Template Path>
- Verify tag is attached to the template
govc tags.ls <Template Path>
Tag to indicate eksd release
- Create tag category
govc tags.category.create -t VirtualMachine eksdRelease
- Create the proper eksd release Tag, depending on your template. You can find the eksd releases in the previous section . For example eksdRelease:kubernetes-1-25-eks-5 for the 1.25 template.
govc tags.create -c eksdRelease eksdRelease:kubernetes-1-25-eks-5
- Attach newly created tag to the template
govc tags.attach eksdRelease:kubernetes-1-25-eks-5 <Template Path>
- Verify tag is attached to the template
govc tags.ls <Template Path>
Note
If the tags above are not applied as shown exactly, eks-a template validations will fail and CLI will abortAfter you are done you can use the template for your workload cluster.
2 - Custom Ubuntu OVAs
There may be a need to make specific configuration changes on the imported ova template before using it to create/update EKS-A clusters.
Set up SSH Access for Imported OVA
SSH user and key need to be configured in order to allow SSH login to the VM template
Clone template to VM
Create an environment variable to hold the name of modified VM/template
export VM=<vm-name>
Clone the imported OVA template to create VM
govc vm.clone -on=false -vm=<full-path-to-imported-template> - folder=<full-path-to-folder-that-will-contain-the-VM> -ds=<datastore> $VM
Configure VM with cloud-init and the VMX GuestInfo datasource
Create a metadata.yaml file
instance-id: cloud-vm
local-hostname: cloud-vm
network:
  version: 2
  ethernets:
    nics:
      match:
        name: ens*
      dhcp4: yes
Create a userdata.yaml file
#cloud-config

users:
  - default
  - name: <username>
    primary_group: <username>
    sudo: ALL=(ALL) NOPASSWD:ALL
    groups: sudo, wheel
    ssh_import_id: None
    lock_passwd: true
    ssh_authorized_keys:
    - <user's ssh public key>
Export environment variable containing the cloud-init metadata and userdata
export METADATA=$(gzip -c9 <metadata.yaml | { base64 -w0 2>/dev/null || base64; }) \
       USERDATA=$(gzip -c9 <userdata.yaml | { base64 -w0 2>/dev/null || base64; })
Assign metadata and userdata to VM’s guestinfo
govc vm.change -vm "${VM}" \
  -e guestinfo.metadata="${METADATA}" \
  -e guestinfo.metadata.encoding="gzip+base64" \
  -e guestinfo.userdata="${USERDATA}" \
  -e guestinfo.userdata.encoding="gzip+base64"
Power the VM on
govc vm.power -on “$VM”
Customize the VM
Once the VM is powered on and fetches an IP address, ssh into the VM using your private key corresponding to the public key specified in userdata.yaml
ssh -i <private-key-file> username@<VM-IP>
At this point, you can make the desired configuration changes on the VM. The following sections describe some of the things you may want to do:
Add a Certificate Authority
Copy your CA certificate under /usr/local/share/ca-certificates and run sudo update-ca-certificates which will place the certificate under the /etc/ssl/certs directory.
Add Authentication Credentials for a Private Registry
If /etc/containerd/config.toml is not present initially, the default configuration can be generated by running the containerd config default > /etc/containerd/config.toml command. To configure a credential for a specific registry, create/modify the /etc/containerd/config.toml as follows:
# explicitly use v2 config format
version = 2

# The registry host has to be a domain name or IP. Port number is also
# needed if the default HTTPS or HTTP port is not used.
[plugins."io.containerd.grpc.v1.cri".registry.configs."registry1-host:port".auth]
  username = ""
  password = ""
  auth = ""
  identitytoken = ""
 # The registry host has to be a domain name or IP. Port number is also
 # needed if the default HTTPS or HTTP port is not used.
[plugins."io.containerd.grpc.v1.cri".registry.configs."registry2-host:port".auth]
  username = ""
  password = ""
  auth = ""
  identitytoken = ""
Restart containerd service with the sudo systemctl restart containerd command.
Convert VM to a Template
After you have customized the VM, you need to convert it to a template.
Cleanup the machine and power off the VM
This step is needed because of a known issue in Ubuntu which results in the clone VMs getting the same DHCP IP
sudo su
echo -n > /etc/machine-id
rm /var/lib/dbus/machine-id
ln -s /etc/machine-id /var/lib/dbus/machine-id
cloud-init clean -l --machine-id
Delete the hostname from file
/etc/hostname
Delete the networking config file
rm -rf /etc/netplan/50-cloud-init.yaml
Edit the cloud init config to turn preserve_hostname to false
vi /etc/cloud/cloud.cfg
Power the VM down
govc vm.power -off "$VM"
Take a snapshot of the VM
It is recommended to take a snapshot of the VM as it reduces the provisioning time for the machines and makes cluster creation faster.
If you do snapshot the VM, you will not be able to customize the disk size of your cluster VMs. If you prefer not to take a snapshot, skip this step.
govc snapshot.create -vm "$VM" root
Convert VM to template
govc vm.markastemplate $VM
Tag the template appropriately as described here
Use this customized template to create/upgrade EKS Anywhere clusters