This is the multi-page printable view of this section. Click here to print.
Cluster management
- 1: Overview
- 2: Upgrade cluster
- 2.1: Upgrade Overview
- 2.2: Upgrade Bare Metal cluster
- 2.3: Upgrade vSphere, CloudStack, Nutanix, or Snow cluster
- 2.4: Upgrade airgapped cluster
- 2.5: Upgrade management components
- 2.6: Update vSphere credentials
- 2.7:
- 3: Scale cluster
- 3.1: Scale Bare Metal cluster
- 3.2: Scale CloudStack cluster
- 3.3: Scale Nutanix cluster
- 3.4: Scale vSphere cluster
- 4: Nodes
- 5: Networking
- 5.1: Secure connectivity with CNI and Network Policy
- 5.2: Replace EKS Anywhere Cilium with a custom CNI
- 5.3: Cilium supported by AWS
- 5.4: Multus CNI plugin configuration
- 6: Storage
- 6.1: vSphere storage
- 7: Security
- 7.1: Security best practices
- 7.2: Authenticate cluster with AWS IAM Authenticator
- 7.3: CIS Self-Assessment Guide
- 8: Observability in EKS Anywhere
- 8.1: Overview
- 8.2: Verify EKS Anywhere cluster status
- 8.3: Configure Kubernetes Audit Policy
- 8.4: Connect EKS Anywhere clusters to the EKS console
- 8.5: Configure Fluent Bit for CloudWatch
- 8.6: Expose metrics for EKS Anywhere components
- 9: Backup and restore cluster
- 9.1: Backup cluster
- 9.2: Restore cluster
- 10: Certificate management
- 10.1: Monitoring Certificate Expiration
- 10.2: Renew certificates using eksctl anywhere
- 10.3: Script to renew cluster certificates
- 10.4: Manual steps to renew certificates
- 11: etcd backup and restore
- 11.1: External etcd backup and restore
- 11.1.1: Bottlerocket
- 11.1.2: Ubuntu and RHEL
- 12: Reliability
- 13: Support
- 13.1: Purchase EKS Anywhere Enterprise Subscriptions
- 13.2: License EKS Anywhere cluster
- 13.3: Share access to EKS Anywhere Curated Packages
- 13.4: Generate an EKS Anywhere support bundle
- 13.5:
- 13.6:
- 13.7:
- 13.8:
- 13.9:
- 13.10:
- 13.11:
- 13.12:
- 14: Manage cluster with GitOps
- 15: Manage cluster with Terraform
- 16: Reboot nodes
- 17: Cluster status
- 18: Delete cluster
- 19: Verify Cluster Images
1 - Overview
Once you have an EKS Anywhere cluster up and running, there are a number of operational tasks you may need to perform, such as changing cluster configuration, upgrading the cluster Kubernetes version, scaling the cluster, and setting up additional operational software such as ingress/load balancing tools, observability tools, and storage drivers.
Cluster Lifecycle Operations
The tools available for cluster lifecycle operations (create, update, upgrade, scale, delete) vary based on the EKS Anywhere architecture you run. You must use the eksctl CLI for cluster lifecycle operations with standalone clusters and management clusters. If you are running a management / workload cluster architecture, you can use the management cluster to manage one-to-many downstream workload clusters. With the management cluster architecture, you can use the eksctl CLI, any Kubernetes API-compatible client, or Infrastructure as Code (IAC) tooling such as Terraform and GitOps to manage the lifecycle of workload clusters. For details on the differences between the architecture options, reference the Architecture page
.
To perform cluster lifecycle operations for standalone, management, or workload clusters, you modify the EKS Anywhere Cluster specification, which is a Kubernetes Custom Resource for EKS Anywhere clusters. When you modify a field in an existing Cluster specification, EKS Anywhere reconciles the infrastructure and Kubernetes components until they match the new desired state you defined. These operations are asynchronous and you can validate the state of your cluster following the guidance on the Verify Cluster page
. To change a cluster configuration, update the field(s) in the Cluster specification and apply it to your standalone or management cluster. To upgrade the Kubernetes version, update the kubernetesVersion field in the Cluster specification and apply it to your standalone or management cluster. To scale the cluster, update the control plane or worker node count in the Cluster specification and apply it to the standalone or management cluster, or alternatively use Cluster Autoscaler to automate the scaling process. This operational model facilitates a declarative, intent-based pattern for defining and managing Kubernetes clusters that aligns with modern IAC and GitOps practices.
Networking
With EKS Anywhere, each virtual machine or bare metal server in the cluster gets an IP address via DHCP. The mechanics of this process vary for each provider (vSphere, bare metal, etc.) and it is handled automatically by EKS Anywhere during machine provisioning. During cluster creation, you must configure an IP address for the cluster’s control plane endpoint that is not in your DHCP address range but is reachable from your cluster’s subnet. This may require changes to your DHCP server to create an IP reservation. The IP address you specify for your cluster control plane endpoint is used as the virtual IP address for kube-vip , which EKS Anywhere uses to load balance traffic across the control plane nodes. You cannot change this IP address after cluster creation.
You additionally must configure CIDR blocks for Pods and Services in the Cluster specification during cluster creation. Each node in EKS Anywhere clusters receives an IP range subset from the Pod CIDR block, see Node IPs configuration for details. EKS Anywhere uses Cilium as the Container Networking Interface (CNI). The Cilium version in EKS Anywhere, “EKS Anywhere Cilium”, contains a subset of the open source Cilium capabilities. EKS Anywhere configures Cilium in Kubernetes host-scope IPAM mode , which delegates the address allocation to each individual node in the cluster. You can optionally replace the EKS Anywhere Cilium installation with a different CNI after cluster creation. Reference the Custom CNI page for details.
Security
The Shared Responsibility Model for EKS Anywhere is different than other AWS services that run in AWS Cloud, and it is your responsibility for the ongoing security of EKS Anywhere clusters you operate. Be sure to review and follow the EKS Anywhere Security Best Practices .
Support
EKS Anywhere is open source and free to use at no cost. To receive support for your EKS Anywhere clusters, you can optionally purchase EKS Anywhere Enterprise Subscriptions to get 24/7 support from AWS subject matter experts and access to EKS Anywhere Curated Packages . See the License cluster page for information on how to apply a license to your EKS Anywhere clusters, and the Generate Support Bundle page for details on how to create a support bundle that contains diagnostics that AWS uses to troubleshoot and resolve issues.
Ingress & Load Balancing
Most Kubernetes-conformant Ingress and Load Balancing options can be used with EKS Anywhere. EKS Anywhere includes Emissary Ingress and MetalLB as EKS Anywhere Curated Packages. For more information on EKS Anywhere Curated Packages, reference the Package Management Overview .
Observability
Most Kubernetes-conformant observability tools can be used with EKS Anywhere. You can optionally use the EKS Connector to view your EKS Anywhere cluster resources in the Amazon EKS console, reference the Connect to console page for details. EKS Anywhere includes the AWS Distro for Open Telemetry (ADOT) and Prometheus for metrics and tracing as EKS Anywhere Curated Packages. You can use popular tooling such as Fluent Bit for logging, and can track the progress of logging for ADOT on the AWS Observability roadmap . For more information on EKS Anywhere Curated Packages, reference the Package Management Overview .
Storage
Most Kubernetes-conformant storage options can be used with EKS Anywhere. For example, you can use the vSphere CSI driver
with EKS Anywhere clusters on vSphere. As of the v0.17.0 EKS Anywhere release, EKS Anywhere no longer installs or manages the vSphere CSI driver automatically, and you must self-manage this add-on. Other popular storage options include Rook/Ceph
, OpenEBS,
, Portworx
, and Netapp Trident
. Please note, if you are using Bottlerocket with EKS Anywhere, Bottlerocket does not currently support iSCSI, see the Bottlerocket GitHub
for details.
2 - Upgrade cluster
2.1 - Upgrade Overview
Version upgrades in EKS Anywhere and Kubernetes are events that should be carefully planned, tested, and implemented. New EKS Anywhere and Kubernetes versions can introduce significant changes, and we recommend that you test the behavior of your applications against new EKS Anywhere and Kubernetes versions before you update your production clusters. Cluster backups should always be performed before initiating an upgrade. When initiating cluster version upgrades, new virtual or bare metal machines are provisioned and the machines on older versions are deprovisioned in a rolling fashion by default.
Unlike Amazon EKS, there are no automatic upgrades in EKS Anywhere and you have full control over when you upgrade. On the end of support date, you can still create new EKS Anywhere clusters with the unsupported Kubernetes version if the EKS Anywhere version you are using includes it. Any existing EKS Anywhere clusters with the unsupported Kubernetes version continue to function. As new Kubernetes versions become available in EKS Anywhere, we recommend that you proactively update your clusters to use the latest available Kubernetes version to remain on versions that receive CVE patches and bug fixes.
Reference the EKS Anywhere Changelog for information on fixes, features, and changes included in each EKS Anywhere release. For details on the EKS Anywhere version support policy, reference the Versioning page.
Upgrade Version Skew
There are a few dimensions of versioning to consider in your EKS Anywhere deployments:
- Management clusters to workload clusters: Management clusters can be at most 1 EKS Anywhere minor version greater than the EKS Anywhere version of workload clusters. Workload clusters cannot have an EKS Anywhere version greater than management clusters.
- Management components to cluster components: Management components can be at most 1 EKS Anywhere minor version greater than the EKS Anywhere version of cluster components.
- EKS Anywhere version upgrades: Skipping EKS Anywhere minor versions during upgrade is not supported (
v0.23.xtov0.25.x). We recommend you upgrade one EKS Anywhere minor version at a time (v0.23.xtov0.24.xtov0.25.x). - Kubernetes version upgrades: Skipping Kubernetes minor versions during upgrade is not supported (
v1.33.xtov1.35.x). You must upgrade one Kubernetes minor version at a time (v1.33.xtov1.34.xtov1.35.x). - Kubernetes control plane and worker nodes: As of Kubernetes v1.28, worker nodes can be up to 3 minor versions lower than the Kubernetes control plane minor version. In earlier Kubernetes versions, worker nodes could be up to 2 minor versions lower than the Kubernetes control plane minor version.
User Interfaces
EKS Anywhere versions for management and standalone clusters must be upgraded with the eksctl anywhere CLI. Kubernetes versions for management, standalone, and workload clusters, and EKS Anywhere versions for workload clusters can be upgraded with the eksctl anywhere CLI or with Kubernetes API-compatible clients such as the kubectl CLI, GitOps, or Terraform. For an overview of the differences between management, standalone, workload clusters, reference the Architecture page.
If you are using the eksctl anywhere CLI, there are eksctl anywhere upgrade plan cluster and eksctl anywhere upgrade cluster commands. The former shows the components and versions that will be upgraded. The latter runs the upgrade, first validating a set of preflight checks and then upgrading your cluster to match the updated spec.
If you are using an Kubernetes API-compatible client, you modify your workload cluster spec yaml and apply the modified yaml to your management cluster. The EKS Anywhere lifecycle controller, which runs on the management cluster, reconciles the desired changes on the workload cluster.
As of EKS Anywhere version v0.19.0, management components can be upgraded separately from cluster components. This is enables you to get the latest updates to the management components such as Cluster API controller, EKS Anywhere controller, and provider-specific controllers without impact to your workload clusters. Management components can only be upgraded with the eksctl anywhere CLI, which has new eksctl anywhere upgrade plan management-components and eksctl anywhere upgrade management-component commands. For more information, reference the Upgrade Management Components page.
Upgrading EKS Anywhere Versions
Each EKS Anywhere version includes all components required to create and manage EKS Anywhere clusters. For example, this includes:
- Administrative / CLI components (
eksctl anywhereCLI, image-builder, diagnostics-collector) - Management components (Cluster API controller, EKS Anywhere controller, provider-specific controllers)
- Cluster components (Kubernetes, Cilium)
You can find details about each EKS Anywhere releases in the EKS Anywhere release manifest. The release manifest contains references to the corresponding bundle manifest for each EKS Anywhere version. Within the bundle manifest, you will find the components included in a specific EKS Anywhere version. The images running in your deployment use the same URI values specified in the bundle manifest for that component. For example, see the bundle manifest
for EKS Anywhere version v0.25.0.
To upgrade the EKS Anywhere version of a management or standalone cluster, you install a new version of the eksctl anywhere CLI, change the eksaVersion field in your management or standalone cluster’s spec yaml, and then run the eksctl anywhere upgrade management-components -f cluster.yaml (as of EKS Anywhere version v0.19) or eksctl anywhere upgrade cluster -f cluster.yaml command. The eksctl anywhere upgrade cluster command upgrades both management and cluster components.
To upgrade the EKS Anywhere version of a workload cluster, you change the eksaVersion field in your workload cluster’s spec yaml, and apply the new workload cluster’s spec yaml to your management cluster using the eksctl anywhere CLI or with Kubernetes API-compatible clients.
Upgrading Kubernetes Versions
Each EKS Anywhere version supports at least 4 minor versions of Kubernetes. Kubernetes patch version increments are included in EKS Anywhere minor and patch releases. There are two places in the cluster spec where you can configure the Kubernetes version, Cluster.Spec.KubernetesVersion and Cluster.Spec.WorkerNodeGroupConfiguration[].KubernetesVersion. If only Cluster.Spec.KubernetesVersion is set, then that version will apply to both control plane and worker nodes. You can use Cluster.Spec.WorkerNodeGroupConfiguration[].KubernetesVersion to upgrade your worker nodes separately from control plane nodes.
The Cluster.Spec.WorkerNodeGroupConfiguration[].KubernetesVersion cannot be greater than Cluster.Spec.KubernetesVersion. In Kubernetes versions lower than v1.28.0, the Cluster.Spec.WorkerNodeGroupConfiguration[].KubernetesVersion can be at most 2 versions lower than the Cluster.Spec.KubernetesVersion. In Kubernetes versions v1.28.0 or greater, the Cluster.Spec.WorkerNodeGroupConfiguration[].KubernetesVersion can be at most 3 versions lower than the Cluster.Spec.KubernetesVersion.
Upgrade Controls
By default, when you upgrade EKS Anywhere or Kubernetes versions, nodes are upgraded one at a time in a rolling fashion. All control plane nodes are upgraded before worker nodes. To control the speed and behavior of rolling upgrades, you can use the upgradeRolloutStrategy.rollingUpdate.maxSurge and upgradeRolloutStrategy.rollingUpdate.maxUnavailable fields in the cluster spec (available on all providers as of EKS Anywhere version v0.19). The maxSurge setting controls how many new machines can be queued for provisioning simultaneously, and the maxUnavailable setting controls how many machines must remain available during upgrades. For more information on these controls, reference Advanced configuration
for vSphere, CloudStack, Nutanix, and Snow upgrades and Advanced configuration
for bare metal upgrades.
As of EKS Anywhere version v0.19.0, if you are running EKS Anywhere on bare metal, you can use the in-place rollout strategy to upgrade EKS Anywhere and Kubernetes versions, which upgrades the components on the same physical machines without requiring additional server capacity. In-place upgrades are not available for other providers.
2.2 - Upgrade Bare Metal cluster
Note
Upgrade overview information was moved to a dedicated Upgrade Overview page.
Considerations
- Only EKS Anywhere and Kubernetes version upgrades are supported for Bare Metal clusters. You cannot update other cluster configuration.
- Upgrades should never be run from ephemeral nodes (short-lived systems that spin up and down on a regular basis). If the EKS Anywhere version is lower than
v0.18.0and upgrade fails, you must not delete the KinD bootstrap cluster Docker container. During an upgrade, the bootstrap cluster contains critical EKS Anywhere components. If it is deleted after a failed upgrade, they cannot be recovered. - It is highly recommended to run the
eksctl anywhere upgrade clustercommand with the--no-timeoutsoption when the command is executed through automation. This prevents the CLI from timing out and enables cluster operators to fix issues preventing the upgrade from completing while the process is running. - In EKS Anywhere version
v0.15.0, we introduced the EKS Anywhere cluster lifecycle controller that runs on management clusters and manages workload clusters. The EKS Anywhere lifecycle controller enables you to use Kubernetes API-compatible clients such askubectl, GitOps, or Terraform for managing workload clusters. In this EKS Anywhere version, the EKS Anywhere cluster lifecycle controller rolls out new nodes in workload clusters when management clusters are upgraded. In EKS Anywhere versionv0.16.0, this behavior was changed such that management clusters can be upgraded separately from workload clusters. - When running workload cluster upgrades after upgrading a management cluster, a machine rollout may be triggered on workload clusters during the workload cluster upgrade, even if the changes to the workload cluster spec didn’t require one (for example scaling down a worker node group).
- Starting with EKS Anywhere
v0.18.0, theosImageURLmust include the Kubernetes minor version (Cluster.Spec.KubernetesVersionorCluster.Spec.WorkerNodeGroupConfiguration[].KubernetesVersionin the cluster spec). For example, if the Kubernetes version is 1.35, theosImageURLmust include 1.35, 1_35, 1-35 or 135. If you are upgrading Kubernetes versions, you must have a new OS image with your target Kubernetes version components. - If you are running EKS Anywhere in an airgapped environment, you must download the new artifacts and images prior to initiating the upgrade. Reference the Airgapped Upgrades page page for more information.
Upgrade Version Skew
There are a few dimensions of versioning to consider in your EKS Anywhere deployments:
- Management clusters to workload clusters: Management clusters can be at most 1 EKS Anywhere minor version greater than the EKS Anywhere version of workload clusters. Workload clusters cannot have an EKS Anywhere version greater than management clusters.
- Management components to cluster components: Management components can be at most 1 EKS Anywhere minor version greater than the EKS Anywhere version of cluster components.
- EKS Anywhere version upgrades: Skipping EKS Anywhere minor versions during upgrade is not supported (
v0.23.xtov0.25.x). We recommend you upgrade one EKS Anywhere minor version at a time (v0.23.xtov0.24.xtov0.25.x). - Kubernetes version upgrades: Skipping Kubernetes minor versions during upgrade is not supported (
v1.33.xtov1.35.x). You must upgrade one Kubernetes minor version at a time (v1.33.xtov1.34.xtov1.35.x). - Kubernetes control plane and worker nodes: As of Kubernetes v1.28, worker nodes can be up to 3 minor versions lower than the Kubernetes control plane minor version. In earlier Kubernetes versions, worker nodes could be up to 2 minor versions lower than the Kubernetes control plane minor version.
Prerequisites
EKS Anywhere upgrades on Bare Metal require at least one spare hardware server for control plane upgrade and one for each worker node group upgrade. During upgrade, the spare hardware server is provisioned with the new version and then an old server is deprovisioned. The deprovisioned server is then reprovisioned with the new version while another old server is deprovisioned. This happens one at a time until all the control plane components have been upgraded, followed by worker node upgrades.
Check upgrade components
Before you perform an upgrade, check the current and new versions of components that are ready to upgrade by typing:
eksctl anywhere upgrade plan cluster -f cluster.yaml
The output should appear similar to the following:
Checking new release availability...
NAME                 CURRENT VERSION                NEXT VERSION
EKS-A Management     v0.19.0-dev+build.20+a0037f0   v0.19.0-dev+build.26+3bc5008
cert-manager         v1.13.2+129095a                v1.13.2+bb56494
cluster-api          v1.6.1+5efe087                 v1.6.1+9cf3436
kubeadm              v1.6.1+8ceb315                 v1.6.1+82f1c0a
tinkerbell           v0.4.0+cdde180                 v0.4.0+e848206
kubeadm              v1.6.1+6420e1c                 v1.6.1+2f0b35f
etcdadm-bootstrap    v1.0.10+7094b99                v1.0.10+a3f0355
etcdadm-controller   v1.0.17+0259550                v1.0.17+ba86997
To format the output in json, add -o json to the end of the command line.
Check hardware availability
Next, you must ensure you have enough available hardware for the rolling upgrade operation to function. This type of upgrade requires you to have one spare hardware server for control plane upgrade and one for each worker node group upgrade. Check prerequisites for more information. Available hardware could have been fed to the cluster as extra hardware during a prior create command, or could be fed to the cluster during the upgrade process by providing the hardware CSV file to the upgrade cluster command .
To check if you have enough available hardware for rolling upgrade, you can use the kubectl command below to check if there are hardware objects with the selector labels corresponding to the controlplane/worker node group and without the ownerName label.
kubectl get hardware -n eksa-system --show-labels
For example, if you want to perform upgrade on a cluster with one worker node group with selector label type=worker-group-1, then you must have an additional hardware object in your cluster with the label type=controlplane (for control plane upgrade) and one with type=worker-group-1 (for worker node group upgrade) that doesn’t have the ownerName label.
In the command shown below, eksa-worker2 matches the selector label and it doesn’t have the ownerName label. Thus, it can be used to perform rolling upgrade of worker-group-1. Similarly, eksa-controlplane-spare will be used for rolling upgrade of control plane.
kubectl get hardware -n eksa-system --show-labels
NAME                STATE       LABELS
eksa-controlplane               type=controlplane,v1alpha1.tinkerbell.org/ownerName=abhnvp-control-plane-template-1656427179688-9rm5f,v1alpha1.tinkerbell.org/ownerNamespace=eksa-system
eksa-controlplane-spare         type=controlplane
eksa-worker1                    type=worker-group-1,v1alpha1.tinkerbell.org/ownerName=abhnvp-md-0-1656427179689-9fqnx,v1alpha1.tinkerbell.org/ownerNamespace=eksa-system
eksa-worker2                    type=worker-group-1
If you don’t have any available hardware that match this requirement in the cluster, you can setup a new hardware CSV . You can feed this hardware inventory file during the upgrade cluster command .
Skip BMC connectivity checks for faulty machines
EKS Anywhere validates that all BMC machines are contactable before performing cluster upgrades. If you have faulty BMC machines with connectivity issues or hardware faults, you can skip validation for those specific machines so they don’t block your cluster upgrade.
To skip BMC validation for a machine:
kubectl label machine.bmc.tinkerbell.org <machine-name> \
  -n eksa-system \
  bmc.tinkerbell.org/skip-contact-check=true
After you have repaired or replaced the faulty hardware and verified that BMC connectivity is restored, remove the skip label to re-enable normal BMC validation for future upgrades:
kubectl label machine.bmc.tinkerbell.org <machine-name> \
  -n eksa-system \
  bmc.tinkerbell.org/skip-contact-check-
NOTE: The skip label should only be used temporarily during upgrades when a machine has known issues. Once the machine is healthy, remove the label to ensure proper BMC validation in subsequent operations.
Performing a cluster upgrade
To perform a cluster upgrade you can modify your cluster specification kubernetesVersion field to the desired version.
As an example, to upgrade a cluster with version 1.34 to 1.35 you would change your spec as follows:
apiVersion: anywhere.eks.amazonaws.com/v1alpha1
kind: Cluster
metadata:
  name: dev
spec:
  controlPlaneConfiguration:
    count: 1
    endpoint:
      host: "198.18.99.49"
    machineGroupRef:
      kind: TinkerbellMachineConfig
      name: dev
      ...
  kubernetesVersion: "1.35"
      ...
NOTE: If you have a custom machine image for your nodes in your cluster config yaml or to upgrade a node or group of nodes to a new operating system version (ie. RHEL 8.7 to RHEL 8.8), you may also need to update your
TinkerbellDatacenterConfigorTinkerbellMachineConfigwith the new operating system image URLosImageURL.
and then you will run the upgrade cluster command .
Upgrade cluster command
-
kubectl CLI: The cluster lifecycle feature lets you use kubectl to talk to the Kubernetes API to upgrade a workload cluster. kubectl can also be used for management cluster upgrades (Kubernetes version, scaling, configuration changes), except when upgrading the EKS Anywhere CLI version which requires
eksctl anywhere upgrade. To use kubectl, run:kubectl apply -f eksa-w01-cluster.yaml --kubeconfig mgmt/mgmt-eks-a-cluster.kubeconfigTo check the state of a cluster managed with the cluster lifecyle feature, use
kubectlto show the cluster object with its status.The
statusfield on the cluster object field holds information about the current state of the cluster.kubectl get clusters w01 -o yamlThe cluster has been fully upgraded once the status of the
Readycondition is markedTrue. See the cluster status guide for more information. -
GitOps: See Manage separate workload clusters with GitOps
-
Terraform: See Manage separate workload clusters with Terraform
NOTE:For kubectl, GitOps and Terraform:
-
The baremetal controller does not support scaling upgrades and Kubernetes version upgrades in the same request.
-
While scaling a workload cluster if you need to add additional machines, run:
eksctl anywhere generate hardware -z updated-hardware.csv > updated-hardware.yaml kubectl apply -f updated-hardware.yaml -
If you want to upgrade multiple workload clusters, make sure that the spare hardware that is available for new nodes to rollout has labels unique to the workload cluster you are trying to upgrade. For instance, for an EKSA cluster named
eksa-workload1, the hardware that is assigned for this cluster should have labels that are only going to be used for this cluster liketype=eksa-workload1-cpandtype=eksa-workload1-worker. Another workload cluster namedeksa-workload2can have labels liketype=eksa-workload2-cpandtype=eksa-workload2-worker. Please note that even though labels can be arbitrary, they need to be unique for each workload cluster. Not specifying unique cluster labels can cause cluster upgrades to behave in unexpected ways which may lead to unsuccessful upgrades and unstable clusters.
-
-
eksctl CLI: To upgrade a workload cluster with eksctl, run:
eksctl anywhere upgrade cluster -f cluster.yaml
# --hardware-csv <hardware.csv> \ # uncomment to add more hardware
--kubeconfig mgmt/mgmt-eks-a-cluster.kubeconfig
As noted earlier, adding the
--kubeconfigoption tellseksctlto use the management cluster identified by that kubeconfig file to create a different workload cluster.This will upgrade the cluster specification (if specified), upgrade the core components to the latest available versions and apply the changes using the provisioner controllers.
Output
Example output:
✅ control plane ready
✅ worker nodes ready
✅ nodes ready
✅ cluster CRDs ready
✅ cluster object present on workload cluster
✅ upgrade cluster kubernetes version increment
✅ validate immutable fields
🎉 all cluster upgrade preflight validations passed
Performing provider setup and validations
Ensuring etcd CAPI providers exist on management cluster before upgrade
Pausing GitOps cluster resources reconcile
Upgrading core components
Backing up management cluster's resources before upgrading
Upgrading management cluster
Updating Git Repo with new EKS-A cluster spec
Forcing reconcile Git repo with latest commit
Resuming GitOps cluster resources kustomization
Writing cluster config file
🎉 Cluster upgraded!
Cleaning up backup resources
Starting in EKS Anywhere v0.18.0, when upgrading management cluster the CLI depends on the EKS Anywhere Controller to perform the upgrade. In the event an issue occurs and the CLI times out, it may be possible to fix the issue and have the upgrade complete as the EKS Anywhere Controller will continually attempt to complete the upgrade.
During the workload cluster upgrade process, EKS Anywhere pauses the cluster controller reconciliation by adding the paused annotation
anywhere.eks.amazonaws.com/paused: trueto the EKS Anywhere cluster, provider datacenterconfig and machineconfig resources, before the components upgrade. After upgrade completes, the annotations are removed so that the cluster controller resumes reconciling the cluster. If the CLI execution is interrupted or times out, the controller won’t reconcile changes to the EKS-A objects until these annotations are removed. You can re-run the CLI to restart the upgrade process or remove the annotations manually withkubectl.Though not recommended, you can manually pause the EKS Anywhere cluster controller reconciliation to perform extended maintenance work or interact with Cluster API objects directly. To do it, you can add the paused annotation to the cluster resource:
kubectl annotate clusters.anywhere.eks.amazonaws.com ${CLUSTER_NAME} -n ${CLUSTER_NAMESPACE} anywhere.eks.amazonaws.com/paused=trueAfter finishing the task, make sure you resume the cluster reconciliation by removing the paused annotation, so that EKS Anywhere cluster controller can continue working as expected.
kubectl annotate clusters.anywhere.eks.amazonaws.com ${CLUSTER_NAME} -n ${CLUSTER_NAMESPACE} anywhere.eks.amazonaws.com/paused-NOTE: During management cluster upgrades, the CLI temporarily pauses all workload cluster CAPI resources (
clusters.cluster.x-k8s.io) and resumes them after the upgrade completes. If you have manually paused workload clusters, the management cluster upgrade will unpause the CAPI cluster resource even though the EKS Anywhere cluster annotation (anywhere.eks.amazonaws.com/paused) remains unchanged. After the management cluster upgrade completes, re-pause any workload clusters that need to remain paused:kubectl patch clusters.cluster.x-k8s.io ${CLUSTER_NAME} -n eksa-system \ --type merge -p '{"spec":{"paused": true}}' --kubeconfig ${MGMT_KUBECONFIG}
Upgradeable cluster attributes
Cluster:
kubernetesVersioncontrolPlaneConfiguration.countcontrolPlaneConfiguration.upgradeRolloutStrategy.rollingUpdate.maxSurgeworkerNodeGroupConfigurations.countworkerNodeGroupConfigurations.kubernetesVersion(in case of modular upgrade)workerNodeGroupConfigurations.upgradeRolloutStrategy.rollingUpdate.maxSurgeworkerNodeGroupConfigurations.upgradeRolloutStrategy.rollingUpdate.maxUnavailable
TinkerbellDatacenterConfig:
osImageURL
Advanced configuration for upgrade rollout strategy
EKS Anywhere allows an optional configuration to customize the behavior of upgrades.
upgradeRolloutStrategy can be configured separately for control plane and for each worker node group.
This template contains an example for control plane under the controlPlaneConfiguration section and for worker node group under workerNodeGroupConfigurations:
apiVersion: anywhere.eks.amazonaws.com/v1alpha1
kind: Cluster
metadata:
  name: my-cluster-name
spec:
  clusterNetwork:
    cniConfig:
      cilium: {}
    pods:
      cidrBlocks:
      - 192.168.0.0/16
    services:
      cidrBlocks:
      - 10.96.0.0/12
  controlPlaneConfiguration:
    count: 1
    endpoint:
      host: "10.61.248.209"
    machineGroupRef:
      kind: TinkerbellMachineConfig
      name: my-cluster-name-cp
    upgradeRolloutStrategy:
      type: RollingUpdate
      rollingUpdate:
        maxSurge: 1
  datacenterRef:
    kind: TinkerbellDatacenterConfig
    name: my-cluster-name
  kubernetesVersion: "1.35"
  managementCluster:
    name: my-cluster-name
  workerNodeGroupConfigurations:
  - count: 2
    machineGroupRef:
      kind: TinkerbellMachineConfig
      name: my-cluster-name
    name: md-0
    upgradeRolloutStrategy:
      type: RollingUpdate
      rollingUpdate:
        maxSurge: 1
        maxUnavailable: 0

---
...
upgradeRolloutStrategy
Configuration parameters for upgrade strategy.
upgradeRolloutStrategy.type
Default: RollingUpdate
Type of rollout strategy. Supported values: RollingUpdate,InPlace.
NOTE: The upgrade rollout strategy type must be the same for all control plane and worker nodes.
upgradeRolloutStrategy.rollingUpdate
Configuration parameters for customizing rolling upgrade behavior.
NOTE: The rolling update parameters can only be configured if
upgradeRolloutStrategy.typeisRollingUpdate.
upgradeRolloutStrategy.rollingUpdate.maxSurge
Default: 1
This can not be 0 if maxUnavailable is 0.
The maximum number of machines that can be scheduled above the desired number of machines.
Example: When this is set to n, the new worker node group can be scaled up immediately by n when the rolling upgrade starts. Total number of machines in the cluster (old + new) never exceeds (desired number of machines + n). Once scale down happens and old machines are brought down, the new worker node group can be scaled up further ensuring that the total number of machines running at any time does not exceed the desired number of machines + n.
upgradeRolloutStrategy.rollingUpdate.maxUnavailable
Default: 0
This can not be 0 if MaxSurge is 0.
The maximum number of machines that can be unavailable during the upgrade.
This can only be configured for worker nodes.
Example: When this is set to n, the old worker node group can be scaled down by n machines immediately when the rolling upgrade starts. Once new machines are ready, old worker node group can be scaled down further, followed by scaling up the new worker node group, ensuring that the total number of machines unavailable at all times during the upgrade never falls below n.
Rolling Upgrades
The RollingUpdate rollout strategy type allows the specification of two parameters that control the desired behavior of rolling upgrades:
maxSurge- The maximum number of machines that can be scheduled above the desired number of machines. When not specified, the current CAPI default of 1 is used.maxUnavailable- The maximum number of machines that can be unavailable during the upgrade. When not specified, the current CAPI default of 0 is used.
Example configuration:
upgradeRolloutStrategy:
  type: RollingUpdate
  rollingUpdate:
    maxSurge: 1
    maxUnavailable: 0    # only configurable for worker nodes
Rolling upgrades with no additional hardware
When maxSurge is set to 0 and maxUnavailable is set to 1, it allows for a rolling upgrade without need for additional hardware. Use this configuration if your workloads can tolerate node unavailability.
NOTE: This could ONLY be used if unavailability of a maximum of 1 node is acceptable. For single node clusters, an additional temporary machine is a must. Alternatively, you may recreate the single node cluster for upgrading and handle data recovery manually.
With this kind of configuration, the rolling upgrade will proceed node by node, deprovision and delete a node fully before re-provisioning it with upgraded version, and re-join it to the cluster. This means that any point during the course of the rolling upgrade, there could be one unavailable node.
In-Place Upgrades
As of EKS Anywhere version v0.19.0, the InPlace rollout strategy type can be used to upgrade the EKS Anywhere and Kubernetes versions by upgrading the components on the same physical machines without requiring additional server capacity.
EKS Anywhere schedules a privileged pod that executes the upgrade logic as a sequence of init containers on each node to be upgraded.
This upgrade logic includes updating the containerd, cri-tools, kubeadm, kubectl and kubelet binaries along with core Kubernetes components and restarting those services.
Due to the nature of this upgrade, temporary downtime of workloads can be expected. It is best practice to configure your clusters in a way that they are resilient to having one node down.
During in place upgrades, EKS Anywhere pauses machine health checks to ensure that new nodes are not rolled out while the node is temporarily down during the upgrade process.
Moreover, autoscaler configuration is not supported when using InPlace upgrade rollout strategy to further ensure that no new nodes are rolled out unexpectedly.
Example configuration:
upgradeRolloutStrategy:
  type: InPlace
Troubleshooting
Attempting to upgrade a cluster with more than 1 minor release will result in receiving the following error.
✅ validate immutable fields
❌ validation failed    {"validation": "Upgrade preflight validations", "error": "validation failed with 1 errors: WARNING: version difference between upgrade version (1.21) and server version (1.19) do not meet the supported version increment of +1", "remediation": ""}
Error: failed to upgrade cluster: validations failed
For more errors you can see the troubleshooting section .
2.3 - Upgrade vSphere, CloudStack, Nutanix, or Snow cluster
Note
Upgrade overview information was moved to a dedicated Upgrade Overview page.
Considerations
- Upgrades should never be run from ephemeral nodes (short-lived systems that spin up and down on a regular basis). If the EKS Anywhere version is lower than
v0.18.0and upgrade fails, you must not delete the KinD bootstrap cluster Docker container. During an upgrade, the bootstrap cluster contains critical EKS Anywhere components. If it is deleted after a failed upgrade, they cannot be recovered. - It is highly recommended to run the
eksctl anywhere upgrade clustercommand with the--no-timeoutsoption when the command is executed through automation. This prevents the CLI from timing out and enables cluster operators to fix issues preventing the upgrade from completing while the process is running. - In EKS Anywhere version
v0.13.0, we introduced the EKS Anywhere cluster lifecycle controller that runs on management clusters and manages workload clusters. The EKS Anywhere lifecycle controller enables you to use Kubernetes API-compatible clients such askubectl, GitOps, or Terraform for managing workload clusters. In this EKS Anywhere version, the EKS Anywhere cluster lifecycle controller rolls out new nodes in workload clusters when management clusters are upgraded. In EKS Anywhere versionv0.16.0, this behavior was changed such that management clusters can be upgraded separately from workload clusters. - When running workload cluster upgrades after upgrading a management cluster, a machine rollout may be triggered on workload clusters during the workload cluster upgrade, even if the changes to the workload cluster spec didn’t require one (for example scaling down a worker node group).
- Starting with EKS Anywhere
v0.18.0, theimage/templatemust include the Kubernetes minor version (Cluster.Spec.KubernetesVersionorCluster.Spec.WorkerNodeGroupConfiguration[].KubernetesVersionin the cluster spec). For example, if the Kubernetes version is 1.24, theimage/templatemust include 1.24, 1_24, 1-24 or 124. If you are upgrading Kubernetes versions, you must have a new image with your target Kubernetes version components. - If you are running EKS Anywhere on Snow, a new Admin instance is needed when upgrading to new versions of EKS Anywhere. See Upgrade EKS Anywhere AMIs in Snowball Edge devices to upgrade and use a new Admin instance in Snow devices.
- If you are running EKS Anywhere in an airgapped environment, you must download the new artifacts and images prior to initiating the upgrade. Reference the Airgapped Upgrades page page for more information.
Upgrade Version Skew
There are a few dimensions of versioning to consider in your EKS Anywhere deployments:
- Management clusters to workload clusters: Management clusters can be at most 1 EKS Anywhere minor version greater than the EKS Anywhere version of workload clusters. Workload clusters cannot have an EKS Anywhere version greater than management clusters.
- Management components to cluster components: Management components can be at most 1 EKS Anywhere minor version greater than the EKS Anywhere version of cluster components.
- EKS Anywhere version upgrades: Skipping EKS Anywhere minor versions during upgrade is not supported (
v0.23.xtov0.25.x). We recommend you upgrade one EKS Anywhere minor version at a time (v0.23.xtov0.24.xtov0.25.x). - Kubernetes version upgrades: Skipping Kubernetes minor versions during upgrade is not supported (
v1.33.xtov1.35.x). You must upgrade one Kubernetes minor version at a time (v1.33.xtov1.34.xtov1.35.x). - Kubernetes control plane and worker nodes: As of Kubernetes v1.28, worker nodes can be up to 3 minor versions lower than the Kubernetes control plane minor version. In earlier Kubernetes versions, worker nodes could be up to 2 minor versions lower than the Kubernetes control plane minor version.
Prepare DHCP IP addresses pool
Please make sure to have sufficient available IP addresses in your DHCP pool to cover the new machines. The number of necessary IPs can be calculated from the machine counts and maxSurge config . For create operation, each machine needs 1 IP. For upgrade operation, control plane and workers need just 1 extra IP (total, not per node) due to rolling upgrade strategy. Each external etcd machine needs 1 extra IP address (ex: 3 etcd nodes would require 3 more IP addresses) because EKS Anywhere needs to create all the new etcd machines before removing any old ones. You will also need additional IPs to be equal to the number used for maxSurge. After calculating the required IPs, please make sure your environment has enough available IPs before performing the upgrade operation.
- Example 1, to create a cluster with 3 control plane node, 2 worker nodes and 3 stacked etcd, you will need at least 5 (3+2+0, as stacked etcd is deployed as part of the control plane nodes) available IPs. To upgrade the same cluster with default maxSurge (0), you will need 1 (1+0+0) additional available IPs.
- Example 2, to create a cluster with 1 control plane node, 2 worker nodes and 3 unstacked (external) etcd nodes, you will need at least 6 (1+2+3) available IPs. To upgrade the same cluster with default maxSurge (0), you will need at least 4 (1+3+0) additional available IPs.
- Example 3, to upgrade a cluster with 1 control plane node, 2 worker nodes and 3 unstacked (external) etcd nodes, with maxSurge set to 2, you will need at least 6 (1+3+2) additional available IPs.
Check upgrade components
Before you perform an upgrade, check the current and new versions of components that are ready to upgrade by typing:
Management Cluster
eksctl anywhere upgrade plan cluster -f mgmt-cluster.yaml
Workload Cluster
eksctl anywhere upgrade plan cluster -f workload-cluster.yaml --kubeconfig mgmt/mgmt-eks-a-cluster.kubeconfig
The output should appear similar to the following:
Checking new release availability...
NAME                 CURRENT VERSION                 NEXT VERSION
EKS-A Management     v0.19.0-dev+build.170+6a04c21   v0.19.0-dev+build.225+c137128
cert-manager         v1.13.2+a34c207                 v1.14.2+c0da11a
cluster-api          v1.6.1+9bf197f                  v1.6.2+f120729
kubeadm              v1.6.1+2c7274d                  v1.6.2+8091cf6
vsphere              v1.8.5+205ebc5                  v1.8.5+65d2d66
kubeadm              v1.6.1+46e4754                  v1.6.2+44d7c68
etcdadm-bootstrap    v1.0.10+43a3235                 v1.0.10+e5e6ac4
etcdadm-controller   v1.0.17+fc882de                 v1.0.17+3d9ebdc
To the format output in json, add -o json to the end of the command line.
Performing a cluster upgrade
To perform a cluster upgrade you can modify your cluster specification kubernetesVersion field to the desired version.
As an example, to upgrade a cluster with version 1.34 to 1.35 you would change your spec
apiVersion: anywhere.eks.amazonaws.com/v1alpha1
kind: Cluster
metadata:
  name: dev
spec:
  controlPlaneConfiguration:
    count: 1
    endpoint:
      host: "198.18.99.49"
    machineGroupRef:
      kind: VSphereMachineConfig
      name: dev
      ...
  kubernetesVersion: "1.35"
      ...
NOTE: If you have a custom machine image for your nodes you may also need to update your
vsphereMachineConfigwith a newtemplate. Refer to vSphere Artifacts to build a new OVA template.
and then you will run the upgrade cluster command .
Upgrade cluster command
-
kubectl CLI: The cluster lifecycle feature lets you use
kubectlto talk to the Kubernetes API to upgrade an EKS Anywhere cluster. For example, to usekubectlto upgrade a management or workload cluster, you can run:# Upgrade a management cluster with cluster name "mgmt" kubectl apply -f mgmt-cluster.yaml --kubeconfig mgmt/mgmt-eks-a-cluster.kubeconfig # Upgrade a workload cluster with cluster name "eksa-w01" kubectl apply -f eksa-w01-cluster.yaml --kubeconfig mgmt/mgmt-eks-a-cluster.kubeconfigTo check the state of a cluster managed with the cluster lifecyle feature, use
kubectlto show the cluster object with its status.The
statusfield on the cluster object field holds information about the current state of the cluster.kubectl get clusters w01 -o yamlThe cluster has been fully upgraded once the status of the
Readycondition is markedTrue. See the cluster status guide for more information. -
GitOps: See Manage separate workload clusters with GitOps
-
Terraform: See Manage separate workload clusters with Terraform
Important
For kubectl, GitOps and Terraform
If you want to update the registry mirror
credential with kubectl, GitOps or Terraform, you need to update the registry-credentials secret in the eksa-system namespace of your management cluster. For example with kubectl, you can run:
kubectl edit secret -n eksa-system registry-credentials --kubeconfig mgmt/mgmt-eks-a-cluster.kubeconfig
Replace username and password fields with the base64-encoded values of your new username and password. You can encode the values using the echo command, for example:
echo -n 'newusername' | base64
echo -n 'newpassword' | base64
-
eksctl CLI: To upgrade an EKS Anywhere cluster with
eksctl, run:# Upgrade a management cluster with cluster name "mgmt" eksctl anywhere upgrade cluster -f mgmt-cluster.yaml # Upgrade a workload cluster with cluster name "eksa-w01" eksctl anywhere upgrade cluster -f eksa-w01-cluster.yaml --kubeconfig mgmt/mgmt-eks-a-cluster.kubeconfigAs noted earlier, adding the
--kubeconfigoption tellseksctlto use the management cluster identified by that kubeconfig file to upgrade a different workload cluster.This will upgrade the cluster specification (if specified), upgrade the core components to the latest available versions and apply the changes using the provisioner controllers.
Output
Example output:
✅ control plane ready
✅ worker nodes ready
✅ nodes ready
✅ cluster CRDs ready
✅ cluster object present on workload cluster
✅ upgrade cluster kubernetes version increment
✅ validate immutable fields
🎉 all cluster upgrade preflight validations passed
Performing provider setup and validations
Ensuring etcd CAPI providers exist on management cluster before upgrade
Pausing GitOps cluster resources reconcile
Upgrading core components
Backing up management cluster's resources before upgrading
Upgrading management cluster
Updating Git Repo with new EKS-A cluster spec
Forcing reconcile Git repo with latest commit
Resuming GitOps cluster resources kustomization
Writing cluster config file
🎉 Cluster upgraded!
Cleaning up backup resources
Starting in EKS Anywhere v0.18.0, when upgrading management cluster the CLI depends on the EKS Anywhere Controller to perform the upgrade. In the event an issue occurs and the CLI times out, it may be possible to fix the issue and have the upgrade complete as the EKS Anywhere Controller will continually attempt to complete the upgrade.
During the workload cluster upgrade process, EKS Anywhere pauses the cluster controller reconciliation by adding the paused annotation anywhere.eks.amazonaws.com/paused: true to the EKS Anywhere cluster, provider datacenterconfig and machineconfig resources, before the components upgrade. After upgrade completes, the annotations are removed so that the cluster controller resumes reconciling the cluster. If the CLI execution is interrupted or times out, the controller won’t reconcile changes to the EKS-A objects until these annotations are removed. You can re-run the CLI to restart the upgrade process or remove the annotations manually with kubectl.
Though not recommended, you can manually pause the EKS Anywhere cluster controller reconciliation to perform extended maintenance work or interact with Cluster API objects directly. To do it, you can add the paused annotation to the cluster resource:
kubectl annotate clusters.anywhere.eks.amazonaws.com ${CLUSTER_NAME} -n ${CLUSTER_NAMESPACE} anywhere.eks.amazonaws.com/paused=true
After finishing the task, make sure you resume the cluster reconciliation by removing the paused annotation, so that EKS Anywhere cluster controller can continue working as expected.
kubectl annotate clusters.anywhere.eks.amazonaws.com ${CLUSTER_NAME} -n ${CLUSTER_NAMESPACE} anywhere.eks.amazonaws.com/paused-
NOTE: During management cluster upgrades, the CLI temporarily pauses all workload cluster CAPI resources (
clusters.cluster.x-k8s.io) and resumes them after the upgrade completes. If you have manually paused workload clusters, the management cluster upgrade will unpause the CAPI cluster resource even though the EKS Anywhere cluster annotation (anywhere.eks.amazonaws.com/paused) remains unchanged. After the management cluster upgrade completes, re-pause any workload clusters that need to remain paused:kubectl patch clusters.cluster.x-k8s.io ${CLUSTER_NAME} -n eksa-system \ --type merge -p '{"spec":{"paused": true}}' --kubeconfig ${MGMT_KUBECONFIG}
NOTE (vSphere only): If you are upgrading a vSphere cluster created using EKS Anywhere version prior to
v0.16.0that has the vSphere CSI Driver installed in it, please refer to the additional steps listed here before attempting an upgrade.
Upgradeable Cluster Attributes
EKS Anywhere upgrade supports upgrading more than just the kubernetesVersion,
allowing you to upgrade a number of fields simultaneously with the same procedure.
Upgradeable Attributes
Cluster:
kubernetesVersioncontrolPlaneConfiguration.countcontrolPlaneConfiguration.machineGroupRef.namecontrolPlaneConfiguration.upgradeRolloutStrategy.rollingUpdate.maxSurgeworkerNodeGroupConfigurations.countworkerNodeGroupConfigurations.machineGroupRef.nameworkerNodeGroupConfigurations.kubernetesVersion(in case of modular upgrade)workerNodeGroupConfigurations.upgradeRolloutStrategy.rollingUpdate.maxSurgeworkerNodeGroupConfigurations.upgradeRolloutStrategy.rollingUpdate.maxUnavailableexternalEtcdConfiguration.machineGroupRef.nameidentityProviderRefs(Only forkind:OIDCConfig,kind:AWSIamConfigis immutable)gitOpsRef(Once set, you can’t change or delete the field’s content later)registryMirrorConfiguration(for non-authenticated registry mirror)endpointportcaCertContentinsecureSkipVerify
VSphereMachineConfig:
datastorediskGiBfoldermemoryMiBnumCPUsresourcePooltemplateusers
NutanixMachineConfig:
vcpusPerSocketvcpuSocketsmemorySizeimageclustersubnetsystemDiskSize
SnowMachineConfig:
amiIDinstanceTypephysicalNetworkConnectorsshKeyNamedevicescontainersVolumeosFamilynetwork
CloudStackDatacenterConfig:
availabilityZones(Can add and remove availability zones provided at least 1 previously configured zone is still present)
CloudStackMachineConfig:
templatecomputeOfferingdiskOfferinguserCustomDetailssymlinksusers
OIDCConfig:
clientIDgroupsClaimgroupsPrefixissuerUrlrequiredClaims.claimrequiredClaims.valueusernameClaimusernamePrefix
AWSIamConfig:
mapRolesmapUsers
EKS Anywhere upgrade also supports adding more worker node groups post-creation.
To add more worker node groups, modify your cluster config file to define the additional group(s).
Example:
apiVersion: anywhere.eks.amazonaws.com/v1alpha1
kind: Cluster
metadata:
  name: dev
spec:
  controlPlaneConfiguration:
     ...
  workerNodeGroupConfigurations:
  - count: 2
    machineGroupRef:
      kind: VSphereMachineConfig
      name: my-cluster-machines
    name: md-0
  - count: 2
    machineGroupRef:
      kind: VSphereMachineConfig
      name: my-cluster-machines
    name: md-1
      ...
Worker node groups can use the same machineGroupRef as previous groups, or you can define a new machine configuration for your new group.
Advanced configuration for rolling upgrade
EKS Anywhere allows an optional configuration to customize the behavior of upgrades.
It allows the specification of Two parameters that control the desired behavior of rolling upgrades:
- maxSurge - The maximum number of machines that can be scheduled above the desired number of machines. When not specified, the current CAPI default of 1 is used.
- maxUnavailable - The maximum number of machines that can be unavailable during the upgrade. When not specified, the current CAPI default of 0 is used.
Example configuration:
upgradeRolloutStrategy:
  type: RollingUpdate
  rollingUpdate:
    maxSurge: 1
    maxUnavailable: 0    # only configurable for worker nodes
‘upgradeRolloutStrategy’ configuration can be specified separately for control plane and for each worker node group. This template contains an example for control plane under the ‘controlPlaneConfiguration’ section and for worker node group under ‘workerNodeGroupConfigurations’:
apiVersion: anywhere.eks.amazonaws.com/v1alpha1
kind: Cluster
metadata:
  name: my-cluster-name
spec:
  controlPlaneConfiguration:
    count: 1
    endpoint:
      host: "xx.xx.xx.xx"
    machineGroupRef:
      kind: VSphereMachineConfig
      name: my-cluster-name-cp
    upgradeRolloutStrategy:
      type: RollingUpdate
      rollingUpdate:
        maxSurge: 1
  workerNodeGroupConfigurations:
  - count: 2
    machineGroupRef:
      kind: VSphereMachineConfig
      name: my-cluster-name
    name: md-0
    upgradeRolloutStrategy:
      type: RollingUpdate
      rollingUpdate:
        maxSurge: 1
        maxUnavailable: 0

---
...
upgradeRolloutStrategy
Configuration parameters for upgrade strategy.
upgradeRolloutStrategy.type
Type of rollout strategy. Currently only RollingUpdate is supported.
upgradeRolloutStrategy.rollingUpdate
Configuration parameters for customizing rolling upgrade behavior.
upgradeRolloutStrategy.rollingUpdate.maxSurge
Default: 1
This can not be 0 if maxUnavailable is 0.
The maximum number of machines that can be scheduled above the desired number of machines.
Example: When this is set to n, the new worker node group can be scaled up immediately by n when the rolling upgrade starts. Total number of machines in the cluster (old + new) never exceeds (desired number of machines + n). Once scale down happens and old machines are brought down, the new worker node group can be scaled up further ensuring that the total number of machines running at any time does not exceed the desired number of machines + n.
upgradeRolloutStrategy.rollingUpdate.maxUnavailable
Default: 0
This can not be 0 if MaxSurge is 0.
The maximum number of machines that can be unavailable during the upgrade.
Example: When this is set to n, the old worker node group can be scaled down by n machines immediately when the rolling upgrade starts. Once new machines are ready, old worker node group can be scaled down further, followed by scaling up the new worker node group, ensuring that the total number of machines unavailable at all times during the upgrade never falls below n.
Resume upgrade after failure
EKS Anywhere supports re-running the upgrade command post-failure as an experimental feature.
If the upgrade command fails, the user can manually fix the issue (when applicable) and simply rerun the same command. At this point, the CLI will skip the completed tasks, restore the state of the operation, and resume the upgrade process.
The completed tasks are stored in the generated folder as a file named <clusterName>-checkpoint.yaml.
This feature is experimental. To enable this feature, export the following environment variable:
export CHECKPOINT_ENABLED=true
Troubleshooting
Attempting to upgrade a cluster with more than 1 minor release will result in receiving the following error.
✅ validate immutable fields
❌ validation failed    {"validation": "Upgrade preflight validations", "error": "validation failed with 1 errors: WARNING: version difference between upgrade version (1.21) and server version (1.19) do not meet the supported version increment of +1", "remediation": ""}
Error: failed to upgrade cluster: validations failed
For troubleshooting other common upgrade issues, see the Troubleshooting documentation.
Update vSphere credentials
To update the vSphere credentials used by EKS Anywhere, see the Update vSphere credentials page.
2.4 - Upgrade airgapped cluster
The procedure to upgrade EKS Anywhere clusters in airgapped environments is similar to the procedure for creating new clusters in airgapped environments. The only difference is that you must upgrade your eksctl anywhere CLI before running the steps to download and import the EKS Anywhere dependencies to your local registry mirror.
Prerequisites
- An existing Admin machine
- The upgraded version of the
eksctl anywhereCLI installed on the Admin machine - Docker running on the Admin machine
- At least 80GB in storage space on the Admin machine to temporarily store the EKS Anywhere images locally before importing them to your local registry. Currently, when downloading images, EKS Anywhere pulls all dependencies for all infrastructure providers and supported Kubernetes versions.
- The download and import images commands must be run on an amd64 machine to import amd64 images to the registry mirror.
Procedure
-
Download the EKS Anywhere artifacts that contain the list and locations of the EKS Anywhere dependencies. A compressed file
eks-anywhere-downloads.tar.gzwill be downloaded. You can use theeksctl anywhere download artifacts --dry-runcommand to see the list of artifacts it will download.eksctl anywhere download artifacts -
Decompress the
eks-anywhere-downloads.tar.gzfile using the following command. This will create aneks-anywhere-downloadsfolder.tar -xvf eks-anywhere-downloads.tar.gz -
Download the EKS Anywhere image dependencies to the Admin machine. This command may take several minutes (10+) to complete. To monitor the progress of the command, you can run with the
-v 6command line argument, which will show details of the images that are being pulled. Docker must be running for the following command to succeed.eksctl anywhere download images -o images.tar -
Set up a local registry mirror to host the downloaded EKS Anywhere images and configure your Admin machine with the certificates and authentication information if your registry requires it. For details, refer to the Registry Mirror Configuration documentation.
-
Import images to the local registry mirror using the following command. Set
REGISTRY_MIRROR_URLto the url of the local registry mirror you created in the previous step. This command may take several minutes to complete. To monitor the progress of the command, you can run with the-v 6command line argument. When using self-signed certificates for your registry, you should run with the--insecurecommand line argument to indicate skipping TLS verification while pushing helm charts and bundles.export REGISTRY_MIRROR_URL=<registryurl>eksctl anywhere import images -i images.tar -r ${REGISTRY_MIRROR_URL} \ --bundles ./eks-anywhere-downloads/bundle-release.yaml -
Optionally import curated packages to your registry mirror. The curated packages images are copied from Amazon ECR to your local registry mirror in a single step, as opposed to separate download and import steps. Follow the Curated Packages documentation.
If the previous steps succeeded, all of the required EKS Anywhere dependencies are now present in your local registry. Before you upgrade your EKS Anywhere cluster, configure registryMirrorConfiguration in your EKS Anywhere cluster specification with the information for your local registry. For details see the Registry Mirror Configuration documentation.
NOTE: If you are running EKS Anywhere on bare metal, you must configure
osImageURLandhookImagesURLPathin your EKS Anywhere cluster specification with the location of the upgraded node operating system image and hook OS image. For details, reference the bare metal configuration documentation.
Next Steps
2.5 - Upgrade management components
Note
Theeksctl anywhere upgrade management-components subcommand was added in EKS Anywhere version v0.19.0 for all providers. Management component upgrades can only be done through the eksctl CLI, not through the Kubernetes API.
What are management components?
Management components run on management or standalone clusters and are responsible for managing the lifecycle of workload clusters. Management components include but are not limited to:
- Cluster API controller
- EKS Anywhere cluster lifecycle controller
- Curated Packages controller
- Provider-specific controllers (vSphere, Tinkerbell etc.)
- Tinkerbell services (Boots, Hegel, Rufio, etc.)
- Custom Resource Definitions (CRDs) (clusters, eksareleases, etc.)
Why upgrade management components separately?
The existing eksctl anywhere upgrade cluster command, when run against management or standalone clusters, upgrades both the management and cluster components. When upgrading versions, this upgrade process performs a rolling replacement of nodes in the cluster, which brings operational complexity, and should be carefully planned and executed.
With the new eksctl anywhere upgrade management-components command, you can upgrade management components separately from cluster components. This enables you to get the latest updates to the management components such as Cluster API controller, EKS Anywhere controller, and provider-specific controllers without a rolling replacement of nodes in the cluster, which reduces the operational complexity of the operation.
Check management components versions
You can check the current and new versions of management components with the eksctl anywhere upgrade plan management-components command:
eksctl anywhere upgrade plan management-components -f management-cluster.yaml
The output should appear similar to the following:
NAME                 CURRENT VERSION       NEXT VERSION
EKS-A Management     v0.18.3+cc70180       v0.19.0+a672f31
cert-manager         v1.13.0+68bec33       v1.13.2+a34c207
cluster-api          v1.5.2+b14378d        v1.6.0+04c07bc
kubeadm              v1.5.2+5762149        v1.6.0+5bf0931
vsphere              v1.7.4+6ecf386        v1.8.5+650acfa
etcdadm-bootstrap    v1.0.10+c9a5a8a       v1.0.10+1ceb898
etcdadm-controller   v1.0.16+0ed68e6       v1.0.17+5e33062
Alternatively, you can run the eksctl anywhere upgrade plan cluster command against your management cluster, which shows the version differences for both management and cluster components.
Upgrade management components
To perform the management components upgrade, run the following command:
eksctl anywhere upgrade management-components -f management-cluster.yaml
The output should appear similar to the following:
Performing setup and validations
✅ Docker provider validation
✅ Control plane ready
✅ Cluster CRDs ready
Upgrading core components
Installing new eksa components
🎉 Management components upgraded!
At this point, a new eksarelease custom resource will be available in your management cluster, which means new cluster components that correspond to your current EKS Anywhere version are available for cluster upgrades. You can subsequently run a workload cluster upgrade with the eksctl anywhere upgrade cluster command, or by updating eksaVersion field in your workload cluster’s spec and applying it to your management cluster with Kubernetes API-compatible tooling such as kubectl, GitOps, or Terraform.
2.6 - Update vSphere credentials
EKS Anywhere does not currently support updating the vSphere credentials used by EKS Anywhere when upgrading clusters with the eksctl anywhere upgrade command.
It is recommended to use the script maintained with EKS Anywhere to update your vSphere credentials, which automates the steps covered in the Update vSphere credentials manually section.
Update vSphere credentials with script
You can update all vSphere credentials in related Secret objects used by EKS Anywhere with the vSphere credential update script in EKS Anywhere GitHub repository. The following steps should be run from your admin machine or the local machine where you host the kubeconfig file for your EKS Anywhere management or standalone cluster.
- Set environment variables on your local machine
- Set the
KUBECONFIGenvironment variable on your local machine to the kubeconfig file for your EKS Anywhere management or standalone cluster. For examplemgmt/mgmt-eks-a-cluster.kubeconfig. - Set the
EKSA_VSPHERE_USERNAMEandEKSA_VSPHERE_PASSWORDenvironment variables on your local machine with the new vSphere credentials.
export KUBECONFIG='<your-kubeconfig-file>'
export EKSA_VSPHERE_USERNAME='<your-vsphere-username>'
export EKSA_VSPHERE_PASSWORD='<your-vsphere-password>'
- Download the script to your local machine
curl -OL https://raw.githubusercontent.com/aws/eks-anywhere/refs/heads/main/scripts/update_vsphere_credential.sh
- Run the script from your local machine
- Replace
CLUSTER_NAMEwith the name of your EKS Anywhere cluster andVSPHERE_SERVER_NAMEwith the name of the vSphere server.
./update_vsphere_credential.sh CLUSTER_NAME VSPHERE_SERVER_NAME
NOTE: If you are using the vSphere CSI in your cluster, you must manually update the vSphere password in the
{CLUSTER_NAME}-csi-vsphere-configSecret under theeksa-systemnamespace. If the annotationkubectl.kubernetes.io/last-applied-configurationexists on the secret object, update password in thekubectl.kubernetes.io/last-applied-configurationfield.
Update vSphere credentials manually
Follow the steps below to manually update the vSphere credentials used by EKS Anywhere.
- Update
EKSA_VSPHERE_PASSWORDenvironment variable to the new password and get the base64 encoded string of the password usingecho -n "<YOUR_PASSWORD>" | base64 - Update the following secrets in your vSphere cluster using
kubectl editcommand:{CLUSTER_NAME}-vsphere-credentialsundereksa-systemnamespace - Updatepasswordfield under data.{CLUSTER_NAME}-cloud-provider-vsphere-credentialsundereksa-systemnamespace - Decode the string under data, in the decoded string (which is the template for Secret objectcloud-provider-vsphere-credentialunderkube-systemnamespace), update the{CLUSTER_NAME}.passwordwith the base64 encoding of new password, then encode the string and update data field with the encoded string.vsphere-credentialsundereksa-systemnamespace - Updatepassword,passwordCP,passwordCSIfield under data.- If annotation
kubectl.kubernetes.io/last-applied-configurationexists on any of the above Secret object, update password inkubectl.kubernetes.io/last-applied-configurationfield. {CLUSTER_NAME}-csi-vsphere-configundereksa-systemnamespace - If annotationkubectl.kubernetes.io/last-applied-configurationexists on the secret object, update password inkubectl.kubernetes.io/last-applied-configurationfield.
2.7 -
There are a few dimensions of versioning to consider in your EKS Anywhere deployments:
- Management clusters to workload clusters: Management clusters can be at most 1 EKS Anywhere minor version greater than the EKS Anywhere version of workload clusters. Workload clusters cannot have an EKS Anywhere version greater than management clusters.
- Management components to cluster components: Management components can be at most 1 EKS Anywhere minor version greater than the EKS Anywhere version of cluster components.
- EKS Anywhere version upgrades: Skipping EKS Anywhere minor versions during upgrade is not supported (
v0.23.xtov0.25.x). We recommend you upgrade one EKS Anywhere minor version at a time (v0.23.xtov0.24.xtov0.25.x). - Kubernetes version upgrades: Skipping Kubernetes minor versions during upgrade is not supported (
v1.33.xtov1.35.x). You must upgrade one Kubernetes minor version at a time (v1.33.xtov1.34.xtov1.35.x). - Kubernetes control plane and worker nodes: As of Kubernetes v1.28, worker nodes can be up to 3 minor versions lower than the Kubernetes control plane minor version. In earlier Kubernetes versions, worker nodes could be up to 2 minor versions lower than the Kubernetes control plane minor version.
3 - Scale cluster
3.1 - Scale Bare Metal cluster
Scaling nodes on Bare Metal clusters
When you are horizontally scaling your Bare Metal EKS Anywhere cluster, consider the number of nodes you need for your control plane and for your data plane.
See the Kubernetes Components documentation to learn the differences between the control plane and the data plane (worker nodes).
Horizontally scaling the cluster is done by increasing the number for the control plane or worker node groups under the Cluster specification.
NOTE: If etcd is running on your control plane (the default configuration) you should scale your control plane in odd numbers (3, 5, 7…).
apiVersion: anywhere.eks.amazonaws.com/v1
kind: Cluster
metadata:
  name: test-cluster
spec:
  controlPlaneConfiguration:
    count: 1     # increase this number to horizontally scale your control plane
...
  workerNodeGroupConfigurations:
  - count: 1     # increase this number to horizontally scale your data plane
Next, you must ensure you have enough available hardware for the scale-up operation to function. Available hardware could have been fed to the cluster as extra hardware during a prior create command, or could be fed to the cluster during the scale-up process by providing the hardware CSV file to the upgrade cluster command (explained in detail below). For scale-down operation, you can skip directly to the upgrade cluster command .
To check if you have enough available hardware for scale up, you can use the kubectl command below to check if there are hardware with the selector labels corresponding to the controlplane/worker node group and without the ownerName label.
kubectl get hardware -n eksa-system --show-labels
For example, if you want to scale a worker node group with selector label type=worker-group-1, then you must have an additional hardware object in your cluster with the label type=worker-group-1 that doesn’t have the ownerName label.
In the command shown below, eksa-worker2 matches the selector label and it doesn’t have the ownerName label. Thus, it can be used to scale up worker-group-1 by 1.
kubectl get hardware -n eksa-system --show-labels
NAME                STATE       LABELS
eksa-controlplane               type=controlplane,v1alpha1.tinkerbell.org/ownerName=abhnvp-control-plane-template-1656427179688-9rm5f,v1alpha1.tinkerbell.org/ownerNamespace=eksa-system
eksa-worker1                    type=worker-group-1,v1alpha1.tinkerbell.org/ownerName=abhnvp-md-0-1656427179689-9fqnx,v1alpha1.tinkerbell.org/ownerNamespace=eksa-system
eksa-worker2                    type=worker-group-1
If you don’t have any available hardware that match this requirement in the cluster, you can setup a new hardware CSV . You can feed this hardware inventory file during the upgrade cluster command .
Upgrade Cluster Command for Scale Up/Down
-
eksctl CLI: To upgrade a workload cluster with eksctl, run:
eksctl anywhere upgrade cluster
-f cluster.yaml
# --hardware-csv <hardware.csv> \ # uncomment to add more hardware
--kubeconfig mgmt/mgmt-eks-a-cluster.kubeconfig
As noted earlier, adding the
--kubeconfigoption tellseksctlto use the management cluster identified by that kubeconfig file to create a different workload cluster. -
kubectl CLI: The cluster lifecycle feature lets you use kubectl to talk to the Kubernetes API to scale a workload cluster. kubectl can also be used for management cluster scaling, except when upgrading the EKS Anywhere CLI version which requires
eksctl anywhere upgrade. To use kubectl, run:kubectl apply -f eksa-w01-cluster.yaml --kubeconfig mgmt/mgmt-eks-a-cluster.kubeconfigTo check the state of a cluster managed with the cluster lifecyle feature, use
kubectlto show the cluster object with its status.The
statusfield on the cluster object field holds information about the current state of the cluster.kubectl get clusters w01 -o yamlThe cluster has been fully upgraded once the status of the
Readycondition is markedTrue. See the cluster status guide for more information. -
GitOps: See Manage separate workload clusters with GitOps
-
Terraform: See Manage separate workload clusters with Terraform
NOTE:For kubectl, GitOps and Terraform:
- The baremetal controller does not support scaling upgrades and Kubernetes version upgrades in the same request.
- While scaling workload cluster if you need to add additional machines, run:
eksctl anywhere generate hardware -z updated-hardware.csv > updated-hardware.yaml kubectl apply -f updated-hardware.yaml - For scaling multiple workload clusters, it is essential that the hardware that will be used for scaling up clusters has labels and selectors that are unique to the target workload cluster. For instance, for an EKSA cluster named
eksa-workload1, the hardware that is assigned for this cluster should have labels that are only going to be used for this cluster liketype=eksa-workload1-cpandtype=eksa-workload1-worker. Another workload cluster namedeksa-workload2can have labels liketype=eksa-workload2-cpandtype=eksa-workload2-worker. Please note that even though labels can be arbitrary, they need to be unique for each workload cluster. Not specifying unique cluster labels can cause cluster upgrades to behave in unexpected ways which may lead to unsuccessful upgrades and unstable clusters.
Selective Server Removal During Scale Down
When scaling down your Bare Metal EKS Anywhere cluster, you may want to remove a specific server rather than letting the system automatically choose which node to remove. By default, Cluster API will remove nodes in a non-deterministic order during scale down operations.
IMPORTANT: Do not attempt to remove specific servers by deleting entries from the hardware CSV file and running the upgrade command. This approach will not have deterministic behavior.
To target a specific server for removal during scale down, use the Cluster API delete annotation on the corresponding machine resource. This ensures that the specific machine is prioritized for removal during the scale-down operation.
Steps to Remove a Specific Server
-
Identify the target node: First, determine which node you want to remove by listing all nodes in your cluster:
kubectl get nodes -
Find the corresponding CAPI machine: List all CAPI machines to find the machine resource that corresponds to your target node:
kubectl get machines.cluster.x-k8s.io -n eksa-systemYou can also find the specific machine for a node using:
NODE_NAME="your-target-node-name" kubectl get machines.cluster.x-k8s.io -n eksa-system --no-headers | awk -v node="$NODE_NAME" '$3==node {print $1}' -
Add the delete annotation: Mark the machine for deletion by adding the Cluster API delete annotation:
MACHINE_NAME="your-machine-name" kubectl annotate machines.cluster.x-k8s.io $MACHINE_NAME cluster.x-k8s.io/delete-machine=yes -n eksa-system -
Update your cluster specification: Reduce the node count in your EKS Anywhere cluster specification file:
apiVersion: anywhere.eks.amazonaws.com/v1 kind: Cluster metadata: name: test-cluster spec: workerNodeGroupConfigurations: - count: 2 # decrease this number for scale down -
Apply the scale down operation: Run the upgrade command to perform the scale down:
eksctl anywhere upgrade cluster -f cluster.yaml --kubeconfig mgmt/mgmt-eks-a-cluster.kubeconfig
The annotated machine will be prioritized for removal during the scale-down operation, ensuring that your specific target server is removed from the cluster.
NOTE: The hardware CSV is designed to manage the hardware catalog by creating Hardware , Machine , and BMC credential resources. For operational tasks like scaling, always use the cluster specification count and CAPI machine annotations rather than modifying the hardware CSV.
Autoscaling
EKS Anywhere supports autoscaling of worker node groups using the Kubernetes Cluster Autoscaler and as a curated package .
See here and as a curated package for details on how to configure your cluster spec to autoscale worker node groups for autoscaling.
3.2 - Scale CloudStack cluster
When you are scaling your CloudStack EKS Anywhere cluster, consider the number of nodes you need for your control plane and for your data plane. In each case you can scale the cluster manually or automatically.
See the Kubernetes Components documentation to learn the differences between the control plane and the data plane (worker nodes).
Manual cluster scaling
NOTE: If etcd is running on your control plane (the default configuration) you should scale your control plane in odd numbers (3, 5, 7, and so on).
apiVersion: anywhere.eks.amazonaws.com/v1
kind: Cluster
metadata:
  name: test-cluster
spec:
  controlPlaneConfiguration:
    count: 1     # increase this number to horizontally scale your control plane
...
  workerNodeGroupConfigurations:
  - count: 1     # increase this number to horizontally scale your data plane
Once you have made configuration updates, you can use eksctl, kubectl, GitOps, or Terraform specified in the upgrade cluster command
to apply those changes.
If you are adding or removing a node, only the terminated nodes will be affected.
Autoscaling
EKS Anywhere supports autoscaling of worker node groups using the Kubernetes Cluster Autoscaler and as a curated package .
See here for details on how to configure your cluster spec to autoscale worker node groups for autoscaling.
3.3 - Scale Nutanix cluster
When you are scaling your Nutanix EKS Anywhere cluster, consider the number of nodes you need for your control plane and for your data plane. Each plane can be scaled horizontally (add more nodes) or vertically (provide nodes with more resources). In each case you can scale the cluster manually or automatically.
See the Kubernetes Components documentation to learn the differences between the control plane and the data plane (worker nodes).
Manual cluster scaling
Horizontally scaling the cluster is done by increasing the number for the control plane or worker node groups under the Cluster specification.
NOTE: If etcd is running on your control plane (the default configuration) you should scale your control plane in odd numbers (3, 5, 7…).
apiVersion: anywhere.eks.amazonaws.com/v1
kind: Cluster
metadata:
  name: test-cluster
spec:
  controlPlaneConfiguration:
    count: 1     # increase this number to horizontally scale your control plane
...
  workerNodeGroupConfigurations:
  - count: 1     # increase this number to horizontally scale your data plane
Vertically scaling your cluster is done by updating the machine config spec for your infrastructure provider. For a Nutanix cluster an example is
apiVersion: anywhere.eks.amazonaws.com/v1
kind: NutanixMachineConfig
metadata:
  name: test-machine
  namespace: default
spec:
  systemDiskSize: 50    # increase this number to make the VM disk larger
  vcpuSockets: 8        # increase this number to add vCPUs to your VM
  memorySize: 8192      # increase this number to add memory to your VM
Once you have made configuration updates, you can use eksctl, kubectl, GitOps, or Terraform specified in the upgrade cluster command
to apply those changes.
If you are adding or removing a node, only the terminated nodes will be affected.
If you are vertically scaling your nodes, then all nodes will be replaced one at a time.
Autoscaling
EKS Anywhere supports autoscaling of worker node groups using the Kubernetes Cluster Autoscaler and as a curated package .
See here and as a curated package for details on how to configure your cluster spec to autoscale worker node groups for autoscaling.
3.4 - Scale vSphere cluster
When you are scaling your vSphere EKS Anywhere cluster, consider the number of nodes you need for your control plane and for your data plane. Each plane can be scaled horizontally (add more nodes) or vertically (provide nodes with more resources). In each case you can scale the cluster manually or automatically.
See the Kubernetes Components documentation to learn the differences between the control plane and the data plane (worker nodes).
Manual cluster scaling
Horizontally scaling the cluster is done by increasing the number for the control plane or worker node groups under the Cluster specification.
NOTE: If etcd is running on your control plane (the default configuration) you should scale your control plane in odd numbers (3, 5, 7…).
apiVersion: anywhere.eks.amazonaws.com/v1
kind: Cluster
metadata:
  name: test-cluster
spec:
  controlPlaneConfiguration:
    count: 1     # increase this number to horizontally scale your control plane
...
  workerNodeGroupConfigurations:
  - count: 1     # increase this number to horizontally scale your data plane
Vertically scaling your cluster is done by updating the machine config spec for your infrastructure provider. For a vSphere cluster an example is
apiVersion: anywhere.eks.amazonaws.com/v1
kind: VSphereMachineConfig
metadata:
  name: test-machine
  namespace: default
spec:
  diskGiB: 25       # increase this number to make the VM disk larger
  numCPUs: 2        # increase this number to add vCPUs to your VM
  memoryMiB: 8192   # increase this number to add memory to your VM
Once you have made configuration updates, you can use eksctl, kubectl, GitOps, or Terraform specified in the upgrade cluster command
to apply those changes.
If you are adding or removing a node, only the terminated nodes will be affected.
If you are vertically scaling your nodes, then all nodes will be replaced one at a time.
Autoscaling
EKS Anywhere supports autoscaling of worker node groups using the Kubernetes Cluster Autoscaler and as a curated package .
See here and as a curated package for details on how to configure your cluster spec to autoscale worker node groups for autoscaling.
4 - Nodes
4.1 - Manage vSphere VMs with vMotion
vMotion with EKS Anywhere
VMware vMotion is a feature within vSphere that allows live migration of virtual machines (VMs) between ESXi hypervisor hosts. This document outlines the guidelines for using vMotion to migrate EKS Anywhere nodes between vSphere ESXi hosts using vMotion while ensuring cluster stability.
Considerations for node migration using vMotion
When migrating EKS Anywhere nodes with vMotion, several considerations must be kept in mind, particularly around configuration values defined in the vSphere cluster spec file . These configurations must remain unchanged during the migration and the infrastructure these configurations represent should also not change.
-
No cross-vCenter vMotion
EKS Anywhere nodes cannot be migrated between different vCenter environments using vMotion. The nodes must remain within the same vCenter instance for proper EKS Anywhere operation. The vCenter Server managing the EKS Anywhere cluster is specified in the
VSphereDatacenterConfigsection of the EKS Anywhere vSphere cluster spec file , under thespec.serverfield, and cannot be changed. -
vSphere infrastructure settings in
VSphereDatacenterConfigIn addition to the vCenter element, two additional elements defined in the
VSphereDatacenterConfigsection of the EKS Anywhere cluster spec file are immutable must remain unchanged during the vMotion process:-
datacenter
(spec.datacenter)- The datacenter specified in the EKS Anywhere cluster spec file must not change during the vMotion migration. This value refers to the vSphere datacenter that hosts the EKS Anywhere nodes. -
network
(spec.network)- The network defined in the EKS Anywhere cluster spec file must not change during the vMotion migration. This value refers the vSphere network in which the EKS Anywhere nodes are operating. Any changes to this network configuration would disrupt node connectivity and lead to outages in the EKS Anywhere cluster.
-
-
VMware Storage vMotion is not supported for EKS Anywhere nodes
datastore
(spec.datastore)- Defined in theVSphereMachineConfigsection of the EKS Anywhere cluster spec file is immutable. This value refers to the vSphere datastore that holds EKS Anywhere node vm backing store. Modifying the datastore during vMotion (storage vMotion) would require a change to this value, which is not supported. -
Node network configuration stability
The IP address, subnet mask, and default gateway of each EKS Anywhere node must remain unchanged during the vMotion process. Any modifications to the IP address configuration can cause communication failures between the EKS Anywhere nodes, pods, and the control plane, leading to disruptions in EKS Anywhere cluster operations.
-
EKS Anywhere configuration stabiltiy
The EKS Anywhere environment itself should remain unchanged during vMotion. Do not perform or trigger any EKS Anywhere changes or life cycle events while performing vmotion.
Best practices for vMotion with EKS Anywhere clusters
-
Follow VMware vMotion best practices
-
General best practices: Review VMware’s general guidelines for optimal vMotion performance, such as ensuring sufficient CPU, memory, and network resources, and minimizing load on the ESXi hosts during the migration. Refer to the VMware vMotion documentation for details.
-
VMware vMotion Networking Best Practices: Whenever possible, follow the Networking Best Practices for VMware vMotion to optimize performance and reduce the risk of issues during the migration process.
-
Use High-Speed Networks: A 10GbE or higher speed network is recommended to ensure smooth vMotion operations for EKS Anywhere nodes, particularly those with large memory footprints.
-
-
Shared Storage
Shared storage is a requirement for vmotion of EKS Anywhere clusters. Storage such as vSAN, Fiber Channel SAN, or NFS should be shared between the supporting vSphere ESXi hosts for maintaining access to the VM’s backing data without relying on storage vMotion, which is not supported in EKS Anywhere environments.
-
Monitoring before and after migration
To verify cluster health and node stability, monitor the EKS Anywhere nodes and pods before and after the vMotion migration:
- Before migration, run the following commands to check the current health and status of the EKS Anywhere nodes and pods.
- After vMotion activity is completed, run the commands again to verify that the nodes and pods are still operational and healthy.
  kubectl get nodes
  kubectl get pods -a
-
Infrastructure maintenance during vMotion
It is recommended that no other infrastructure maintenance activities be performed during the vMotion operation. The underlying datacenter infrastructure supporting the network, storage, and server resources utilized by VMware vSphere must remain stable during the vMotion process. Any interruptions in these services could lead to partial or complete failures in the vMotion process, potentially causing the EKS Anywhere nodes to lose connectivity or experience disruptions in normal operations.
5 - Networking
5.1 - Secure connectivity with CNI and Network Policy
Announcements
- EKS Anywhere release
v0.24.0introduces the First-Party Supported Cilium as the default Cilium CNI in an EKS Anywhere cluster. The image for First-Party Supported Cilium is available in AWS public ECR gallery https://gallery.ecr.aws/eks/cilium/cilium. It is recommended to use this first-party supported Cilium which has been tested by AWS as the CNI in your cluster.
EKS Anywhere uses Cilium for pod networking and security.
Cilium is installed by default as a Kubernetes CNI plugin and so is already running in your EKS Anywhere cluster.
This section provides information about:
-
Understanding Cilium components and requirements
-
Validating your Cilium networking setup.
-
Using Cilium to securing workload connectivity using Kubernetes Network Policy.
Cilium Features
The following table lists features available in open source Cilium and indicates which ones are supported by AWS under the Amazon EKS Anywhere Enterprise Subscription.
Expand to see Cilium Features
| Open Source Cilium Feature | EKS Anywhere Support |
|---|---|
| Networking Routing with tunneling mode | ✔ |
| Networking Routing with native routing mode | ✔ |
| Kubernetes Host Scope IPAM | ✔ |
| Kubernetes Network Policy | ✔ |
| Cilium Network Policy (L3/L4/L7, Clusterwide Policy) | ✔ |
| Egress Masquerade | ✔ |
| CNI Exclusive Configuration | ✔ |
| Policy Enforcement Modes | ✔ |
| Load-Balancing (L3/L4) | ✔ |
| Border Gateway Protocol | ✔ |
| Ingress, Gateway API, Service Mesh | — |
| Multi-Cluster, Egress Gateway | — |
| Hubble Network Observability (Metrics, Logs, Prometheus, Grafana, OpenTelemetry) | — |
Note
Features marked with — are not officially supported by the EKS Anywhere team, but can still be manually enabled on EKS Anywhere Cilium. If you plan to use functionality outside the scope of AWS support, it is recommended to obtain alternative commercial support for Cilium or have the in-house expertise to troubleshoot and contribute fixes to the Cilium project.Cilium Components
The primary Cilium Agent runs as a DaemonSet on each Kubernetes node. Each cluster also includes a Cilium Operator Deployment to handle certain cluster-wide operations. For EKS Anywhere, Cilium is configured to use the Kubernetes API server as the identity store, so no etcd cluster connectivity is required.
In a properly working environment, each Kubernetes node should have a Cilium Agent pod (cilium-WXYZ) in “Running” and ready (1/1) state.
By default there will be two
Cilium Operator pods (cilium-operator-123456-WXYZ) in “Running” and ready (1/1) state on different Kubernetes nodes for high-availability.
Run the following command to ensure all cilium related pods are in a healthy state.
kubectl get pods -n kube-system | grep cilium
Example output for this command in a 3 node environment is:
kube-system   cilium-fsjmd                                1/1     Running           0          4m
kube-system   cilium-nqpkv                                1/1     Running           0          4m
kube-system   cilium-operator-58ff67b8cd-jd7rf            1/1     Running           0          4m
kube-system   cilium-operator-58ff67b8cd-kn6ss            1/1     Running           0          4m
kube-system   cilium-zz4mt                                1/1     Running           0          4m
Network Connectivity Requirements
To provide pod connectivity within an on-premises environment, the Cilium agent implements an overlay network using the GENEVE tunneling protocol. As a result, UDP port 6081 connectivity MUST be allowed by any firewall running between Kubernetes nodes running the Cilium agent.
Allowing ICMP Ping (type = 8, code = 0) as well as TCP port 4240 is also recommended in order for Cilium Agents to validate node-to-node connectivity as part of internal status reporting.
Validating Connectivity
Install the latest version of Cilium CLI . The Cilium CLI has connectivity test functionality to validate proper installation and connectivity within a Kubernetes cluster.
By default, Cilium CLI will run tests in the cilium-test-1 namespace which can be changed by using --test-namespace flag. For example:
cilium connectivity test
Successful test output will show all tests in a “successful” (some tests might be in “skipped”) state. For example:
✅ [cilium-test-1] All 12 tests (139 actions) successful, 72 tests skipped, 0 scenarios skipped.
Afterward, simply delete the namespace to clean-up the connectivity test:
kubectl delete ns cilium-test-1
Kubernetes Network Policy
By default, all Kubernetes workloads within a cluster can talk to any other workloads in the cluster, as well as any workloads outside the cluster. To enable a stronger security posture, Cilium implements the Kubernetes Network Policy specification to provide identity-aware firewalling / segmentation of Kubernetes workloads.
Network policies are defined as Kubernetes YAML specifications that are applied to a particular namespaces to describe that connections should be allowed to or from a given set of pods. These network policies are “identity-aware” in that they describe workloads within the cluster using Kubernetes metadata like namespace and labels, rather than by IP Address.
Basic network policies are validated as part of the above Cilium connectivity check test.
For next steps on leveraging Network Policy, we encourage you to explore:
-
A hands-on Network Policy Intro Tutorial .
-
The visual Network Policy Editor .
-
The #networkpolicy channel on Cilium Slack .
-
Other resources on networkpolicy.io .
5.2 - Replace EKS Anywhere Cilium with a custom CNI
This page provides walkthroughs on replacing the EKS Anywhere Cilium with a custom CNI. For more information on CNI customization see Use a custom CNI .
Note
- Starting from EKS Anywhere
v0.24.0release, the EKS Anywhere default Cilium will change from the Isovalent Cilium to the open-source AWS First-Party Supported Cilium. It is recommended to use this first-party supported Cilium which has been tested by AWS as the CNI in your cluster. When replacing EKS Anywhere Cilium with a custom CNI, it is your responsibility to manage the CNI, including version upgrades and support.
Prerequisites
- EKS Anywhere v0.15+.
- Cilium CLI v0.14.
Add a custom CNI to a new cluster
If an operator intends to uninstall EKS Anywhere Cilium from a new cluster they can enable the skipUpgrade option when creating the cluster.
Any future upgrades to the newly created cluster will not have EKS Anywhere Cilium upgraded.
-
Generate a cluster configuration according to the Getting Started section.
-
Modify the
Clusterobject’sspec.clusterNetwork.cniConfig.cilium.skipUpgradefield to equaltrue.
apiVersion: anywhere.eks.amazonaws.com/v1alpha1
kind: Cluster
metadata:
    name: eks-anywhere
spec:
  clusterNetwork:
    cniConfig:
      cilium:
        skipUpgrade: true
  ...
-
Create the cluster according to the Getting Started guide.
-
Pause reconciliation of the cluster. This ensures EKS Anywhere components do not attempt to remediate issues arising from a missing CNI.
kubectl --kubeconfig=MANAGEMENT_KUBECONFIG -n eksa-system annotate clusters.cluster.x-k8s.io WORKLOAD_CLUSTER_NAME cluster.x-k8s.io/paused=true
-
Uninstall EKS Anywhere Cilium.
cilium uninstall -
Install a custom CNI.
-
Resume reconciliation of the cluster object.
kubectl --kubeconfig=MANAGEMENT_KUBECONFIG -n eksa-system annotate clusters.cluster.x-k8s.io WORKLOAD_CLUSTER_NAME cluster.x-k8s.io/paused-
Add a custom CNI to an existing cluster with eksctl
- Modify the existing
Clusterobject’sspec.clusterNetwork.cniConfig.cilium.skipUpgradefield to equaltrue.
apiVersion: anywhere.eks.amazonaws.com/v1alpha1
kind: Cluster
metadata:
    name: eks-anywhere
spec:
  clusterNetwork:
    cniConfig:
      cilium:
        skipUpgrade: true
  ...
-
Pause reconciliation of the cluster. This ensures EKS Anywhere components do not attempt to remediate issues arising from a missing CNI.
kubectl --kubeconfig=MANAGEMENT_KUBECONFIG -n eksa-system annotate clusters.cluster.x-k8s.io WORKLOAD_CLUSTER_NAME cluster.x-k8s.io/paused=true
-
Uninstall EKS Anywhere Cilium.
cilium uninstall -
Install a custom CNI.
-
Resume reconciliation of the cluster object.
kubectl --kubeconfig=MANAGEMENT_KUBECONFIG -n eksa-system annotate clusters.cluster.x-k8s.io WORKLOAD_CLUSTER_NAME cluster.x-k8s.io/paused-
Add a custom CNI to an existing cluster with Lifecycle Controller
Warning
Clusters created using the Full Lifecycle Controller prior to v0.15 that have removed the EKS Anywhere Cilium CNI must manually populate their cluster.anywhere.eks.amazonaws.com object with the following annotation to ensure EKS Anywhere does not attempt to re-install EKS Anywhere Cilium.
anywhere.eks.amazonaws.com/eksa-cilium: ""
- Modify the existing
Clusterobject’sspec.clusterNetwork.cniConfig.cilium.skipUpgradefield to equaltrue.
apiVersion: anywhere.eks.amazonaws.com/v1alpha1
kind: Cluster
metadata:
    name: eks-anywhere
spec:
  clusterNetwork:
    cniConfig:
      cilium:
        skipUpgrade: true
  ...
-
Apply the cluster configuration to the cluster and await successful object reconciliation.
kubectl apply -f <cluster config path> -
Pause reconciliation of the cluster. This ensures EKS Anywhere components do not attempt to remediate issues arising from a missing CNI.
kubectl --kubeconfig=MANAGEMENT_KUBECONFIG -n eksa-system annotate clusters.cluster.x-k8s.io WORKLOAD_CLUSTER_NAME cluster.x-k8s.io/paused=true
- Uninstall EKS Anywhere Cilium.
cilium uninstall
-
Install a custom CNI.
-
Resume reconciliation of the cluster object.
kubectl --kubeconfig=MANAGEMENT_KUBECONFIG -n eksa-system annotate clusters.cluster.x-k8s.io WORKLOAD_CLUSTER_NAME cluster.x-k8s.io/paused-
5.3 - Cilium supported by AWS
Overview
As of EKS Anywhere v0.24, EKS Anywhere installs an AWS build of Cilium with all the features of open source Cilium as the default Kubernetes CNI plugin. Previous versions of EKS Anywhere included a Cilium build with a limited set of features compared to open source Cilium. With this update, for clusters with an EKS Anywhere Enterprise Subscription license, AWS will continue to provide technical support for Networking Routing (CNI), Identity-Based Network Policy (Labels, CIDR), and Load-Balancing (L3/L4) capabilities of Cilium, but you no longer need to replace the default EKS Anywhere CNI to use other capabilities available with open source Cilium. If you plan to use functionality outside the scope of AWS support, AWS recommends obtaining alternative commercial support for Cilium or have the in-house expertise to troubleshoot and contribute fixes to the Cilium project.
EKS Anywhere supports two approaches for managing the versions of the Cilium build maintained by AWS:
- AWS build of Cilium with automatic version upgrades:: EKS Anywhere automatically manages Cilium installation and upgrades (default behavior)
- AWS build of Cilium with self-managed version upgrades: You manage Cilium deployment using Helm while using AWS-maintained images from the public ECR registry
The AWS build of Cilium version provides images that include security patches and bug fixes validated by Amazon, available at public.ecr.aws/eks/cilium/cilium.
Installing AWS build of Cilium with automatic version upgrades
If you want to use the full open source Cilium version with advanced features, the transition is seamless and requires no configuration changes. AWS provides support for the subset of Cilium features mentioned in the Overview section above. You can customize Cilium settings using the helmValues parameter (see Helm Values Configuration for Cilium Plugin
).
Installing AWS build of Cilium with self-managed version upgrades
If you want to continue managing the Cilium CNI version yourself while using the AWS build of Cilium, you can install the AWS build of Cilium using Helm.
Prerequisites
- Helm 3.x installed
- Access to your EKS Anywhere cluster with
kubectlconfigured - Appropriate permissions to manage resources in the
kube-systemnamespace
Installation
Install the AWS build of Cilium version using Helm (replace 1.17.6-0 with your desired version from https://gallery.ecr.aws/eks/cilium/cilium):
helm install cilium oci://public.ecr.aws/eks/cilium/cilium \
  --version 1.17.6-0 \
  --namespace kube-system \
  --set envoy.enabled=false \
  --set ingressController.enabled=false \
  --set loadBalancer.l7.backend=none
Pros and Cons
Pros:
- Access to full Cilium open source features with AWS support for a subset of features
- Security patches and bug fixes handled by AWS
- Control over upgrade timing and version selection
- Greater flexibility to customize Cilium configuration
Cons:
- You are responsible for upgrading and validating Cilium versions
- Additional operational overhead for validating that your Cilium version is compatible with your Kubernetes version
- No automatic upgrades during EKS Anywhere cluster upgrades
Migrating from upstream open source Cilium to AWS build of Cilium
If you’re currently running the upstream open source Cilium version and want to switch to the AWS build of Cilium, you can perform an in-place upgrade using Helm. This migration allows you to benefit from images maintained by AWS while preserving your existing Cilium configuration and network policies.
The AWS build of Cilium uses images from the AWS public ECR registry (public.ecr.aws/eks/cilium/cilium) and includes security patches and bug fixes validated by AWS. This upgrade is performed as a rolling update, minimizing disruption to your workloads.
To perform the migration, run :
helm upgrade cilium oci://public.ecr.aws/eks/cilium/cilium \
  --version 1.17.6-0 \
  --namespace kube-system \
  --set envoy.enabled=false \
  --set ingressController.enabled=false \
  --set loadBalancer.l7.backend=none
Cilium 1.17.6 is the only Cilium version that AWS currently builds.
After the upgrade, verify the installation status:
cilium status --wait
Expected output showing AWS ECR images:
    /¯¯\
 /¯¯\__/¯¯\    Cilium:             OK
 \__/¯¯\__/    Operator:           OK
 /¯¯\__/¯¯\    Envoy DaemonSet:    disabled (using embedded mode)
 \__/¯¯\__/    Hubble Relay:       disabled
    \__/       ClusterMesh:        disabled

DaemonSet              cilium                   Desired: 4, Ready: 4/4, Available: 4/4
Deployment             cilium-operator          Desired: 2, Ready: 2/2, Available: 2/2
Containers:            cilium                   Running: 4
                       cilium-operator          Running: 2
                       clustermesh-apiserver
                       hubble-relay
Cluster Pods:          17/17 managed by Cilium
Helm chart version:    1.17.6-0
Image versions         cilium             public.ecr.aws/eks/cilium/cilium:v1.17.6-0: 4
                       cilium-operator    public.ecr.aws/eks/cilium/operator-generic:v1.17.6-0: 2
After aligning your Cilium installation with the AWS-supported version, you can optionally transition management of Cilium upgrades to EKS Anywhere.This allows EKS Anywhere to automatically upgrade your Cilium deployment to the latest AWS build of Cilium for the Kubernetes you are upgrading to, reducing operational overhead.
To complete the transition:
-
Upgrade Your Cluster: Upgrade your cluster to the latest EKS Anywhere version.
-
Toggle the skipUpgrade Configuration: Modify the
skipUpgradesetting in your cluster configuration:kubectl edit cluster <cluster-name>Choose one of the following options:
Option 1: Remove the
skipUpgradeline entirely and use default settings:cilium: {}Option 2: Explicitly set
skipUpgradeto false:cilium: skipUpgrade: false -
Save and Exit: Save the configuration file and exit the editor.
Once configured, EKS Anywhere will automatically manage Cilium upgrades during cluster upgrades, ensuring compatibility and reducing manual maintenance.
5.4 - Multus CNI plugin configuration
NOTE: Currently, Multus support is only available with the EKS Anywhere Bare Metal provider. The vSphere and CloudStack providers, do not have multi-network support for cluster machines. Once multiple network support is added to those clusters, Multus CNI can be supported.
Multus CNI is a container network interface plugin for Kubernetes that enables attaching multiple network interfaces to pods. In Kubernetes, each pod has only one network interface by default, other than local loopback. With Multus, you can create multi-homed pods that have multiple interfaces. Multus acts a as ‘meta’ plugin that can call other CNI plugins to configure additional interfaces.
Pre-Requisites
Given that Multus CNI is used to create pods with multiple network interfaces, the cluster machines that these pods run on need to have multiple network interfaces attached and configured. The interfaces on multi-homed pods need to map to these interfaces on the machines.
For Bare Metal clusters using the Tinkerbell provider, the cluster machines need to have multiple network interfaces cabled in and appropriate network configuration put in place during machine provisioning.
Overview of Multus setup
The following diagrams show the result of two applications (app1 and app2) running in pods that use the Multus plugin to communicate over two network interfaces (eth0 and net1) from within the pods. The Multus plugin uses two network interfaces on the worker node (eth0 and eth1) to provide communications outside of the node.
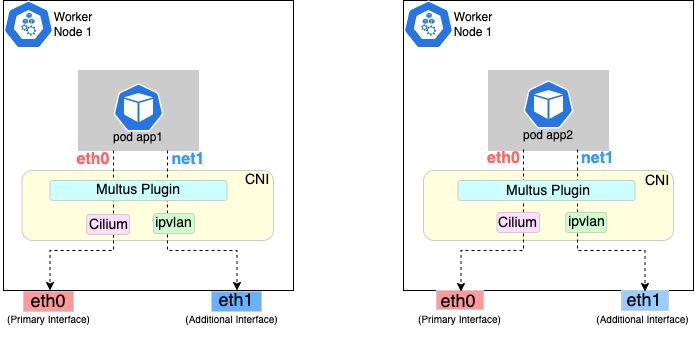
Follow the procedure below to set up Multus as illustrated in the previous diagrams.
Install and configure Multus
Deploying Multus using a Daemonset will spin up pods that install a Multus binary and configure Multus for usage in every node in the cluster. Here are the steps for doing that.
-
Clone the Multus CNI repo:
git clone https://github.com/k8snetworkplumbingwg/multus-cni.git && cd multus-cni -
Apply Multus daemonset to your EKS Anywhere cluster:
kubectl apply -f ./deployments/multus-daemonset-thick-plugin.yml -
Verify that you have Multus pods running:
kubectl get pods --all-namespaces | grep -i multus -
Check that Multus is running:
kubectl get pods -A | grep multusOutput:
kube-system kube-multus-ds-bmfjs     1/1      Running      0      3d1h
kube-system kube-multus-ds-fk2sk     1/1      Running      0      3d1h
Create Network Attachment Definition
You need to create a Network Attachment Definition for the CNI you wish to use as the plugin for the additional interface.
You can verify that your intended CNI plugin is supported by ensuring that the binary corresponding to that CNI plugin is present in the node’s /opt/cni/bin directory.
Below is an example of a Network Attachment Definition yaml:
cat <<EOF | kubectl create -f -
apiVersion: "k8s.cni.cncf.io/v1"
kind: NetworkAttachmentDefinition
metadata:
   name: ipvlan-conf
spec:
   config: '{
      "cniVersion": "0.3.0",
      "type": "ipvlan",
      "master": "eth1",
      "mode": "l3",
      "ipam": {
         "type": "host-local",
         "subnet": "198.17.0.0/24",
         "rangeStart": "198.17.0.200",
         "rangeEnd": "198.17.0.216",
         "routes": [
             { "dst": "0.0.0.0/0" }
         ],
         "gateway": "198.17.0.1"
      }
 }'
EOF
Note that eth1 is used as the master parameter.
This master parameter should match the interface name on the hosts in your cluster.
Verify the configuration
Type the following to verify the configuration you created:
kubectl get network-attachment-definitions
kubectl describe network-attachment-definitions ipvlan-conf
Deploy sample applications with network attachment
-
Create a sample application 1 (app1) with network annotation created in the previous steps:
cat <<EOF | kubectl apply -f - apiVersion: v1 kind: Pod metadata: name: app1 annotations: k8s.v1.cni.cncf.io/networks: ipvlan-conf spec: containers: - name: app1 command: ["/bin/sh", "-c", "trap : TERM INT; sleep infinity & wait"] image: alpine EOF -
Create a sample application 2 (app2) with the network annotation created in the previous step:
cat <<EOF | kubectl apply -f - apiVersion: v1 kind: Pod metadata: name: app2 annotations: k8s.v1.cni.cncf.io/networks: ipvlan-conf spec: containers: - name: app2 command: ["/bin/sh", "-c", "trap : TERM INT; sleep infinity & wait"] image: alpine EOF -
Verify that the additional interfaces were created on these application pods using the defined network attachment:
kubectl exec -it app1 -- ip aOutput:
1: lo: <LOOPBACK,UP,LOWER_UP> mtu 65536 qdisc noqueue state UNKNOWN qlen 1000
    link/loopback 00:00:00:00:00:00 brd 00:00:00:00:00:00
    inet 127.0.0.1/8 scope host lo
       valid_lft forever preferred_lft forever
    inet6 ::1/128 scope host
       valid_lft forever preferred_lft forever
*2: net1@if3: <BROADCAST,MULTICAST,NOARP,UP,LOWER_UP,M-DOWN> mtu 1500 qdisc noqueue state UNKNOWN
    link/ether 00:50:56:9a:84:3b brd ff:ff:ff:ff:ff:ff
    inet 198.17.0.200/24 brd 198.17.0.255 scope global net1
       valid_lft forever preferred_lft forever
    inet6 fe80::50:5600:19a:843b/64 scope link
       valid_lft forever preferred_lft forever*
31: eth0@if32: <BROADCAST,MULTICAST,UP,LOWER_UP,M-DOWN> mtu 1500 qdisc noqueue state UP
    link/ether 0a:9e:a0:b4:21:05 brd ff:ff:ff:ff:ff:ff
    inet 192.168.1.218/32 scope global eth0
       valid_lft forever preferred_lft forever
    inet6 fe80::89e:a0ff:feb4:2105/64 scope link
       valid_lft forever preferred_lft forever
kubectl exec -it app2 -- ip aOutput:
1: lo: <LOOPBACK,UP,LOWER_UP> mtu 65536 qdisc noqueue state UNKNOWN qlen 1000
    link/loopback 00:00:00:00:00:00 brd 00:00:00:00:00:00
    inet 127.0.0.1/8 scope host lo
       valid_lft forever preferred_lft forever
    inet6 ::1/128 scope host
       valid_lft forever preferred_lft forever
*2: net1@if3: <BROADCAST,MULTICAST,NOARP,UP,LOWER_UP,M-DOWN> mtu 1500 qdisc noqueue state UNKNOWN
    link/ether 00:50:56:9a:84:3b brd ff:ff:ff:ff:ff:ff
    inet 198.17.0.201/24 brd 198.17.0.255 scope global net1
       valid_lft forever preferred_lft forever
    inet6 fe80::50:5600:29a:843b/64 scope link
       valid_lft forever preferred_lft forever*
33: eth0@if34: <BROADCAST,MULTICAST,UP,LOWER_UP,M-DOWN> mtu 1500 qdisc noqueue state UP
    link/ether b2:42:0a:67:c0:48 brd ff:ff:ff:ff:ff:ff
    inet 192.168.1.210/32 scope global eth0
       valid_lft forever preferred_lft forever
    inet6 fe80::b042:aff:fe67:c048/64 scope link
       valid_lft forever preferred_lft forever
Note that both pods got the new interface net1. Also, the additional network interface on each pod got assigned an IP address out of the range specified by the Network Attachment Definition.
-
Test the network connectivity across these pods for Multus interfaces:
kubectl exec -it app1 -- ping -I net1 198.17.0.201Output:
PING 198.17.0.201 (198.17.0.201): 56 data bytes
64 bytes from 198.17.0.201: seq=0 ttl=64 time=0.074 ms
64 bytes from 198.17.0.201: seq=1 ttl=64 time=0.077 ms
64 bytes from 198.17.0.201: seq=2 ttl=64 time=0.078 ms
64 bytes from 198.17.0.201: seq=3 ttl=64 time=0.077 ms
kubectl exec -it app2 -- ping -I net1 198.17.0.200Output:
PING 198.17.0.200 (198.17.0.200): 56 data bytes
64 bytes from 198.17.0.200: seq=0 ttl=64 time=0.074 ms
64 bytes from 198.17.0.200: seq=1 ttl=64 time=0.077 ms
64 bytes from 198.17.0.200: seq=2 ttl=64 time=0.078 ms
64 bytes from 198.17.0.200: seq=3 ttl=64 time=0.077 ms
6 - Storage
6.1 - vSphere storage
EKS Anywhere clusters running on vSphere can leverage the vSphere Container Storage Plug-in (also called the vSphere CSI Driver ) for dynamic provisioning of persistent storage volumes on vSphere storage infrastructure. The CSI Driver integrates with the Cloud Native Storage (CNS) component in vCenter for the purpose of volume provisioning via vSAN, attaching and detaching volumes to/from VMs, mounting, formatting, and unmounting volumes on/from pods, snapshots, cloning, dynamic volume expansion, etc.
Bundled vSphere CSI Driver Removal
EKS Anywhere versions prior to v0.16.0 included built-in installation and management of the vSphere CSI Driver in EKS Anywhere clusters. The vSphere CSI driver components in EKS Anywhere included a Kubernetes CSI controller Deployment, a node-driver-registrar DaemonSet, a default Storage Class, and a number of related Secrets and RBAC entities.
In EKS Anywhere version v0.16.0, the built-in vSphere CSI driver feature was deprecated and was removed in EKS Anywhere version v0.17.0. You can still use the vSphere CSI driver with EKS Anywhere to make use of the storage options provided by vSphere in a Kubernetes-native way, but you must manage the installation and operation of the vSphere CSI driver on your EKS Anywhere clusters.
Refer to the vSphere CSI Driver documentation for the self-managed installation and management procedure. Refer to these compatibiltiy matrices to determine the correct version of the vSphere CSI Driver for the Kubernetes version and vSphere version you are running with EKS Anywhere.
vSphere CSI Driver Cleanup for Upgrades
If you are using an EKS Anywhere version v0.16.0 or below, you must remove the EKS Anywhere-managed version of the vSphere CSI driver prior to upgrading to EKS Anywhere version v0.17.0 or later. You do not need to run these steps if you are not using the EKS Anywhere-managed version of the vSphere CSI driver. If you are self-managing your vSphere CSI driver installation, it will persist through EKS Anywhere upgrades.
See below for instructions on how to remove the EKS Anywhere vSphere CSI driver objects. You must delete the DaemonSet and Deployment first, as they rely on the other resources.
default namespace
vsphere-csi-controller-role(kind:ClusterRole)kubectl delete clusterrole vsphere-csi-controller-rolevsphere-csi-controller-binding(kind:ClusterRoleBinding)kubectl delete clusterrolebinding vsphere-csi-controller-bindingcsi.vsphere.vmware.com(kind:CSIDriver)kubectl delete csidriver csi.vsphere.vmware.com
kube-system namespace
vsphere-csi-node(kind:DaemonSet)kubectl delete daemonset vsphere-csi-node -n kube-systemvsphere-csi-controller(kind:Deployment)kubectl delete deployment vsphere-csi-controller -n kube-systemvsphere-csi-controller(kind:ServiceAccount)kubectl delete serviceaccount vsphere-csi-controller -n kube-systemcsi-vsphere-config(kind:Secret)kubectl delete secret csi-vsphere-config -n kube-system
eksa-system namespace
<cluster-name>-csi(kind:ClusterResourceSet)kubectl delete clusterresourceset <cluster-name>-csi -n eksa-system
7 - Security
7.1 - Security best practices
If you discover a potential security issue in this project, we ask that you notify AWS/Amazon Security via our vulnerability reporting page . Please do not create a public GitHub issue for security problems.
This guide provides advice about best practices for EKS Anywhere specific security concerns. For a more complete treatment of Kubernetes security generally please refer to the official Kubernetes documentation on Securing a Cluster and the Amazon EKS Best Practices Guide for Security .
The Shared Responsibility Model and EKS-A
AWS Cloud Services follow the Shared Responsibility Model, where AWS is responsible for security “of” the cloud, while the customer is responsible for security “in” the cloud. However, EKS Anywhere is an open-source tool and the distribution of responsibility differs from that of a managed cloud service like EKS.
AWS Responsibilities
AWS is responsible for building and delivering a secure tool. This tool will provision an initially secure Kubernetes cluster.
AWS is responsible for vetting and securely sourcing the services and tools packaged with EKS Anywhere and the cluster it creates (such as CoreDNS, Cilium, Flux, CAPI, and govc).
The EKS Anywhere build and delivery infrastructure, or supply chain, is secured to the standard of any AWS service and AWS takes responsibility for the secure and reliable delivery of a quality product which provisions a secure and stable Kubernetes cluster.
When the eksctl anywhere plugin is executed, EKS Anywhere components are automatically downloaded from AWS.
eksctl will then perform checksum verification on the components to ensure their authenticity.
AWS is responsible for the secure development and testing of the EKS Anywhere controller and associated custom resource definitions.
AWS is responsible for the secure development and testing of the EKS Anywhere CLI, and ensuring it handles sensitive data and cluster resources securely.
End user responsibilities
The end user is responsible for the entire EKS Anywhere cluster after it has been provisioned. AWS provides a mechanism to upgrade the cluster in-place, but it is the responsibility of the end user to perform that upgrade using the provided tools. End users are responsible for operating their clusters in accordance with Kubernetes security best practices, and for the ongoing security of the cluster after it has been provisioned. This includes but is not limited to:
- creation or modification of RBAC roles and bindings
- creation or modification of namespaces
- modification of the default container network interface plugin
- configuration of network ingress and load balancing
- use and configuration of container storage interfaces
- the inclusion of add-ons and other services
End users are also responsible for:
-
The hardware and software which make up the infrastructure layer (such as vSphere, ESXi, physical servers, and physical network infrastructure).
-
The ongoing maintenance of the cluster nodes, including the underlying guest operating systems. Additionally, while EKS Anywhere provides a streamlined process for upgrading a cluster to a new Kubernetes version, it is the responsibility of the user to perform the upgrade as necessary.
-
Any applications which run “on” the cluster, including their secure operation, least privilege, and use of well-known and vetted container images.
EKS Anywhere Security Best Practices
This section captures EKS Anywhere specific security best practices. Please read this section carefully and follow any guidance to ensure the ongoing security and reliability of your EKS Anywhere cluster.
Critical Namespaces
EKS Anywhere creates and uses resources in several critical namespaces. All of the EKS Anywhere managed namespaces should be treated as sensitive and access should be limited to only the most trusted users and processes. Allowing additional access or modifying the existing RBAC resources could potentially allow a subject to access the namespace and the resources that it contains. This could lead to the exposure of secrets or the failure of your cluster due to modification of critical resources. Here are rules you should follow when dealing with critical namespaces:
-
Avoid creating Roles in these namespaces or providing users access to them with ClusterRoles . For more information about creating limited roles for day-to-day administration and development, please see the official introduction to Role Based Access Control (RBAC) .
-
Do not modify existing Roles in these namespaces, bind existing roles to additional subjects , or create new Roles in the namespace.
-
Do not modify existing ClusterRoles or bind them to additional subjects.
-
Avoid using the cluster-admin role, as it grants permissions over all namespaces.
-
No subjects except for the most trusted administrators should be permitted to perform ANY action in the critical namespaces.
The critical namespaces include:
eksa-systemeksa-packagesflux-systemcapv-system(or the respective provider you are using)capi-systemcapi-webhook-systemcapi-kubeadm-control-plane-systemcapi-kubeadm-bootstrap-systemcert-manageretcdadm-controller-systemetcdadm-bootstrap-provider-systemkube-system(as with any Kubernetes cluster, this namespace is critical to the functioning of your cluster and should be treated with the highest level of sensitivity.)
Secrets
EKS Anywhere stores sensitive information, like the vSphere credentials and GitHub Personal Access Token, in the cluster as native Kubernetes secrets
.
These secret objects are namespaced, for example in the eksa-system and flux-system namespace, and limiting access to the sensitive namespaces will ensure that these secrets will not be exposed.
Additionally, limit access to the underlying node. Access to the node could allow access to the secret content.
EKS Anywhere also supports encryption-at-rest for Kubernetes secrets. See etcd encryption for more details.
The EKS Anywhere kubeconfig file
eksctl anywhere create cluster creates an EKS Anywhere-based Kubernetes cluster and outputs a kubeconfig
file with administrative privileges to the $PWD/$CLUSTER_NAME directory.
By default, this kubeconfig file uses certificate-based authentication and contains the user certificate data for the administrative user.
The kubeconfig file grants administrative privileges over your cluster to the bearer and the certificate key should be treated as you would any other private key or administrative password.
The EKS Anywhere-generated kubeconfig file should only be used for interacting with the cluster via eksctl anywhere commands, such as upgrade, and for the most privileged administrative tasks.
For more information about creating limited roles for day-to-day administration and development, please see the official introduction to Role Based Access Control (RBAC)
.
GitOps
GitOps enabled EKS Anywhere clusters maintain a copy of their cluster configuration in the user provided Git repository. This configuration acts as the source of truth for the cluster. Changes made to this configuration will be reflected in the cluster configuration.
AWS recommends that you gate any changes to this repository with mandatory pull request reviews. Carefully review pull requests for changes which could impact the availability of the cluster (such as scaling nodes to 0 and deleting the cluster object) or contain secrets.
GitHub Personal Access Token
Treat the GitHub PAT used with EKS Anywhere as you would any highly privileged secret, as it could potentially be used to make changes to your cluster by modifying the contents of the cluster configuration file through the GitHub.com API.
- Never commit the PAT to a Git repository
- Never share the PAT via untrusted channels
- Never grant non-administrative subjects access to the
flux-systemnamespace where the PAT is stored as a native Kubernetes secret.
Executing EKS Anywhere
Ensure that you execute eksctl anywhere create cluster on a trusted workstation in order to protect the values of sensitive environment variables and the EKS Anywhere generated kubeconfig file.
SSH Access to Cluster Nodes and ETCD Nodes
EKS Anywhere provides the option to configure an ssh authorized key for access to underlying nodes in a cluster, via vsphereMachineConfig.Users.sshAuthorizedKeys.
This grants the associated private key the ability to connect to the cluster via ssh as the user capv with sudo permissions.
The associated private key should be treated as extremely sensitive, as sudo access to the cluster and ETCD nodes can permit access to secret object data and potentially confer arbitrary control over the cluster.
VMWare OVAs
Only download OVAs for cluster nodes from official sources, and do not allow untrusted users or processes to modify the templates used by EKS Anywhere for provisioning nodes.
Keeping Bottlerocket up to date
EKS Anywhere provides the most updated patch of operating systems with every release. It is recommended that your clusters are kept up to date with the latest EKS Anywhere release to ensure you get the latest security updates. Bottlerocket is an EKS Anywhere supported operating system that can be kept up to date without requiring a cluster update. The Bottlerocket Update Operator is a Kubernetes update operator that coordinates Bottlerocket updates on hosts in the cluster. Please follow the instructions here to install Bottlerocket update operator.
Baremetal Clusters
EKS Anywhere Baremetal clusters run directly on physical servers in a datacenter. Make sure that the physical infrastructure, including the network, is secure before running EKS Anywhere clusters.
Please follow industry best practices for securing your network and datacenter, including but not limited to the following
- Only allow trusted devices on the network
- Secure the network using a firewall
- Never source hardware from an untrusted vendor
- Inspect and verify the metal servers you are using for the clusters are the ones you intended to use
- If possible, use a separate L2 network for EKS Anywhere baremetal clusters
- Conduct thorough audits of access, users, logs and other exploitable venues periodically
Benchmark tests for cluster hardening
EKS Anywhere creates clusters with server hardening configurations out of the box, via the use of security flags and opinionated default templates. You can verify the security posture of your EKS Anywhere cluster by using a tool called kube-bench
, that checks whether Kubernetes is deployed securely.
kube-bench runs checks documented in the CIS Benchmark for Kubernetes
, such as, pod specification file permissions, disabling insecure arguments, and so on.
Refer to the EKS Anywhere CIS Self-Assessment Guide for more information on how to evaluate the security configurations of your EKS Anywhere cluster.
Admission Webhooks
Custom admission webhooks are a Kubernetes extension mechanism that can validate or mutate resources before they are persisted to etcd. Webhooks enable use cases such as policy enforcement and security controls, but they can also introduce operational risks.
Misconfigured or faulty admission webhooks can block security patches from being applied to control plane components, prevent security-critical operations such as RBAC updates or certificate rotations, or disrupt critical infrastructure components such as Cilium or CoreDNS.
To protect against these risks, enable the skipAdmissionForSystemResources feature for production clusters running Kubernetes 1.31 or later. This feature prevents custom admission webhooks from interfering with system operations while allowing them to continue validating application workloads.
spec:
  controlPlaneConfiguration:
    skipAdmissionForSystemResources: true
This protection mechanism uses the same approach as AWS EKS, requires no changes to existing webhook configurations, and protects system resources during cluster upgrades and normal operations while maintaining webhook functionality for application workloads. For detailed information about this feature, including configuration options and protected resources, see the Admission Webhook Protection documentation.
Additional Webhook Security Best Practices
When deploying custom admission webhooks:
- Use appropriate failure policies: Set
failurePolicy: Ignorefor non-critical validations to prevent blocking operations during webhook unavailability - Scope webhooks carefully: Use
namespaceSelectorandobjectSelectorto limit webhook scope to only the intended resources - Avoid targeting system resources: Unless absolutely necessary, do not configure webhooks to intercept operations on
kube-system, control plane components, or critical infrastructure - Monitor webhook health: Implement monitoring and alerting for webhook service availability and response times
- Test thoroughly: Test webhook behavior during cluster upgrades and failure scenarios before deploying to production
- Maintain webhook services: Ensure webhook backend services are highly available and can handle expected load
For more information on admission webhooks, refer to:
7.2 - Authenticate cluster with AWS IAM Authenticator
AWS IAM Authenticator Support (optional)
EKS Anywhere supports configuring AWS IAM Authenticator as an authentication provider for clusters.
When you enable IAM Authenticator on a cluster, EKS Anywhere
- Installs
aws-iam-authenticatorserver as a DaemonSet on the workload cluster. - Configures the Kubernetes API Server to communicate with iam authenticator using a token authentication webhook .
- Creates the necessary ConfigMaps based on user options.
Create IAM Authenticator enabled cluster
Generate your cluster configuration and add the necessary IAM Authenticator configuration. For a full spec reference check AWSIamConfig .
Create an EKS Anywhere cluster as follows:
CLUSTER_NAME=my-cluster-name
eksctl anywhere create cluster -f ${CLUSTER_NAME}.yaml
Example AWSIamConfig configuration
This example uses a region in the default aws partition and EKSConfigMap as backendMode. Also, the IAM ARNs are mapped to the kubernetes system:masters group.
apiVersion: anywhere.eks.amazonaws.com/v1alpha1
kind: Cluster
metadata:
   name: my-cluster-name
spec:
   ...
   # IAM Authenticator
   identityProviderRefs:
      - kind: AWSIamConfig
        name: aws-iam-auth-config
---
apiVersion: anywhere.eks.amazonaws.com/v1alpha1
kind: AWSIamConfig
metadata:
   name: aws-iam-auth-config
spec:
    awsRegion: us-west-1
    backendMode:
        - EKSConfigMap
    mapRoles:
        - roleARN: arn:aws:iam::XXXXXXXXXXXX:role/myRole
          username: myKubernetesUsername
          groups:
          - system:masters
    mapUsers:
        - userARN: arn:aws:iam::XXXXXXXXXXXX:user/myUser
          username: myKubernetesUsername
          groups:
          - system:masters
    partition: aws
Note
When using backend modeCRD, the mapRoles and mapUsers are not required. For more details on configuring CRD mode, refer to CRD.
Authenticating with IAM Authenticator
After your cluster is created you may now use the mapped IAM ARNs to authenticate to the cluster.
EKS Anywhere generates a KUBECONFIG file in your local directory that uses aws-iam-authenticator client to authenticate with the cluster. The file can be found at
${PWD}/${CLUSTER_NAME}/${CLUSTER_NAME}-aws.kubeconfig
Steps
-
Ensure the IAM role/user ARN mapped in the cluster is configured on the local machine from which you are trying to access the cluster.
-
Install the
aws-iam-authenticator clientbinary on the local machine.- We recommend installing the binary referenced in the latest
release manifestof the kubernetes version used when creating the cluster. - The below commands can be used to fetch the installation uri for clusters created with
1.35kubernetes version and OSlinux.
CLUSTER_NAME=my-cluster-name KUBERNETES_VERSION=1.35 export KUBECONFIG=${PWD}/${CLUSTER_NAME}/${CLUSTER_NAME}-eks-a-cluster.kubeconfig EKS_D_MANIFEST_URL=$(kubectl get bundles $CLUSTER_NAME -o jsonpath="{.spec.versionsBundles[?(@.kubeVersion==\"$KUBERNETES_VERSION\")].eksD.manifestUrl}") OS=linux curl -fsSL $EKS_D_MANIFEST_URL | yq e '.status.components[] | select(.name=="aws-iam-authenticator") | .assets[] | select(.os == '"\"$OS\""' and .type == "Archive") | .archive.uri' - - We recommend installing the binary referenced in the latest
-
Export the generated IAM Authenticator based
KUBECONFIGfile.export KUBECONFIG=${PWD}/${CLUSTER_NAME}/${CLUSTER_NAME}-aws.kubeconfig -
Run
kubectlcommands to check cluster access. Example,kubectl get pods -A
Managing AWS IAM Authenticator
EKS Anywhere supports adding, removing, and modifying AWS IAM Authenticator configuration on existing clusters. These operations can be performed using the upgrade cluster command or GitOps.
Add AWS IAM Authenticator to existing cluster
You can add AWS IAM Authenticator to an existing cluster that was created without it.
- Add the
identityProviderRefssection to your cluster configuration and create theAWSIamConfigresource:
apiVersion: anywhere.eks.amazonaws.com/v1alpha1
kind: Cluster
metadata:
   name: my-cluster-name
spec:
   ...
   # Add IAM Authenticator to existing cluster
   identityProviderRefs:
      - kind: AWSIamConfig
        name: aws-iam-auth-config
---
apiVersion: anywhere.eks.amazonaws.com/v1alpha1
kind: AWSIamConfig
metadata:
   name: aws-iam-auth-config
spec:
    awsRegion: us-west-1
    backendMode:
        - EKSConfigMap
    mapRoles:
        - roleARN: arn:aws:iam::XXXXXXXXXXXX:role/myRole
          username: myKubernetesUsername
          groups:
          - system:masters
    mapUsers:
        - userARN: arn:aws:iam::XXXXXXXXXXXX:user/myUser
          username: myKubernetesUsername
          groups:
          - system:masters
    partition: aws
- Run the upgrade command:
CLUSTER_NAME=my-cluster-name
eksctl anywhere upgrade cluster -f ${CLUSTER_NAME}.yaml
EKS Anywhere will:
- Install the
aws-iam-authenticatorserver on the workload cluster - Configure the Kubernetes API Server with the authentication webhook
- Create the necessary ConfigMaps
- Generate the AWS IAM-based kubeconfig file at
${PWD}/${CLUSTER_NAME}/${CLUSTER_NAME}-aws.kubeconfig
Note
Adding AWS IAM Authenticator to an existing cluster will roll out control plane nodes in the cluster.Remove AWS IAM Authenticator from cluster
You can remove AWS IAM Authenticator from a cluster that has it enabled.
- Set
identityProviderRefsto an empty array in your cluster configuration:
apiVersion: anywhere.eks.amazonaws.com/v1alpha1
kind: Cluster
metadata:
   name: my-cluster-name
spec:
   ...
   # Set to empty array to remove IAM Authenticator
   identityProviderRefs: []
Important
You must explicitly setidentityProviderRefs: [] (empty array) in your cluster configuration. Simply removing or commenting out the field will not properly remove the IAM Authenticator configuration due to Kubernetes server-side apply merge behavior.
- Run the upgrade command:
CLUSTER_NAME=my-cluster-name
eksctl anywhere upgrade cluster -f ${CLUSTER_NAME}.yaml
EKS Anywhere will:
- Remove the
aws-iam-authenticatorserver from the workload cluster - Clean up the authentication webhook configuration
- Remove ConfigMaps and other related resources
- Clean up the AWS IAM-based kubeconfig file
Warning
Removing AWS IAM Authenticator will roll out control plane nodes in the cluster. After removal, users will no longer be able to authenticate using the AWS IAM-based kubeconfig file. Ensure you have alternative authentication methods configured before removing IAM Authenticator.Modify IAM Authenticator mappings
The mapRoles and mapUsers lists in AWSIamConfig can be modified when running the upgrade cluster command from EKS Anywhere.
As an example, let’s add another IAM user to the above example configuration.
apiVersion: anywhere.eks.amazonaws.com/v1alpha1
kind: AWSIamConfig
metadata:
   name: aws-iam-auth-config
spec:
    ...
    mapUsers:
        - userARN: arn:aws:iam::XXXXXXXXXXXX:user/myUser
          username: myKubernetesUsername
          groups:
          - system:masters
        - userARN: arn:aws:iam::XXXXXXXXXXXX:user/anotherUser
          username: anotherKubernetesUsername
    partition: aws
and then run the upgrade command
CLUSTER_NAME=my-cluster-name
eksctl anywhere upgrade cluster -f ${CLUSTER_NAME}.yaml
EKS Anywhere now updates the role mappings for IAM authenticator in the cluster and the new user gains access to the cluster.
GitOps
If the cluster has GitOps configured, then AWS IAM Authenticator can be added, removed, or modified by the GitOps controller. For GitOps configuration details refer to Manage Cluster with GitOps .
Note
GitOps support for theAWSIamConfig is currently only on management or self-managed clusters.
-
Clone your git repo and modify the cluster specification. The default path for the cluster file is:
clusters/$CLUSTER_NAME/eksa-system/eksa-cluster.yaml -
To add AWS IAM Authenticator: Add the
identityProviderRefssection andAWSIamConfigresource to the cluster specification.To remove AWS IAM Authenticator: Set
identityProviderRefs: [](empty array) in the cluster specification.To modify mappings: Update the
mapRolesandmapUserslists in theAWSIamConfigobject. -
Commit the file to your git repository
git add eksa-cluster.yaml
git commit -m 'Update IAM Authenticator configuration'
git push origin main
EKS Anywhere GitOps Controller will apply the changes to the cluster, adding, removing, or updating the IAM authenticator configuration as specified.
7.3 - CIS Self-Assessment Guide
The CIS Benchmark self-assessment guide serves to help EKS Anywhere users evaluate the level of security of the hardened cluster configuration against Kubernetes benchmark controls from the Center for Information Security (CIS). This guide will walk through the various controls and provide updated example commands to audit compliance in EKS Anywhere clusters.
You can verify the security posture of your EKS Anywhere cluster by using a tool called kube-bench
. The ideal way to run the benchmark tests on your EKS Anywhere cluster is to apply the Kube-bench Job YAMLs
to the cluster. This runs the kube-bench tests on a Pod on the cluster, and the logs of the Pod provide the test results.
Kube-bench currently does not support unstacked etcd topology (which is the default for EKS Anywhere), so the following checks are skipped in the default kube-bench Job YAML. If you created your EKS Anywhere cluster with stacked etcd configuration, you can apply the stacked etcd Job YAML
instead.
| Check number | Check description |
|---|---|
| 1.1.7 | Ensure that the etcd pod specification file permissions are set to 644 or more restrictive |
| 1.1.8 | Ensure that the etcd pod specification file ownership is set to root:root |
| 1.1.11 | Ensure that the etcd data directory permissions are set to 700 or more restrictive |
| 1.1.12 | Ensure that the etcd data directory ownership is set to etcd:etcd |
The following tests are also skipped, because they are not applicable or enforce settings that might make the cluster unstable.
| Check number | Check description | Reason for skipping |
|---|---|---|
| Controlplane node configuration | ||
| 1.2.6 | Ensure that the –kubelet-certificate-authority argument is set as appropriate | When generating serving certificates, functionality could break in conjunction with hostname overrides which are required for certain cloud providers |
| 1.2.16 | Ensure that the admission control plugin PodSecurityPolicy is set | Enabling Pod Security Policy can cause applications to unexpectedly fail |
| 1.2.32 | Ensure that the –encryption-provider-config argument is set as appropriate | Enabling encryption changes how data can be recovered as data is encrypted |
| 1.2.33 | Ensure that encryption providers are appropriately configured | Enabling encryption changes how data can be recovered as data is encrypted |
| Worker node configuration | ||
| 4.2.6 | Ensure that the –protect-kernel-defaults argument is set to true | System level configurations are required before provisioning the cluster in order for this argument to be set to true |
| 4.2.10 | Ensure that the –tls-cert-file and –tls-private-key-file arguments are set as appropriate | When generating serving certificates, functionality could break in conjunction with hostname overrides which are required for certain cloud providers |
Note
Running kube-bench on Bottlerocket controlplane nodes currently produces false negatives with respect to pod specification file (manifest) permissions, since the default configuration does not include the paths in which Bottlerocket places these manifests. This issue is being tracked here.8 - Observability in EKS Anywhere
8.1 - Overview
Most Kubernetes-conformant observability tools can be used with EKS Anywhere. You can optionally use the EKS Connector to view your EKS Anywhere cluster resources in the Amazon EKS console, reference the Connect to console page for details. EKS Anywhere includes the AWS Distro for Open Telemetry (ADOT) and Prometheus for metrics and tracing as EKS Anywhere Curated Packages. You can use popular tooling such as Fluent Bit for logging, and can track the progress of logging for ADOT on the AWS Observability roadmap . For more information on EKS Anywhere Curated Packages, reference the Package Management Overview .
AWS Integrations
AWS offers comprehensive monitoring, logging, alarming, and dashboard capabilities through services such as Amazon CloudWatch , Amazon Managed Prometheus (AMP) , and Amazon Managed Grafana (AMG) . With CloudWatch, you can take advantage of a highly scalable, AWS-native centralized logging and monitoring solution for EKS Anywhere clusters. With AMP and AMG, you can monitor your containerized applications EKS Anywhere clusters at scale with popular Prometheus and Grafana interfaces.
Resources
8.2 - Verify EKS Anywhere cluster status
Note
- To check the status of a single cluster, configure
kubectlto communicate with the cluster by setting theKUBECONFIGenvironment variable to point to your cluster’skubeconfigfile. - To check the status of workload clusters from a management cluster, configure
kubectlwith thekubeconfigof the management cluster.
Check cluster nodes
To verify the expected number of cluster nodes are present and running, use the kubectl command to show that nodes are Ready.
Worker nodes are named using the cluster name followed by the worker node group name. In the example below, the cluster name is mgmt and the worker node group name is md-0. The other nodes shown in the response are control plane or etcd nodes.
kubectl get nodes
NAME                              STATUS   ROLES           AGE   VERSION
mgmt-clrt4                        Ready    control-plane   3d22h   v1.27.1-eks-61789d8
mgmt-md-0-5557f7c7bxsjkdg-l2kpt   Ready    <none>          3d22h   v1.27.1-eks-61789d8
Check cluster machines
To verify that the expected number of cluster machines are present and running, use the kubectl command to show that the machines are Running.
The machine objects are named using the cluster name as a prefix and there should be one created for each node in your cluster. In the example below, the command was run against a management cluster with a single attached workload cluster. When the command is run against a management cluster, all machines for the management cluster and attached workload clusters are shown.
kubectl get machines -A
NAMESPACE     NAME                              CLUSTER   NODENAME                          PROVIDERID                                       PHASE     AGE     VERSION
eksa-system   mgmt-clrt4                        mgmt      mgmt-clrt4                        vsphere://421a801c-ac46-f47e-de1f-f070ef990c4d   Running   3d22h   v1.27.1-eks-1-27-4
eksa-system   mgmt-md-0-5557f7c7bxsjkdg-l2kpt   mgmt      mgmt-md-0-5557f7c7bxsjkdg-l2kpt   vsphere://421a4b9b-c457-fc4d-458a-d5092f981c5d   Running   3d22h   v1.27.1-eks-1-27-4
eksa-system   w01-7hzfh                         w01       w01-7hzfh                         vsphere://421a642b-f4ef-5764-47f9-5b56efcf8a4b   Running   15h     v1.27.1-eks-1-27-4
eksa-system   w01-etcd-z2ggk                    w01                                         vsphere://421ac003-3a1a-7dd9-ac83-bd0c75370cc4   Running   15h
eksa-system   w01-md-0-799ffd7946x5gz8w-p94mt   w01       w01-md-0-799ffd7946x5gz8w-p94mt   vsphere://421a7b77-ca57-dc78-18bf-f361081a2c5e   Running   15h     v1.27.1-eks-1-27-4
Check cluster components
To verify cluster components are present and running, use the kubectl command to show that the system Pods are Running. The number of Pods may vary based on the infrastructure provider (vSphere, bare metal, Snow, Nutanix, CloudStack), and whether the cluster is a workload cluster or a management cluster.
kubectl get pods -A
NAMESPACE                           NAME                                                             READY   STATUS    RESTARTS      AGE
capi-kubeadm-bootstrap-system       capi-kubeadm-bootstrap-controller-manager-8665b88c65-v982t       1/1     Running   0             3d22h
capi-kubeadm-control-plane-system   capi-kubeadm-control-plane-controller-manager-67595c55d8-z7627   1/1     Running   0             3d22h
capi-system                         capi-controller-manager-88bdd56b4-wnk66                          1/1     Running   0             3d22h
capv-system                         capv-controller-manager-644d9864dc-hbrcz                         1/1     Running   1 (16h ago)   3d22h
cert-manager                        cert-manager-548579646f-4tgb2                                    1/1     Running   0             3d22h
cert-manager                        cert-manager-cainjector-cbb6df554-w5fjx                          1/1     Running   0             3d22h
cert-manager                        cert-manager-webhook-54f748c89b-qnfr2                            1/1     Running   0             3d22h
eksa-packages                       ecr-credential-provider-package-4c7mk                            1/1     Running   0             3d22h
eksa-packages                       ecr-credential-provider-package-nvlkb                            1/1     Running   0             3d22h
eksa-packages                       eks-anywhere-packages-784c6fc8b9-2t5nr                           1/1     Running   0             3d22h
eksa-system                         eksa-controller-manager-76f484bd5b-x6qld                         1/1     Running   0             3d22h
etcdadm-bootstrap-provider-system   etcdadm-bootstrap-provider-controller-manager-6bcdd4f5d7-wvqw8   1/1     Running   0             3d22h
etcdadm-controller-system           etcdadm-controller-controller-manager-6f96f5d594-kqnfw           1/1     Running   0             3d22h
kube-system                         cilium-lbqdt                                                     1/1     Running   0             3d22h
kube-system                         cilium-operator-55c4778776-jvrnh                                 1/1     Running   0             3d22h
kube-system                         cilium-operator-55c4778776-wjjrk                                 1/1     Running   0             3d22h
kube-system                         cilium-psqm2                                                     1/1     Running   0             3d22h
kube-system                         coredns-69797695c4-kdtjc                                         1/1     Running   0             3d22h
kube-system                         coredns-69797695c4-r25vv                                         1/1     Running   0             3d22h
kube-system                         etcd-mgmt-clrt4                                                  1/1     Running   0             3d22h
kube-system                         kube-apiserver-mgmt-clrt4                                        1/1     Running   0             3d22h
kube-system                         kube-controller-manager-mgmt-clrt4                               1/1     Running   0             3d22h
kube-system                         kube-proxy-588gj                                                 1/1     Running   0             3d22h
kube-system                         kube-proxy-hrksw                                                 1/1     Running   0             3d22h
kube-system                         kube-scheduler-mgmt-clrt4                                        1/1     Running   0             3d22h
kube-system                         kube-vip-mgmt-clrt4                                              1/1     Running   0             3d22h
kube-system                         vsphere-cloud-controller-manager-7vzjx                           1/1     Running   0             3d22h
kube-system                         vsphere-cloud-controller-manager-cqfs5                           1/1     Running   0             3d22h
Check control plane components
You can verify the control plane is present and running by filtering Pods by the control-plane=controller-manager label.
kubectl get pod -A -l control-plane=controller-manager
NAMESPACE                           NAME                                                             READY   STATUS    RESTARTS      AGE
capi-kubeadm-bootstrap-system       capi-kubeadm-bootstrap-controller-manager-8665b88c65-v982t       1/1     Running   0             3d21h
capi-kubeadm-control-plane-system   capi-kubeadm-control-plane-controller-manager-67595c55d8-z7627   1/1     Running   0             3d21h
capi-system                         capi-controller-manager-88bdd56b4-wnk66                          1/1     Running   0             3d21h
capv-system                         capv-controller-manager-644d9864dc-hbrcz                         1/1     Running   1 (15h ago)   3d21h
eksa-packages                       eks-anywhere-packages-784c6fc8b9-2t5nr                           1/1     Running   0             3d21h
etcdadm-bootstrap-provider-system   etcdadm-bootstrap-provider-controller-manager-6bcdd4f5d7-wvqw8   1/1     Running   0             3d21h
etcdadm-controller-system           etcdadm-controller-controller-manager-6f96f5d594-kqnfw           1/1     Running   0             3d21h
Check workload clusters from management clusters
Set up CLUSTER_NAME and KUBECONFIG environment variable for the management cluster:
export CLUSTER_NAME=mgmt
export KUBECONFIG=${CLUSTER_NAME}/${CLUSTER_NAME}-eks-a-cluster.kubeconfig
Check control plane resources for all clusters
Use the command below to check the status of cluster control plane resources. This is useful to verify clusters with multiple control plane nodes after an upgrade. The status for the management cluster and all attached workload clusters is shown.
kubectl get kubeadmcontrolplanes.controlplane.cluster.x-k8s.io -n eksa-system
NAME   CLUSTER   INITIALIZED   API SERVER AVAILABLE   REPLICAS   READY   UPDATED   UNAVAILABLE   AGE     VERSION
mgmt   mgmt      true          true                   1          1       1                       3d22h   v1.27.1-eks-1-27-4
w01    w01       true          true                   1          1       1         0             16h     v1.27.1-eks-1-27-4
Use the command below to check the status of a cluster resource. This is useful to verify cluster health after any mutating cluster lifecycle operation. The status for the management cluster and all attached workload clusters is shown.
kubectl get clusters.cluster.x-k8s.io -A -o=custom-columns=NAME:.metadata.name,CONTROLPLANE-READY:.status.controlPlaneReady,INFRASTRUCTURE-READY:.status.infrastructureReady,MANAGED-EXTERNAL-ETCD-INITIALIZED:.status.managedExternalEtcdInitialized,MANAGED-EXTERNAL-ETCD-READY:.status.managedExternalEtcdReady
NAME   CONTROLPLANE-READY   INFRASTRUCTURE-READY   MANAGED-EXTERNAL-ETCD-INITIALIZED   MANAGED-EXTERNAL-ETCD-READY
mgmt   true                 true                   <none>                              <none>
w01    true                 true                   true                                true
8.3 - Configure Kubernetes Audit Policy
Kubernetes Audit Policy Support
EKS Anywhere configures a default audit policy for all clusters to provide basic logging and monitoring of API server requests. This default policy covers essential security events and resource access patterns.
Note
All EKS Anywhere clusters include audit logging with a sensible default policy. TheauditPolicyContent field is only needed if you want to customize the audit policy beyond the default configuration.
Customizing Audit Policy (Optional)
If you need to customize the audit policy beyond the default configuration, you can override it by adding the auditPolicyContent field to the controlPlaneConfiguration section of your cluster configuration:
apiVersion: anywhere.eks.amazonaws.com/v1alpha1
kind: Cluster
metadata:
  name: my-cluster
spec:
  controlPlaneConfiguration:
    count: 1
    endpoint:
      host: "192.168.1.100"
    machineGroupRef:
      kind: VSphereMachineConfig
      name: my-cluster-control-plane
    auditPolicyContent: |
      apiVersion: audit.k8s.io/v1
      kind: Policy
      rules:
        - level: RequestResponse
          resources:
            - group: ""
              resources:
                - pods
                - services
                - secrets
                - configmaps
Updating Audit Policy
To modify the audit policy on an existing cluster:
- Add/Update the
auditPolicyContentin your cluster configuration file - Run the cluster upgrade command:
eksctl anywhere upgrade cluster -f my-cluster.yaml
The upgrade process will rollout all control plane nodes with updated audit policy configuration.
8.4 - Connect EKS Anywhere clusters to the EKS console
The EKS Connector lets you connect your EKS Anywhere cluster to the EKS console. The connected console displays the EKS Anywhere cluster, its configuration, workloads, and their status. EKS Connector is a software agent that runs on your EKS Anywhere cluster and registers the cluster with the EKS console
Visit the EKS Connector documentation for details on how to configure and run the EKS Connector.
8.5 - Configure Fluent Bit for CloudWatch
Fluent Bit is an open source, multi-platform log processor and forwarder which allows you to collect data/logs from different sources, then unify and send them to multiple destinations. It’s fully compatible with Docker and Kubernetes environments. Due to its lightweight nature, using Fluent Bit as the log forwarder for EKS Anywhere clusters enables you to stream application logs into Amazon CloudWatch Logs efficiently and reliably.
You can additionally use CloudWatch Container Insights to collect, aggregate, and summarize metrics and logs from your containerized applications and microservices running on EKS Anywhere clusters. CloudWatch automatically collects metrics for many resources, such as CPU, memory, disk, and network. Container Insights also provides diagnostic information, such as container restart failures, to help you isolate issues and resolve them quickly. You can also set CloudWatch alarms on metrics that Container Insights collects.
On this page, we show how to set up Fluent Bit and Container Insights to send logs and metrics from your EKS Anywhere clusters to CloudWatch.
Prerequisites
- An AWS Account (see AWS documentation to get started)
- An EKS Anywhere cluster with IAM Roles for Service Account (IRSA) enabled: With IRSA, an IAM role can be associated with a Kubernetes service account. This service account can provide AWS permissions to the containers in any Pod that use the service account, which enables the containers to securely communicate with AWS services. This removes the need to hardcode AWS security credentials as environment variables on your nodes. See the IRSA configuration page for details.
Note
- The example uses
eksapocas the EKS Anywhere cluster name. You must adjust the configuration in the examples below if you use a different cluster name. Specifically, make sure to adjust thefluentbit.yamlmanifest accordingly. - The example uses the
us-west-2AWS Region. You must adjust the configuration in the examples below if you are using a different region.
Before setting up Fluent Bit, first create an IAM Policy and Role to send logs to CloudWatch.
Step 1: Create IAM Policy
-
Go to IAM Policy in the AWS console.
-
Click on JSON as shown below:
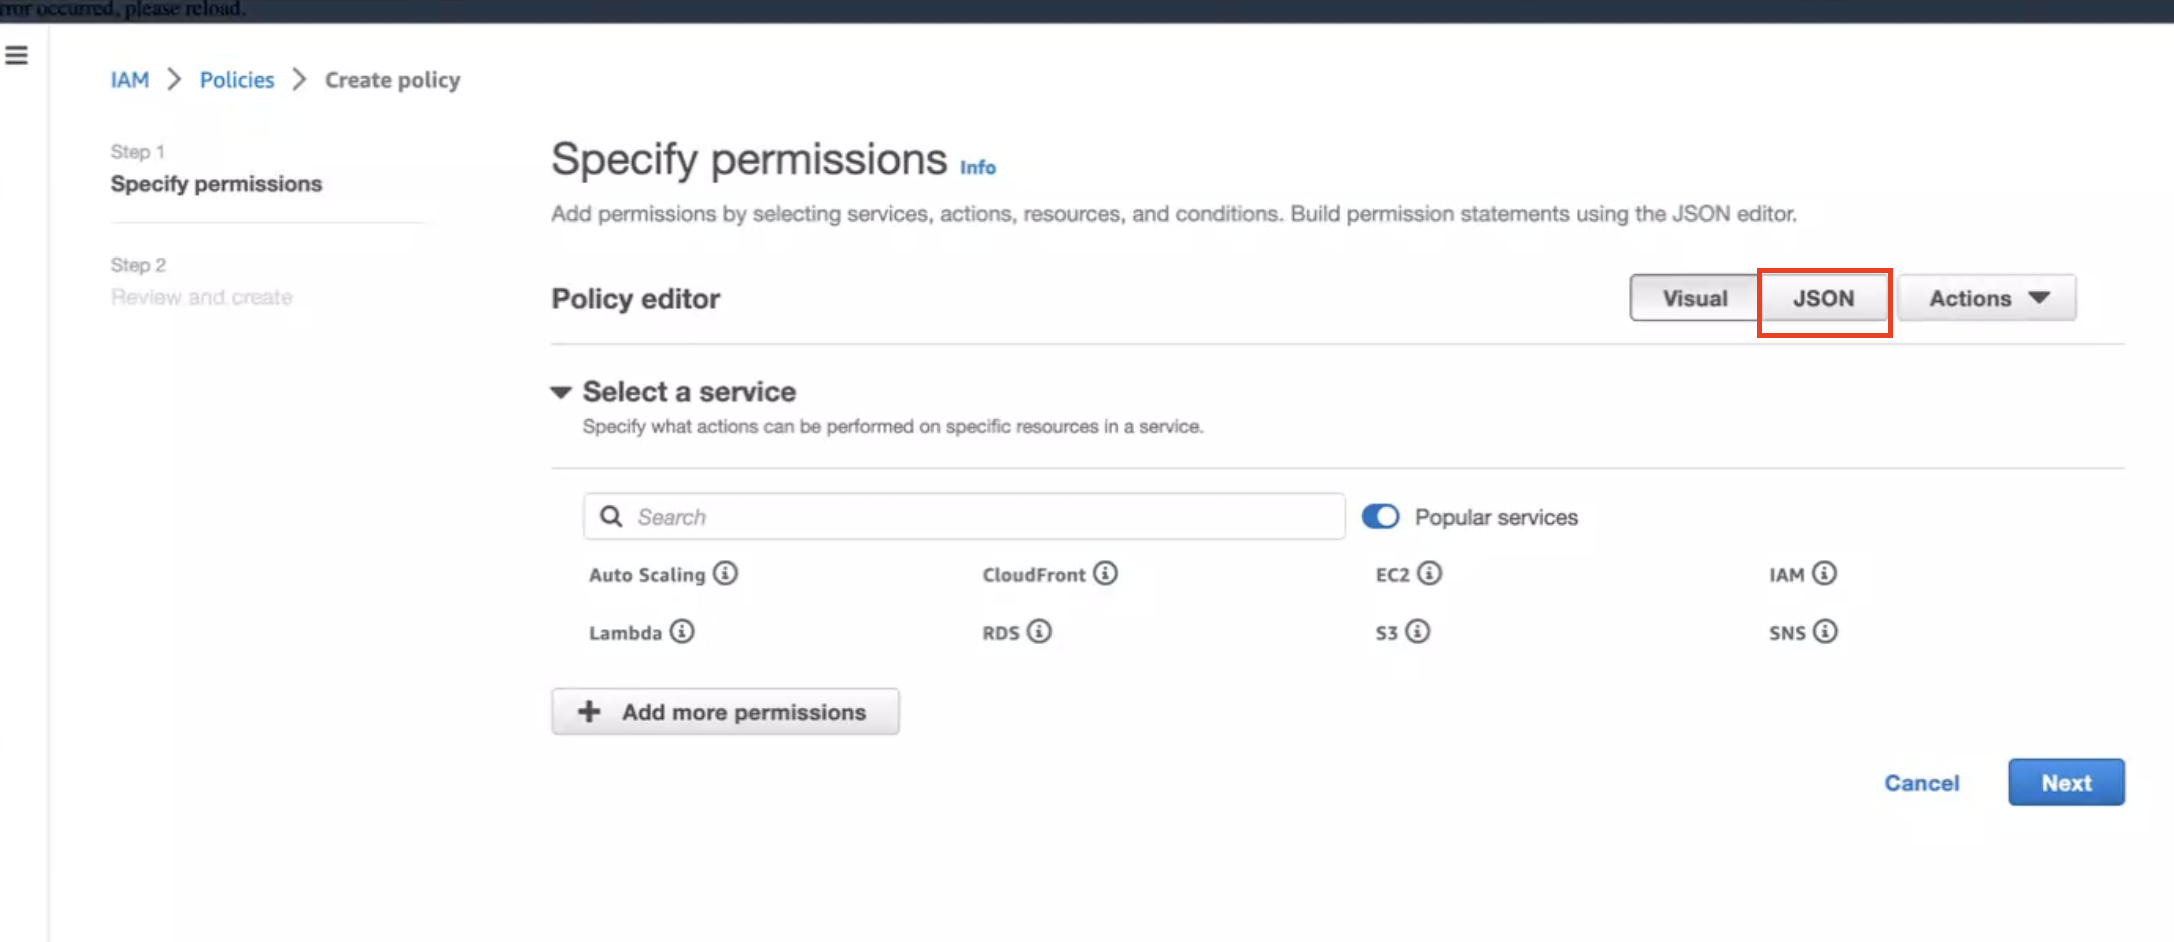
-
Create below policy on the IAM Console. Click on Create Policy as shown:
        {
            "Version": "2012-10-17",
            "Statement": [
                {
                    "Sid": "EKSAnywhereLogging",
                    "Effect": "Allow",
                    "Action": "cloudwatch:*",
                    "Resource": "*"
                }
            ]
        }
Step 2: Create IAM Role
-
Go to IAM Role in the AWS console.
-
Follow the steps as shown below:
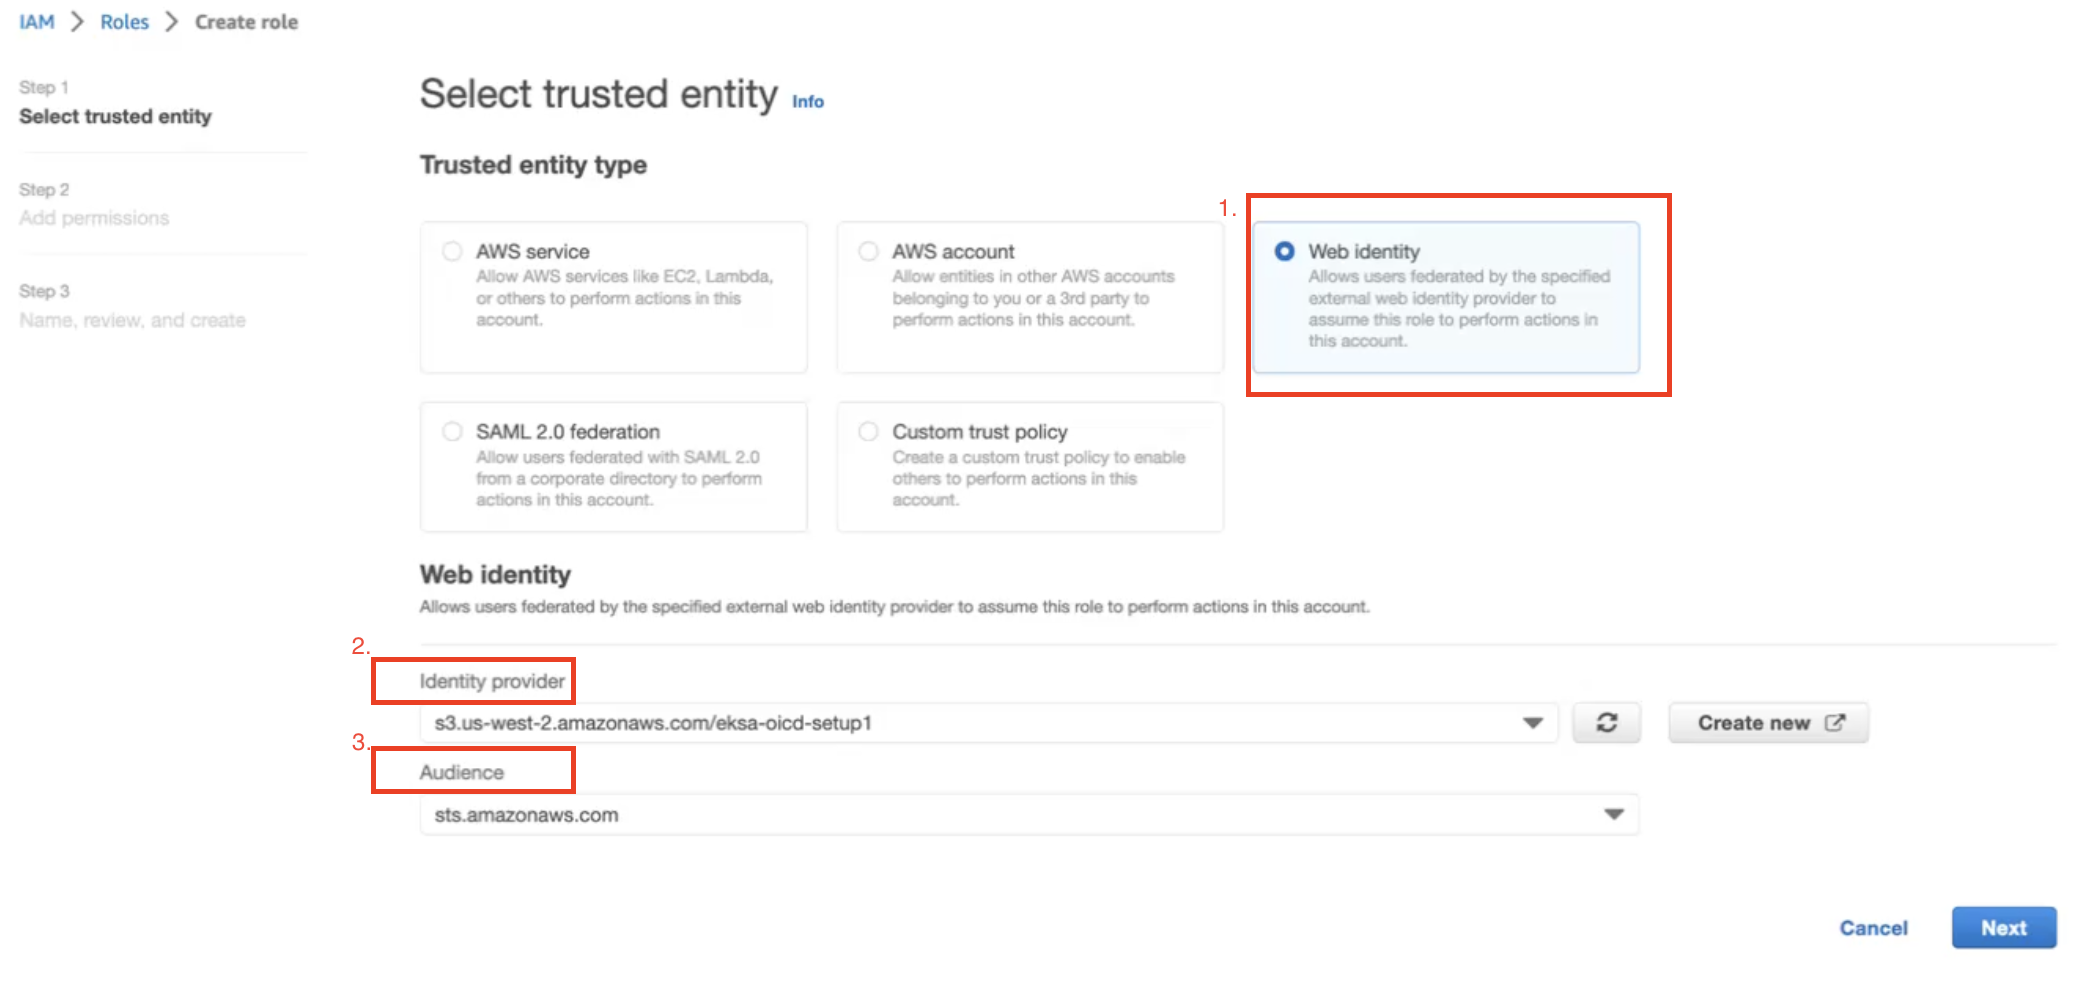
In Identity Provider, enter the OIDC provider you created as a part of IRSA configuration.
In Audience, select sts.amazonaws.com. Click on Next.
-
Select permission name which we have created in Create IAM Policy
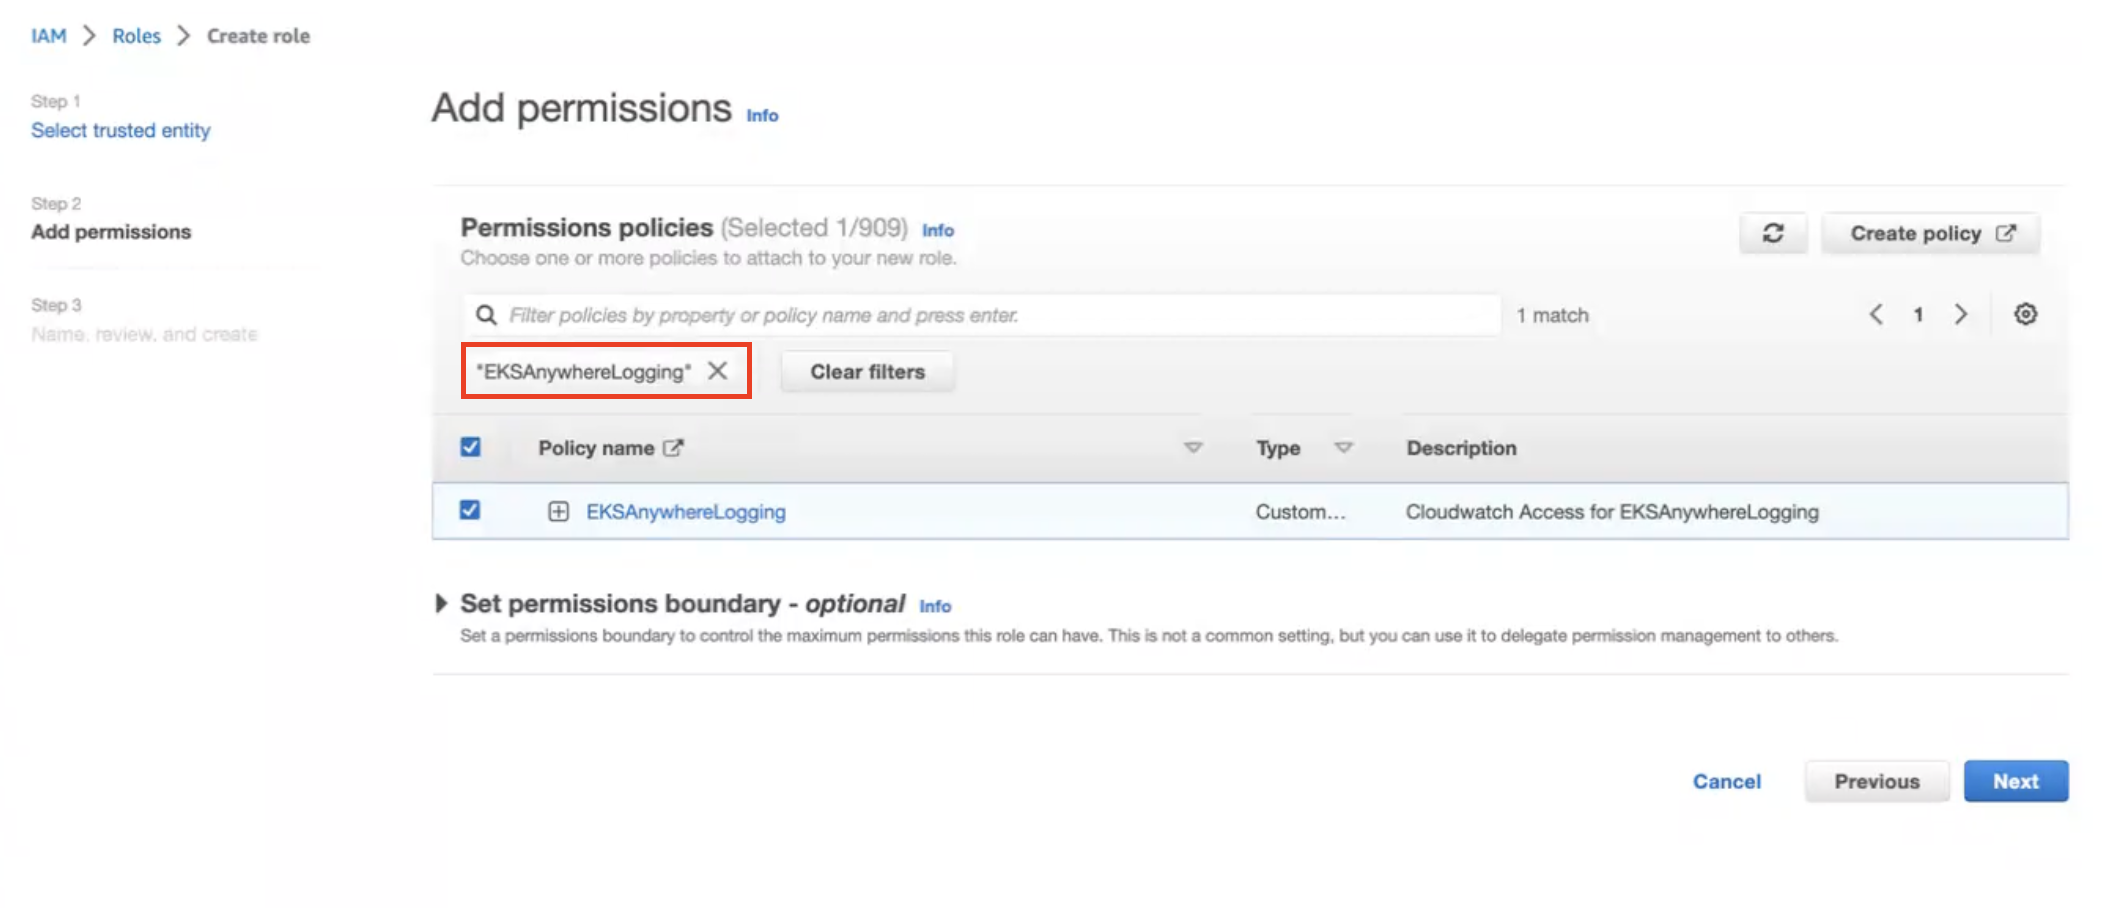
-
Provide a Role name
EKSAnywhereLoggingand click Next. -
Copy the ARN as shown below and save it locally for the next step.
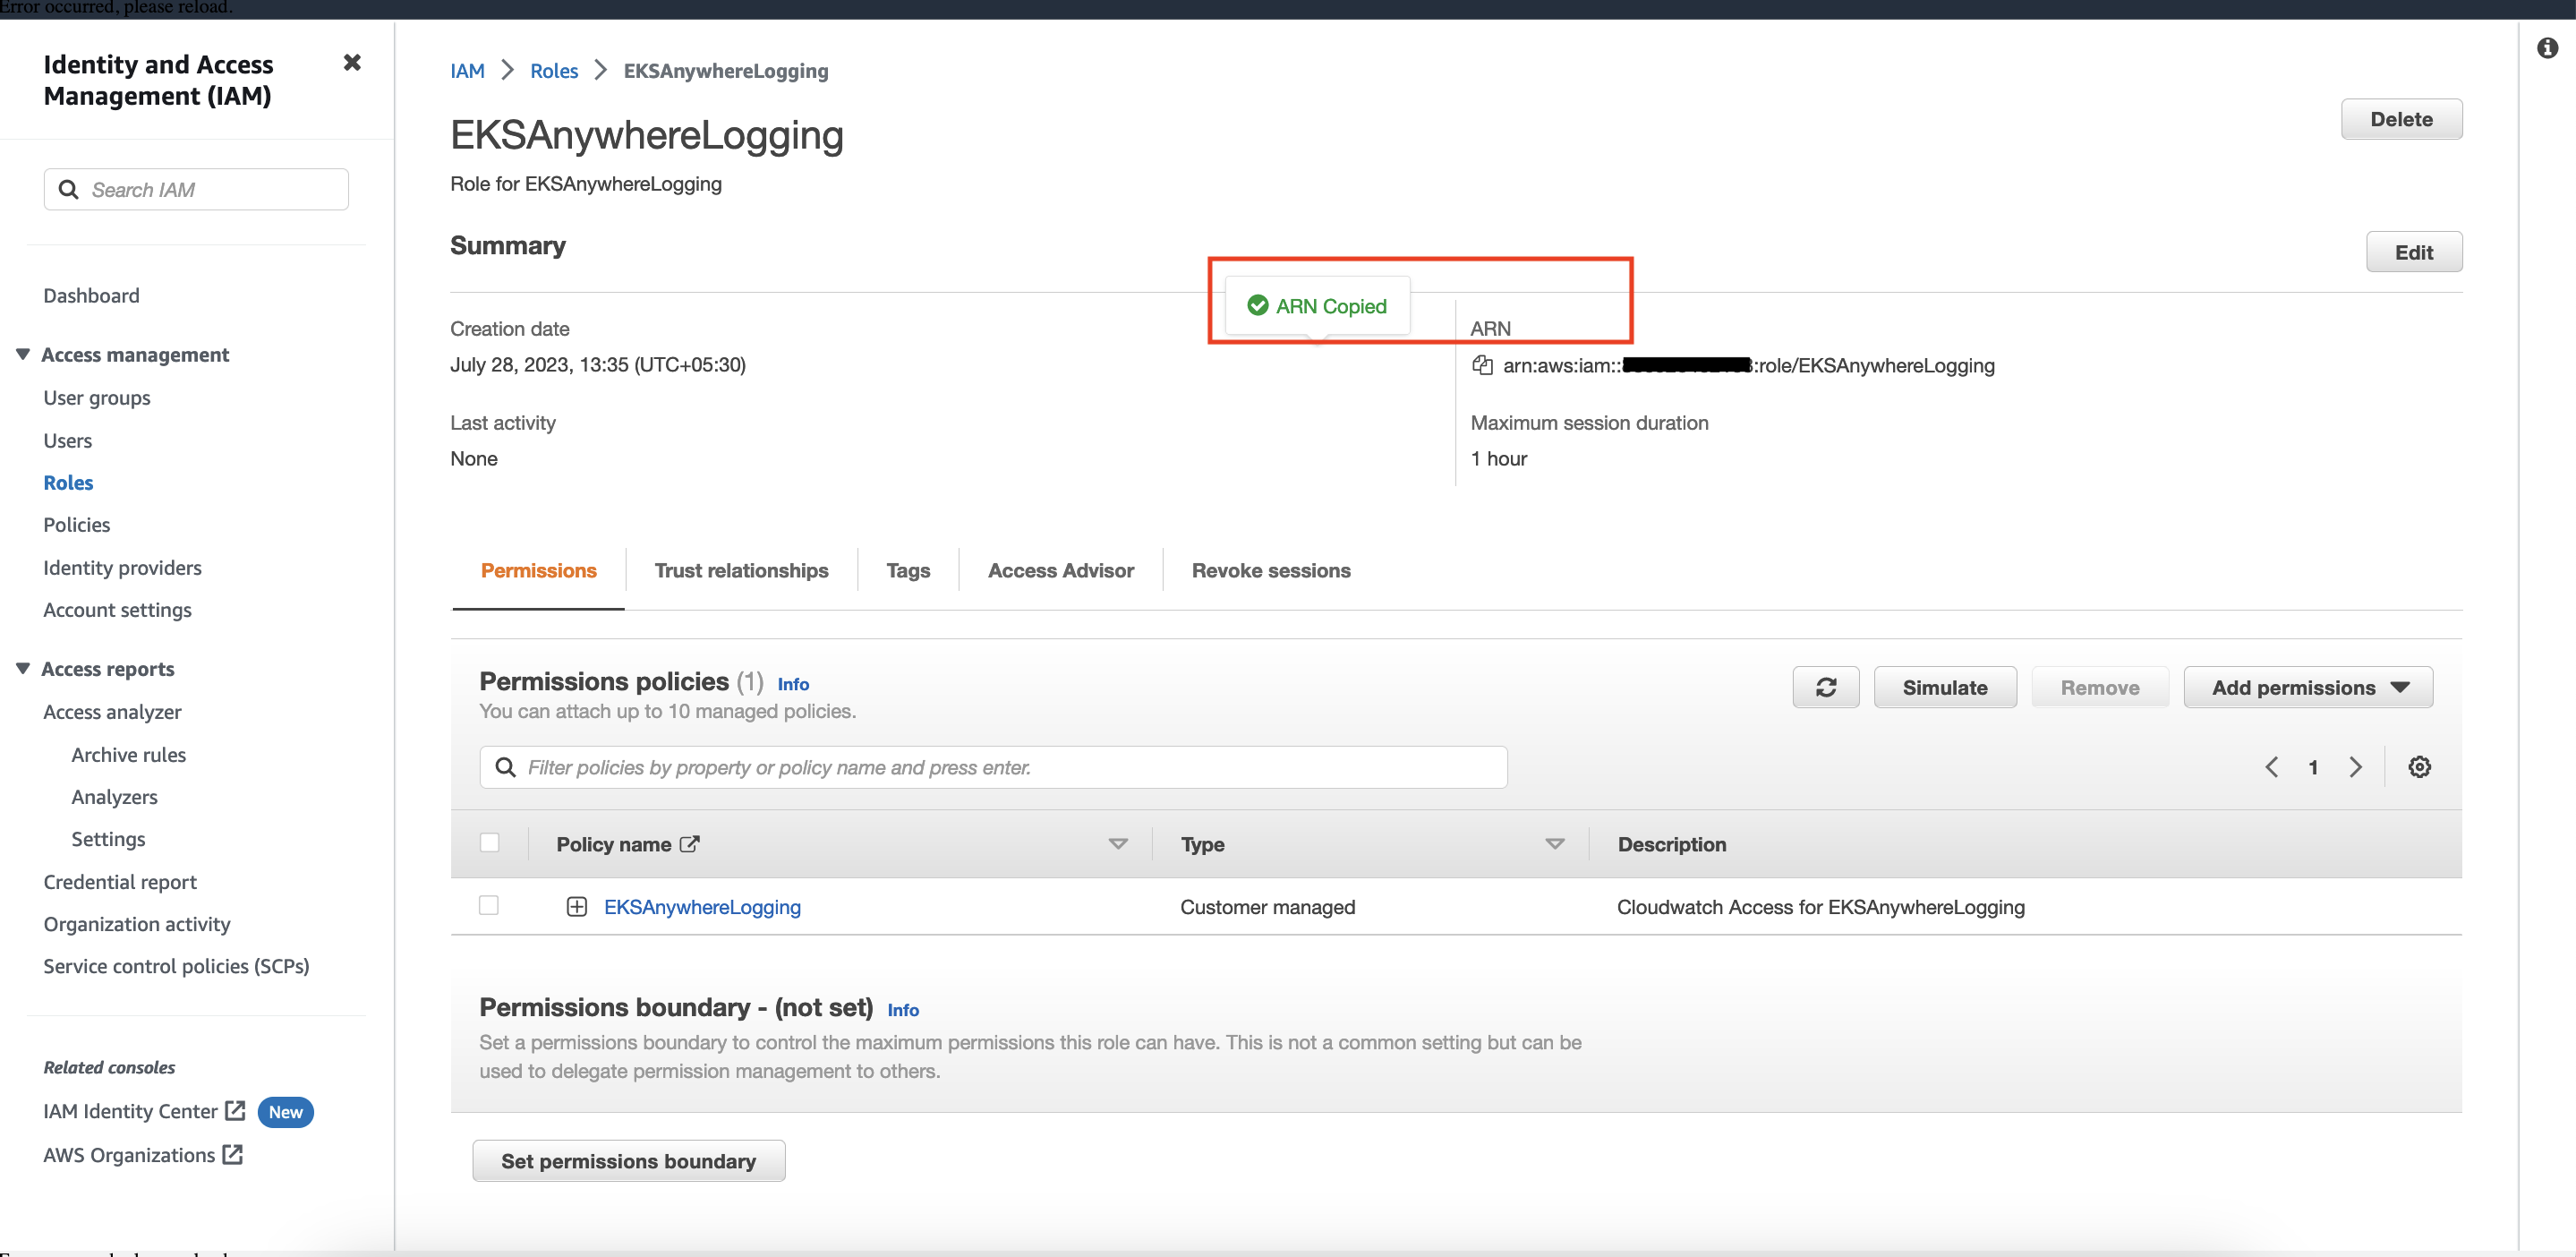
Step 3: Install Fluent Bit
-
Create the
amazon-cloudwatchnamespace using this command:kubectl create namespace amazon-cloudwatch -
Create the Service Account for
cloudwatch-agentandfluent-bitunder theamazon-cloudwatchnamespace. In this section, we will use Role ARN which we saved earlier . Replace$RoleARNwith your actual value.cat << EOF | kubectl apply -f - # create cwagent service account and role binding apiVersion: v1 kind: ServiceAccount metadata: name: cloudwatch-agent namespace: amazon-cloudwatch annotations: # set this with value of OIDC_IAM_ROLE eks.amazonaws.com/role-arn: "$RoleARN" # optional: Defaults to "sts.amazonaws.com" if not set eks.amazonaws.com/audience: "sts.amazonaws.com" # optional: When set to "true", adds AWS_STS_REGIONAL_ENDPOINTS env var # to containers eks.amazonaws.com/sts-regional-endpoints: "true" # optional: Defaults to 86400 for expirationSeconds if not set # Note: This value can be overwritten if specified in the pod # annotation as shown in the next step. eks.amazonaws.com/token-expiration: "86400" --- apiVersion: v1 kind: ServiceAccount metadata: name: fluent-bit namespace: amazon-cloudwatch annotations: # set this with value of OIDC_IAM_ROLE eks.amazonaws.com/role-arn: "$RoleARN" # optional: Defaults to "sts.amazonaws.com" if not set eks.amazonaws.com/audience: "sts.amazonaws.com" # optional: When set to "true", adds AWS_STS_REGIONAL_ENDPOINTS env var # to containers eks.amazonaws.com/sts-regional-endpoints: "true" # optional: Defaults to 86400 for expirationSeconds if not set # Note: This value can be overwritten if specified in the pod # annotation as shown in the next step. eks.amazonaws.com/token-expiration: "86400" EOFThe above command creates two Service Accounts:
serviceaccount/cloudwatch-agent created serviceaccount/fluent-bit created -
Now deploy Fluent Bit in your EKS Anywhere cluster to scrape and send logs to CloudWatch:
kubectl apply -f "https://anywhere.eks.amazonaws.com/manifests/fluentbit.yaml"You should see the following output:
clusterrole.rbac.authorization.k8s.io/cloudwatch-agent-role changed clusterrolebinding.rbac.authorization.k8s.io/cloudwatch-agent-role-binding changed configmap/cwagentconfig changed daemonset.apps/cloudwatch-agent changed configmap/fluent-bit-cluster-info changed clusterrole.rbac.authorization.k8s.io/fluent-bit-role changed clusterrolebinding.rbac.authorization.k8s.io/fluent-bit-role-binding changed configmap/fluent-bit-config changed daemonset.apps/fluent-bit changed -
You can verify the
DaemonSetshave been deployed with the following command:kubectl -n amazon-cloudwatch get daemonsets
-
If you are running the EKS connector , you can verify the status of
DaemonSetsby logging into AWS console and navigate to Amazon EKS -> Cluster -> Resources -> DaemonSets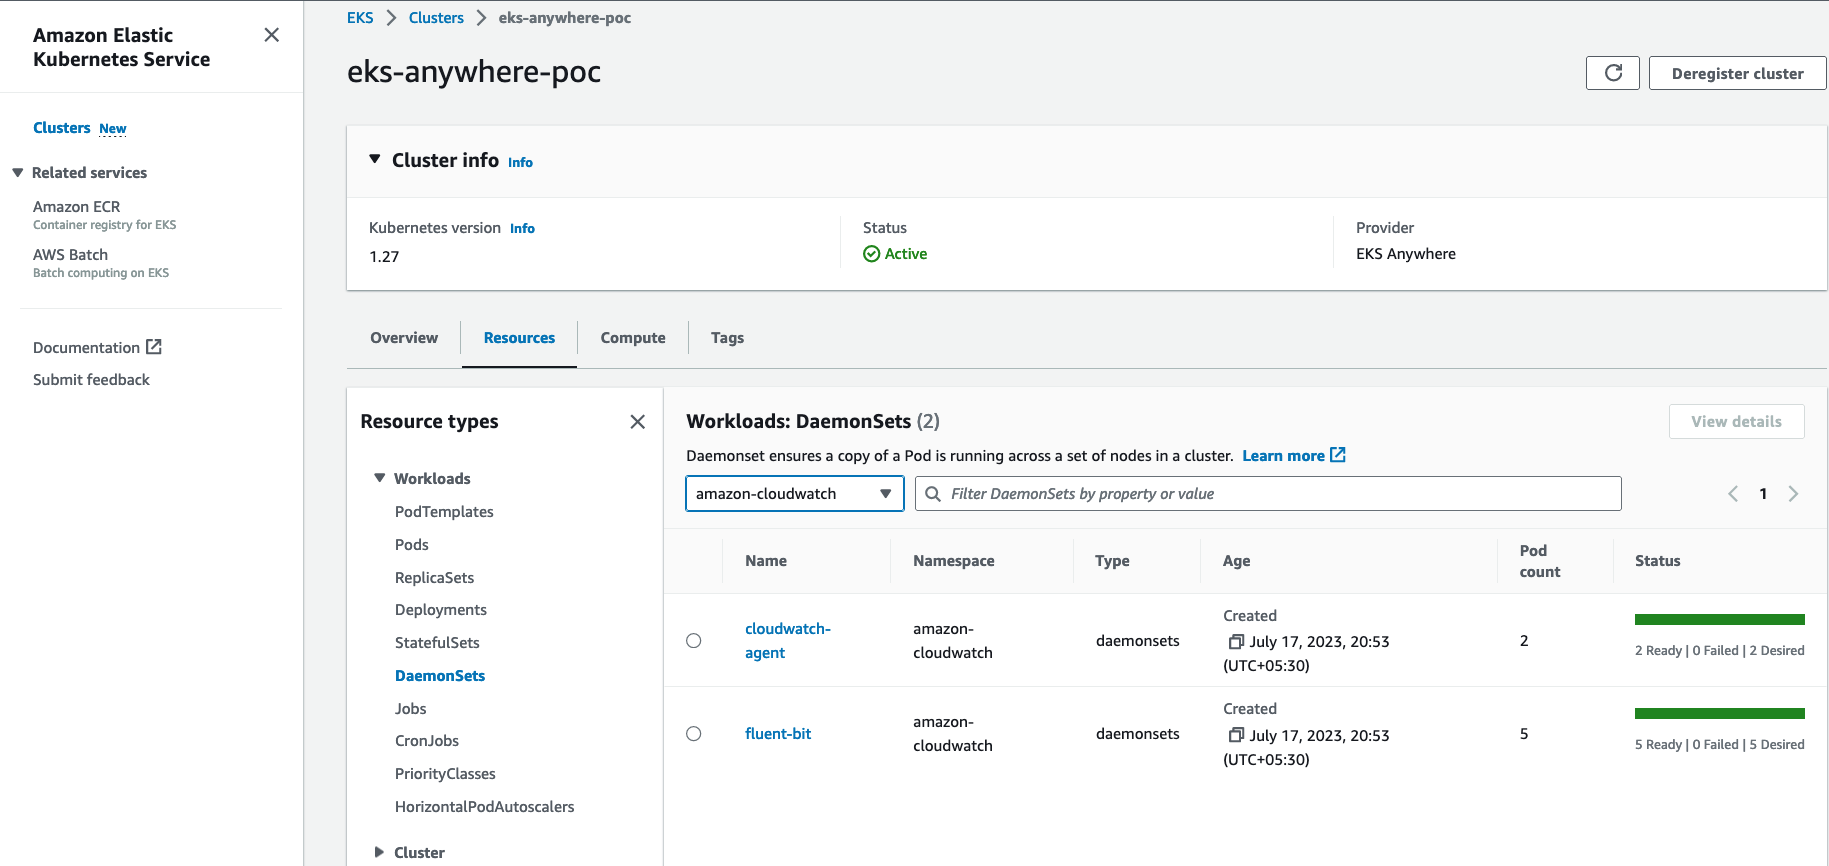
Step 4: Deploy a test application
Deploy a simple test application to verify your setup is working properly.
Step 5: View cluster logs and metrics
Cloudwatch Logs
-
Open the CloudWatch console . The link opens the console and displays your current available log groups.
-
Choose the EKS Anywhere clustername that you want to view logs for. The log group name format is /aws/containerinsights/
my-EKS-Anywhere-cluster/cluster.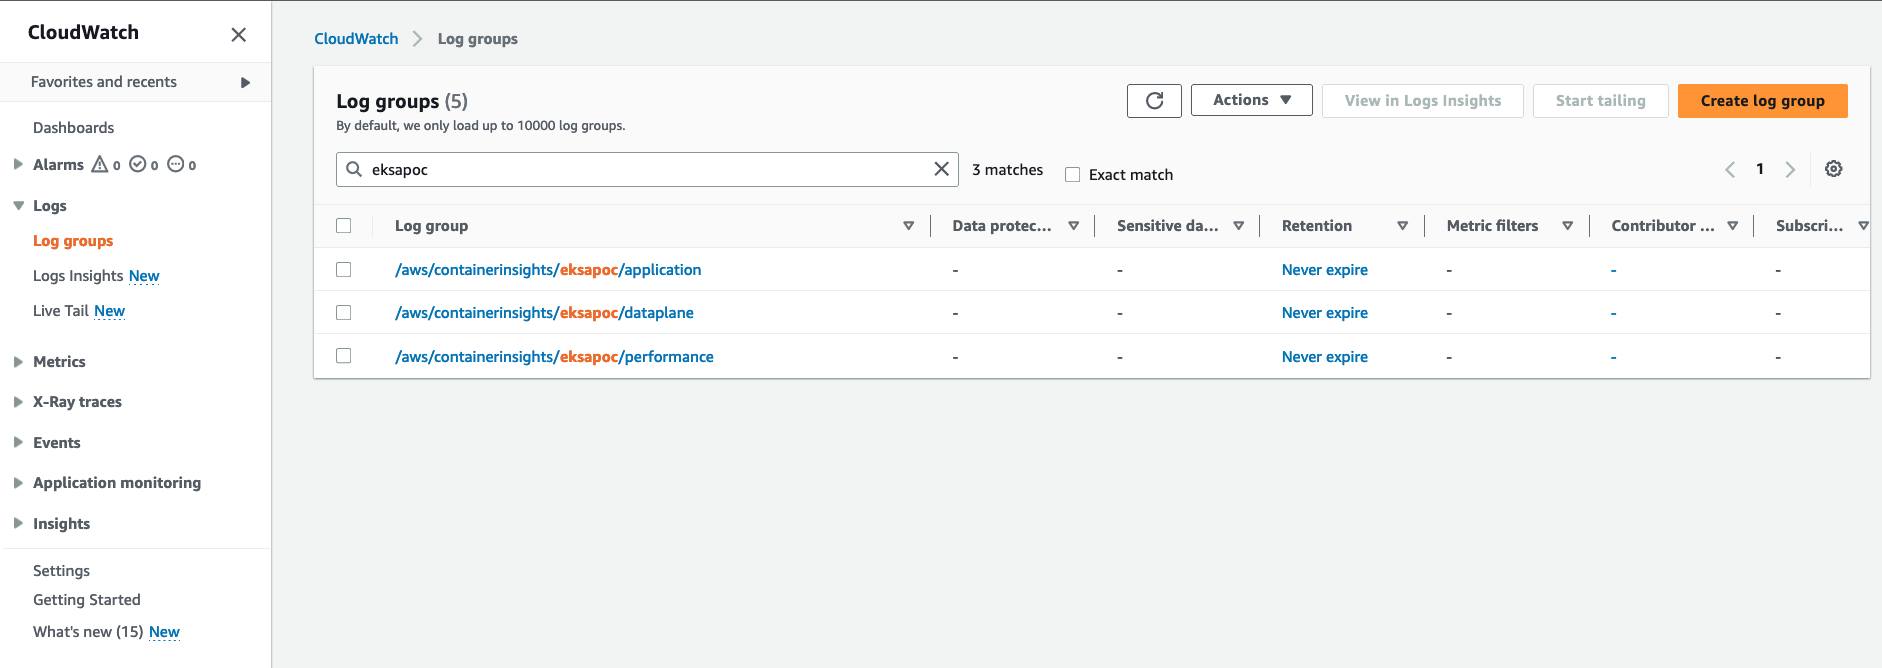
Log group name
/aws/containerinsights/my-EKS-Anywhere-cluster/applicationhas log source from /var/log/containers.Log group name
/aws/containerinsights/my-EKS-Anywhere-cluster/dataplanehas log source forkubelet.service,kubeproxy.service, anddocker.service -
To view the deployed test application logs, click on the application LogGroup, and click on Search All
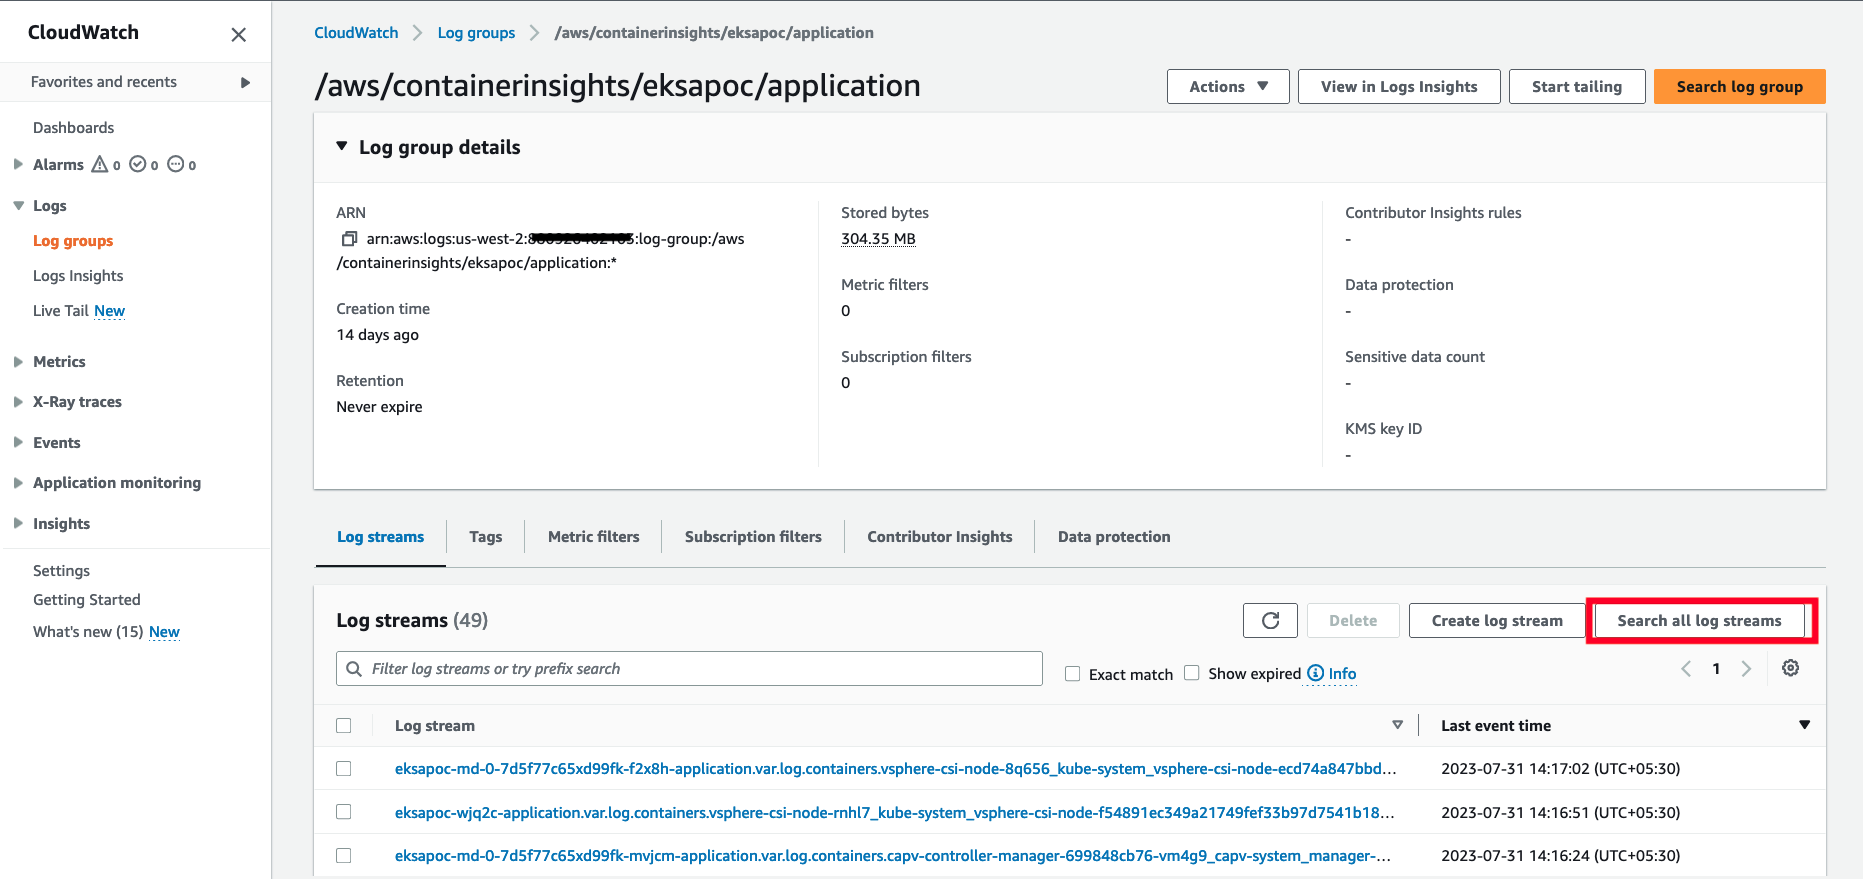
-
Type
HTTP 1.1 200in the search box and press enter. You should see logs as shown below:
Cloudwatch Container Insights
-
Open the CloudWatch console . The link opens the Container Insights performance Monitoring console and displays a dropdown to select your
EKS Clusters.
For more details on CloudWatch logs, please refer What is Amazon CloudWatch Logs?
8.6 - Expose metrics for EKS Anywhere components
Some Kubernetes system components like kube-controller-manager, kube-scheduler, kube-proxy and etcd (Stacked) expose metrics only on the localhost by default. In order to expose metrics for these components so that other monitoring systems like Prometheus can scrape them, you can deploy a proxy as a Daemonset on the host network of the nodes. The proxy pods also need to be configured with control plane tolerations so that they can be scheduled on the control plane nodes.
For etcd metrics, the steps outlined below are applicable only for stacked etcd setup. For Unstacked/External etcd, metrics are already exposed on https://<etcd-machine-ip>:2379/metrics endpoint and can be scraped by Prometheus directly without deploying a proxy.
Configure Proxy
To configure a proxy for exposing metrics on an EKS Anywhere cluster, you can perform the following steps:
-
Create a config map to store the proxy configuration.
Below is an example ConfigMap if you use HAProxy as the proxy server.
cat << EOF | kubectl apply -f - apiVersion: v1 kind: ConfigMap metadata: name: metrics-proxy data: haproxy.cfg: | defaults mode http timeout connect 5000ms timeout client 5000ms timeout server 5000ms default-server maxconn 10 frontend kube-proxy bind \${NODE_IP}:10249 http-request deny if !{ path /metrics } default_backend kube-proxy backend kube-proxy server kube-proxy 127.0.0.1:10249 check frontend kube-controller-manager bind \${NODE_IP}:10257 http-request deny if !{ path /metrics } default_backend kube-controller-manager backend kube-controller-manager server kube-controller-manager 127.0.0.1:10257 ssl verify none check frontend kube-scheduler bind \${NODE_IP}:10259 http-request deny if !{ path /metrics } default_backend kube-scheduler backend kube-scheduler server kube-scheduler 127.0.0.1:10259 ssl verify none check frontend etcd bind \${NODE_IP}:2381 http-request deny if !{ path /metrics } default_backend etcd backend etcd server etcd 127.0.0.1:2381 check EOF -
Create a daemonset for the proxy and mount the config map volume onto the proxy pods.
Below is an example configuration for the HAProxy daemonset.
cat << EOF | kubectl apply -f -
apiVersion: apps/v1
kind: DaemonSet
metadata:
  name: metrics-proxy
spec:
  selector:
    matchLabels:
      app: metrics-proxy
  template:
    metadata:
      labels:
        app: metrics-proxy
    spec:
      tolerations:
      - key: node-role.kubernetes.io/control-plane
        operator: Exists
        effect: NoSchedule
      hostNetwork: true
      containers:
        - name: haproxy
          image: public.ecr.aws/eks-anywhere/kubernetes-sigs/kind/haproxy:v0.20.0-eks-a-54
          env:
            - name: NODE_IP
              valueFrom:
                fieldRef:
                  apiVersion: v1
                  fieldPath: status.hostIP
          ports:
            - name: kube-proxy
              containerPort: 10249
            - name: kube-ctrl-mgr
              containerPort: 10257
            - name: kube-scheduler
              containerPort: 10259
            - name: etcd
              containerPort: 2381
          volumeMounts:
            - mountPath: "/usr/local/etc/haproxy"
              name: haproxy-config
      volumes:
        - configMap:
            name: metrics-proxy
          name: haproxy-config
EOF
Configure Client Permissions
-
Create a new cluster role for the client to access the metrics endpoint of the components.
cat << EOF | kubectl apply -f - apiVersion: rbac.authorization.k8s.io/v1 kind: ClusterRole metadata: name: metrics-reader rules: - nonResourceURLs: - "/metrics" verbs: - get EOF -
Create a new cluster role binding to bind the above cluster role to the client pod’s service account.
cat << EOF | kubectl apply -f - apiVersion: rbac.authorization.k8s.io/v1 kind: ClusterRoleBinding metadata: name: metrics-reader-binding subjects: - kind: ServiceAccount name: default namespace: default roleRef: kind: ClusterRole name: metrics-reader apiGroup: rbac.authorization.k8s.io EOF -
Verify that the metrics are exposed to the client pods by running the following commands:
cat << EOF | kubectl apply -f -
apiVersion: v1
kind: Pod
metadata:
  name: test-pod
spec:
  tolerations:
  - key: node-role.kubernetes.io/control-plane
    operator: Exists
    effect: NoSchedule
  containers:
  - command:
    - /bin/sleep
    - infinity
    image: curlimages/curl:latest
    name: test-container
    env:
    - name: NODE_IP
      valueFrom:
        fieldRef:
          apiVersion: v1
          fieldPath: status.hostIP
EOF
kubectl exec -it test-pod -- sh export TOKEN=$(cat /var/run/secrets/kubernetes.io/serviceaccount/token) curl -H "Authorization: Bearer ${TOKEN}" "http://${NODE_IP}:10257/metrics" curl -H "Authorization: Bearer ${TOKEN}" "http://${NODE_IP}:10259/metrics" curl -H "Authorization: Bearer ${TOKEN}" "http://${NODE_IP}:10249/metrics" curl -H "Authorization: Bearer ${TOKEN}" "http://${NODE_IP}:2381/metrics"
9 - Backup and restore cluster
9.1 - Backup cluster
We strongly advise performing regular cluster backups of all the EKS Anywhere clusters. This ensures that you always have an up-to-date cluster state available for restoration in case the cluster experiences issues or becomes unrecoverable. This document outlines the steps for creating the two essential types of backups required for the EKS Anywhere cluster restore process .
Etcd backup
For optimal cluster maintenance, it is crucial to perform regular etcd backups on all your EKS Anywhere management and workload clusters. Always take an etcd backup before performing an upgrade so it can be used to restore the cluster to a previous state in the event of a cluster upgrade failure. To create an etcd backup for your cluster, follow the guidelines provided in the External etcd backup and restore section.
Cluster API backup
Since cluster failures primarily occur following unsuccessful cluster upgrades, EKS Anywhere takes the proactive step of automatically creating backups for the Cluster API objects. For the management cluster, it captures the states of both the management cluster and its workload clusters if all the clusters are in ready state. If one of the workload clusters is not ready, EKS Anywhere takes the best effort to backup the management cluster itself. For the workload cluster, it captures the state workload cluster’s Cluster API objects. These backups are stored within the management cluster folder, where the upgrade command is initiated from the Admin machine, and are generated before each management and/or workload cluster upgrade process.
For example, after executing a cluster upgrade command on mgmt-cluster, a backup folder is generated with the naming convention of mgmt-cluster-backup-${timestamp}:
mgmt-cluster/
├── mgmt-cluster-backup-2023-10-11T02_55_56 <------ Folder with a backup of the CAPI objects
├── mgmt-cluster-eks-a-cluster.kubeconfig
├── mgmt-cluster-eks-a-cluster.yaml
└── generated
For workload cluster, a backup folder is generated with the naming convention of wkld-cluster-backup-${timestamp} under mgmt-cluster directory
mgmt-cluster/
├── wkld-cluster-backup-2023-10-11T02_55_56 <------ Folder with a backup of the CAPI objects
├── mgmt-cluster-eks-a-cluster.kubeconfig
├── mgmt-cluster-eks-a-cluster.yaml
└── generated
Although the likelihood of a cluster failure occurring without any associated cluster upgrade operation is relatively low, it is still recommended to manually back up these Cluster API objects on a routine basis. For example, to create a Cluster API backup of a cluster:
MGMT_CLUSTER="mgmt"
MGMT_CLUSTER_KUBECONFIG=${MGMT_CLUSTER}/${MGMT_CLUSTER}-eks-a-cluster.kubeconfig
BACKUP_DIRECTORY=backup-mgmt

# Create the backup directory
mkdir -p ${BACKUP_DIRECTORY}

# Substitute the EKS Anywhere release version with whatever CLI version you are using
EKSA_RELEASE_VERSION=v0.25.0
BUNDLE_MANIFEST_URL=$(curl -s https://anywhere-assets.eks.amazonaws.com/releases/eks-a/manifest.yaml | yq ".spec.releases[] | select(.version==\"$EKSA_RELEASE_VERSION\").bundleManifestUrl")
CLI_TOOLS_IMAGE=$(curl -s $BUNDLE_MANIFEST_URL | yq ".spec.versionsBundles[0].eksa.cliTools.uri")


docker run -i --network host -w $(pwd) -v $(pwd):/$(pwd) --entrypoint clusterctl ${CLI_TOOLS_IMAGE} move \
        --namespace eksa-system \
        --kubeconfig $MGMT_CLUSTER_KUBECONFIG \
        --to-directory ${BACKUP_DIRECTORY}
This saves the Cluster API objects of the management cluster mgmt with all its workload clusters, to a local directory under the backup-mgmt folder.
9.2 - Restore cluster
In certain unfortunate circumstances, an EKS Anywhere cluster may find itself in an unrecoverable state due to various factors such as a failed cluster upgrade, underlying infrastructure problems, or network issues, rendering the cluster inaccessible through conventional means. This document outlines detailed steps to guide you through the process of restoring a failed cluster from backups in these critical situations.
Prerequisite
Always backup your EKS Anywhere cluster. Refer to the Backup cluster and make sure you have the updated etcd and Cluster API backup at hand.
Restore a management cluster
As an EKS Anywhere management cluster contains the management components of itself, plus all the workload clusters it manages, the restoration process can be more complicated than just restoring all the objects from the etcd backup. To be more specific, all the core EKS Anywhere and Cluster API custom resources, that manage the lifecycle (provisioning, upgrading, operating, etc.) of the management and its workload clusters, are stored in the management cluster. This includes all the supporting infrastructure, like virtual machines, networks and load balancers. For example, after a failed cluster upgrade, the infrastructure components can change after the etcd backup was taken. Since the backup does not contain the new state of the half upgraded cluster, simply restoring it can create virtual machines UUID and IP mismatches, rendering EKS Anywhere incapable of healing the cluster.
Depending on whether the infrastructure components are changed or not after the etcd backup was taken (for example, if machines are rolled out and recreated and new IP addresses assigned to the machines), different strategy needs to be applied in order to restore the management cluster.
Cluster accessible and the infrastructure components not changed after etcd backup was taken
If the management cluster is still accessible through the API server, and the underlying infrastructure layer (nodes, machines, VMs, etc.) are not changed after the etcd backup was taken, simply follow the External etcd backup and restore to restore the management cluster itself from the backup.
Warning
Do not apply the etcd restore unless you are very sure that the infrastructure layer is not changed after the etcd backup was taken. In other words, the nodes, machines, VMs, and their assigned IPs need to be exactly the same as when the backup was taken.Cluster not accessible or infrastructure components changed after etcd backup was taken
If the cluster is no longer accessible in any means, or the infrastructure machines are changed after the etcd backup was taken, restoring this management cluster itself from the outdated etcd backup will not work. Instead, you need to create a new management cluster, and migrate all the EKS Anywhere resources of the old workload clusters to the new one, so that the new management cluster can maintain the new ownership of managing the existing workload clusters. Below is an example of migrating a failed management cluster mgmt-old with its workload clusters w01 and w02 to a new management cluster mgmt-new:
-
Create a new management cluster to which you will be migrating your workload clusters later.
You can define a cluster config similar to your old management cluster, and run cluster creation of the new management cluster with the exact same EKS Anywhere version used to create the old management cluster.
If the original management cluster still exists with old infrastructure running, you need to create a new management cluster with a different cluster name to avoid conflict.
eksctl anywhere create cluster -f mgmt-new.yaml -
Move the custom resources of all the workload clusters to the new management cluster created above.
Using the vSphere provider as an example, we are moving the Cluster API custom resources, such as
vpsherevms,vspheremachinesandmachinesof the workload clusters, from the old management cluster to the new management cluster created in above step. By using the--filter-clusterflag with theclusterctl movecommand, we are only targeting the custom resources from the workload clusters.# Use the same cluster name if the newly created management cluster has the same cluster name as the old one MGMT_CLUSTER_OLD="mgmt-old" MGMT_CLUSTER_NEW="mgmt-new" MGMT_CLUSTER_NEW_KUBECONFIG=${MGMT_CLUSTER_NEW}/${MGMT_CLUSTER_NEW}-eks-a-cluster.kubeconfig WORKLOAD_CLUSTER_1="w01" WORKLOAD_CLUSTER_2="w02" # Substitute the workspace path with the workspace you are using WORKSPACE_PATH="/home/ec2-user/eks-a" # Retrieve the Cluster API backup folder path that are automatically generated during the cluster upgrade # This folder contains all the resources that represent the cluster state of the old management cluster along with its workload clusters CLUSTER_STATE_BACKUP_LATEST=$(ls -Art ${WORKSPACE_PATH}/${MGMT_CLUSTER_OLD} | grep ${MGMT_CLUSTER_OLD}-backup | tail -1) CLUSTER_STATE_BACKUP_LATEST_PATH=${WORKSPACE_PATH}/${MGMT_CLUSTER_OLD}/${CLUSTER_STATE_BACKUP_LATEST}/ # Substitute the EKS Anywhere release version with the EKS Anywhere version of the original management cluster EKSA_RELEASE_VERSION=v0.17.3 BUNDLE_MANIFEST_URL=$(curl -s https://anywhere-assets.eks.amazonaws.com/releases/eks-a/manifest.yaml | yq ".spec.releases[] | select(.version==\"$EKSA_RELEASE_VERSION\").bundleManifestUrl") CLI_TOOLS_IMAGE=$(curl -s $BUNDLE_MANIFEST_URL | yq ".spec.versionsBundles[0].eksa.cliTools.uri") # The clusterctl move command needs to be executed for each workload cluster. # It will only move the workload cluster resources from the EKS Anywhere backup to the new management cluster. # If you have multiple workload clusters, you have to run the command for each cluster as shown below. # Move workload cluster w01 resources to the new management cluster mgmt-new docker run -i --network host -w $(pwd) -v $(pwd):/$(pwd) --entrypoint clusterctl ${CLI_TOOLS_IMAGE} move \ --namespace eksa-system \ --filter-cluster ${WORKLOAD_CLUSTER_1} \ --from-directory ${CLUSTER_STATE_BACKUP_LATEST_PATH} \ --to-kubeconfig ${MGMT_CLUSTER_NEW_KUBECONFIG} # Move workload cluster w02 resources to the new management cluster mgmt-new docker run -i --network host -w $(pwd) -v $(pwd):/$(pwd) --entrypoint clusterctl ${CLI_TOOLS_IMAGE} move \ --namespace eksa-system \ --filter-cluster ${WORKLOAD_CLUSTER_2} \ --from-directory ${CLUSTER_STATE_BACKUP_LATEST_PATH} \ --to-kubeconfig ${MGMT_CLUSTER_NEW_KUBECONFIG} -
(Optional) Update the cluster config file of the workload clusters if the new management cluster has a different cluster name than the original management cluster.
You can skip this step if the new management cluster has the same cluster name as the old management cluster.
# workload cluster w01
---
apiVersion: anywhere.eks.amazonaws.com/v1alpha1
kind: Cluster
metadata:
  name: w01
  namespace: default
spec:
  managementCluster:
    name: mgmt-new # This needs to be updated with the new management cluster name.
  ...
# workload cluster w02 --- apiVersion: anywhere.eks.amazonaws.com/v1alpha1 kind: Cluster metadata: name: w02 namespace: default spec: managementCluster: name: mgmt-new # This needs to be updated with the new management cluster name. ...Make sure that apart from the
managementClusterfield you updated above, all the other cluster configs of the workload clusters need to stay the same as the old workload clusters resources after the old management cluster fails. -
Apply the updated cluster config of each workload cluster in the new management cluster.
MGMT_CLUSTER_NEW="mgmt-new" MGMT_CLUSTER_NEW_KUBECONFIG=${MGMT_CLUSTER_NEW}/${MGMT_CLUSTER_NEW}-eks-a-cluster.kubeconfig kubectl apply -f w01/w01-eks-a-cluster.yaml --kubeconfig ${MGMT_CLUSTER_NEW_KUBECONFIG} kubectl apply -f w02/w02-eks-a-cluster.yaml --kubeconfig ${MGMT_CLUSTER_NEW_KUBECONFIG} -
Validate all clusters are in the desired state.
kubectl get clusters -n default -o custom-columns="NAME:.metadata.name,READY:.status.conditions[?(@.type=='Ready')].status" --kubeconfig ${MGMT_CLUSTER_NEW}/${MGMT_CLUSTER_NEW}-eks-a-cluster.kubeconfig

NAME       READY
mgmt-new   True
w01        True
w02        True

kubectl get clusters.cluster.x-k8s.io -n eksa-system --kubeconfig ${MGMT_CLUSTER_NEW}/${MGMT_CLUSTER_NEW}-eks-a-cluster.kubeconfig

NAME       PHASE         AGE
mgmt-new   Provisioned   11h
w01        Provisioned   11h
w02        Provisioned   11h

kubectl get kcp -n eksa-system  --kubeconfig ${MGMT_CLUSTER_NEW}/${MGMT_CLUSTER_NEW}-eks-a-cluster.kubeconfig

NAME       CLUSTER    INITIALIZED   API SERVER AVAILABLE   REPLICAS   READY   UPDATED   UNAVAILABLE   AGE   VERSION
mgmt-new   mgmt-new   true          true                   2          2       2                       11h   v1.27.1-eks-1-27-4
w01        w01        true          true                   2          2       2                       11h   v1.27.1-eks-1-27-4
w02        w02        true          true                   2          2       2                       11h   v1.27.1-eks-1-27-4
Restore a workload cluster
Cluster accessible and the infrastructure components not changed after etcd backup was taken
Similar to the failed management cluster without infrastructure components change situation, follow the External etcd backup and restore to restore the workload cluster itself from the backup.
Cluster not accessible or infrastructure components changed after etcd backup was taken
If the workload cluster is still accessible, but the infrastructure machines are changed after the etcd backup was taken, you can still try restoring the cluster itself from the etcd backup. Although doing so is risky: it can potentially cause the node names, IPs and other infrastructure configurations to revert to a state that is no longer valid. Restoring etcd effectively takes a cluster back in time and all clients will experience a conflicting, parallel history. This can impact the behavior of watching components like Kubernetes controller managers, EKS Anywhere cluster controller manager, and Cluster API controller managers.
If the original workload cluster becomes inaccessible or cannot be restored to a healthy state from an outdated etcd, a new workload cluster needs to be created. This new cluster should be managed by the same management cluster that oversaw the original. You must then restore your workload applications to this new cluster from the etcd backup of the original. This ensures the management cluster retains control, with all data from the old cluster intact. Below is an example of applying the etcd backup etcd-snapshot-w01.db from a failed workload cluster w01 to a new cluster w02:
-
Create a new workload cluster to which you will be migrating your workloads and applications from the original failed workload cluster.
You can define a cluster config similar to your old workload cluster, with a different cluster name (if the old workload cluster still exists), and run cluster creation of the new workload cluster with the exact same EKS Anywhere version used to create the old workload cluster.
export MGMT_CLUSTER="mgmt" export MGMT_CLUSTER_KUBECONFIG=${MGMT_CLUSTER}/${MGMT_CLUSTER}-eks-a-cluster.kubeconfig eksctl anywhere create cluster -f w02.yaml --kubeconfig $MGMT_CLUSTER_KUBECONFIG -
Save the config map objects of the new workload cluster to a file.
Save a copy of the new workload cluster’s
cluster-info,kube-proxyandkubeadm-configconfig map objects before the restore. This is necessary as the etcd restore will override the config maps above with the metadata information (certificates, endpoint, etc.) from the old cluster.export WORKLOAD_CLUSTER_NAME="w02" export WORKLOAD_CLUSTER_KUBECONFIG=${WORKLOAD_CLUSTER_NAME}/${WORKLOAD_CLUSTER_NAME}-eks-a-cluster.kubeconfig cat <<EOF >> w02-cm.yaml $(kubectl get -n kube-public cm cluster-info -oyaml --kubeconfig $WORKLOAD_CLUSTER_KUBECONFIG) --- $(kubectl get -n kube-system cm kube-proxy -oyaml --kubeconfig $WORKLOAD_CLUSTER_KUBECONFIG) --- $(kubectl get -n kube-system cm kubeadm-config -oyaml --kubeconfig $WORKLOAD_CLUSTER_KUBECONFIG) EOFManually remove the
creationTimestamp,resourceVersion,uidfrom the config map objects, so that later you can runkubectl applyagainst this file without errors. -
Follow the External etcd backup and restore to restore the old workload cluster’s etcd backup
etcd-snapshot-w01.dbonto the new workload clusterw02. Use different restore process based on OS family:Warning
Do not unpause the cluster reconcilers as the workload cluster is not completely setup with required configurations yet. Unpausing the cluster reconcilers might cause unexpected machine rollout and leave the cluster in unhealthy state.You might notice that after restoring the original etcd backup to the new workload cluster
w02, all the nodes go toNotReadystate with node names changed to have prefixw01-*. This is because restoring etcd effectively applies the node data from the original cluster which causes a conflicting history and can impact the behavior of watching components like Kubelets, Kubernetes controller managers.kubectl get nodes --kubeconfig $WORKLOAD_CLUSTER_KUBECONFIG NAME STATUS ROLES AGE VERSION w01-bbtdd NotReady control-plane 3d23h v1.27.3-eks-6f07bbc w01-md-0-66dbcfb56cxng8lc-8ppv5 NotReady <none> 3d23h v1.27.3-eks-6f07bbc -
Restart Kubelet of the control plane and worker nodes of the new workload cluster after the restore.
For some cases, Kubelet on the node will automatically restart and nodes becomes ready. For other cases, you need to manually restart the Kubelet on all the control plane and worker nodes in order to bring back the nodes to ready state. Kubelet registers the node itself with the apisever which then updates etcd with the correct node data of the new workload cluster
w02.# SSH into the control plane and worker nodes. You must do this for each node. ssh -i ${SSH_KEY} ${SSH_USERNAME}@<node IP> sudo su systemctl restart kubelet# SSH into the control plane and worker nodes. You must do this for each node. ssh -i ${SSH_KEY} ${SSH_USERNAME}@<node IP> apiclient exec admin bash sheltie systemctl restart kubelet -
Add back
node-role.kubernetes.io/control-planelabel to all the control plane nodes.kubectl label nodes <control-plane-node-name> node-role.kubernetes.io/control-plane= --kubeconfig $WORKLOAD_CLUSTER_KUBECONFIG -
Remove the lagacy nodes (if any).
kubectl get nodes --kubeconfig $WORKLOAD_CLUSTER_KUBECONFIG NAME STATUS ROLES AGE VERSION w01-bbtdd NotReady control-plane 3d23h v1.27.3-eks-6f07bbc w01-md-0-66dbcfb56cxng8lc-8ppv5 NotReady <none> 3d23h v1.27.3-eks-6f07bbc w02-fcbm2j Ready control-plane 91m v1.27.3-eks-6f07bbc w02-md-0-b7cc67cd4xd86jf-4c9ktp Ready <none> 73m v1.27.3-eks-6f07bbckubectl delete node w01-bbtdd --kubeconfig $WORKLOAD_CLUSTER_KUBECONFIG kubectl delete node w01-md-0-66dbcfb56cxng8lc-8ppv5 --kubeconfig $WORKLOAD_CLUSTER_KUBECONFIG -
Re-apply the original config map objects of the workload cluster.
Re-apply the
cluster-info,kube-proxyandkubeadm-configconfig map objects we saved in previous step to the workload clusterw02.kubectl apply -f w02-cm.yaml --kubeconfig $WORKLOAD_CLUSTER_KUBECONFIG -
Validate the nodes are in ready state.
kubectl get nodes --kubeconfig $WORKLOAD_CLUSTER_KUBECONFIG NAME STATUS ROLES AGE VERSION w02-djshz Ready control-plane 9m7s v1.27.3-eks-6f07bbc w02-md-0-6bbc8dd6d4xbgcjh-wfmb6 Ready <none> 3m55s v1.27.3-eks-6f07bbc -
Restart the system pods to ensure that they use the config maps you re-applied in previous step.
kubectl rollout restart ds kube-proxy -n kube-system --kubeconfig $WORKLOAD_CLUSTER_KUBECONFIG -
Unpause the cluster reconcilers
kubectl annotate clusters.anywhere.eks.amazonaws.com $WORKLOAD_CLUSTER_NAME anywhere.eks.amazonaws.com/paused- --kubeconfig=$MGMT_CLUSTER_KUBECONFIG kubectl patch clusters.cluster.x-k8s.io $WORKLOAD_CLUSTER_NAME --type merge -p '{"spec":{"paused": false}}' -n eksa-system --kubeconfig=$MGMT_CLUSTER_KUBECONFIG -
Rollout and restart all the machine objects so that the workload cluster has a clean state.
# Substitute the EKS Anywhere release version with whatever CLI version you are using EKSA_RELEASE_VERSION=v0.25.0 BUNDLE_MANIFEST_URL=$(curl -s https://anywhere-assets.eks.amazonaws.com/releases/eks-a/manifest.yaml | yq ".spec.releases[] | select(.version==\"$EKSA_RELEASE_VERSION\").bundleManifestUrl") CLI_TOOLS_IMAGE=$(curl -s $BUNDLE_MANIFEST_URL | yq ".spec.versionsBundles[0].eksa.cliTools.uri") # Rollout restart all the control plane machines docker run -i --network host -w $(pwd) -v $(pwd):/$(pwd) --entrypoint clusterctl ${CLI_TOOLS_IMAGE} alpha rollout restart kubeadmcontrolplane/${WORKLOAD_CLUSTER_NAME} -n eksa-system --kubeconfig ${MGMT_CLUSTER_KUBECONFIG} # Rollout restart all the worker machines # You need to repeat below command for each worker node group docker run -i --network host -w $(pwd) -v $(pwd):/$(pwd) --entrypoint clusterctl ${CLI_TOOLS_IMAGE} alpha rollout restart machinedeployment/${WORKLOAD_CLUSTER_NAME}-md-0 -n eksa-system --kubeconfig ${MGMT_CLUSTER_KUBECONFIG} -
Validate the new workload cluster is in the desired state.
kubectl get clusters -n default -o custom-columns="NAME:.metadata.name,READY:.status.conditions[?(@.type=='Ready')].status" --kubeconfig $MGMT_CLUSTER_KUBECONFIG

NAME   READY
mgmt   True
w02    True

kubectl get clusters.cluster.x-k8s.io -n eksa-system --kubeconfig $MGMT_CLUSTER_KUBECONFIG

NAME   PHASE         AGE
mgmt   Provisioned   11h
w02    Provisioned   11h

kubectl get kcp -n eksa-system  --kubeconfig $MGMT_CLUSTER_KUBECONFIG

NAME   CLUSTER    INITIALIZED   API SERVER AVAILABLE   REPLICAS   READY   UPDATED   UNAVAILABLE   AGE   VERSION
mgmt   mgmt       true          true                   2          2       2                       11h   v1.27.1-eks-1-27-4
w02    w02        true          true                   2          2       2                       11h   v1.27.1-eks-1-27-4
10 - Certificate management
10.1 - Monitoring Certificate Expiration
There are a few ways to check certificate expiration dates depending on your cluster’s accessibility.
Using ClusterCertificateInfo (When cluster is accessible)
When your cluster is accessible via kubectl, use the ClusterCertificateInfo field in the cluster status:
kubectl get cluster <cluster-name> -o json | jq '.status.clusterCertificateInfo'
This will output a list of objects containing the machine name and the number of days until the certificate expires:
[
  {
    "machine": "my-cluster-control-plane-abc123",
    "expiresInDays": 300
  },
  {
    "machine": "my-cluster-control-plane-def456",
    "expiresInDays": 300
  },
  {
    "machine": "my-cluster-etcd-ghi789",
    "expiresInDays": 300
  }
]
The ClusterCertificateInfo field contains a list of machine objects with the following properties:
machine: The name of the machine (control plane or external etcd)expiresInDays: The number of days until the certificate expires
This information is updated periodically as part of the cluster status reconciliation process. The certificate expiration check is performed by connecting to each machine’s API server (port 6443 for control plane) or etcd server (port 2379 for external etcd) and retrieving the certificate expiration date.
Using OpenSSL for Direct Certificate Inspection (When cluster is not accessible)
When the cluster is not accessbile, you can directly check certificates using opessl:
# The expiry time of api-server certificate on control plane node
echo | openssl s_client -connect ${CONTROL_PLANE_IP}:6443 2>/dev/null | openssl x509 -noout -dates

# The expiry time of certificate used by your external etcd server, if you configured one
echo | openssl s_client -connect ${EXTERNAL_ETCD_IP}:2379 2>/dev/null | openssl x509 -noout -dates
Monitoring Best Practices
- Regular Checks: Periodically check certificate expiration to ensure you have enough time to plan for certificate renewal.
- Set Up Alerts: Consider setting up alerts to notify you when certificates are approaching expiration (e.g., 30 days before expiration).
- Proactive Renewal: If certificates are approaching expiration (less than 30 days), plan for certificate renewal using one of the methods described below.
Certificate Renewal
EKS Anywhere automatically rotates certificates when new machines are rolled out during cluster lifecycle operations such as upgrade (ie. EKS Anywhere version upgrades or Kubernetes version upgrades where nodes actually roll out). If you upgrade your cluster at least once a year, as recommended, manual rotation of cluster certificates will not be necessary.
If you need to manually renew certificates, you can use one of the following methods:
- Renew certificates using eksctl anywhere - Recommended approach using the eksctl anywhere CLI
- Script to renew certificates - Automated approach using a script
- Manual steps to renew certificates - Step-by-step manual process
10.2 - Renew certificates using eksctl anywhere
Overview
EKS Anywhere provides a simple and recommended way to renew cluster certificates using the eksctl anywhere renew certificates command. This is the recommended approach for certificate renewal.
Get more information on EKS Anywhere cluster certificates from Monitoring Certificate Expiration
Note
This feature is officially available starting with EKS Anywherev0.23.1.
However, it can also be used with clusters running older EKS Anywhere versions. To do so, you can download the new EKS Anywhere CLI at version v0.23.1 (or later) and use it to renew your existing cluster’s certificates.
Prerequisites
- Admin machine with:
eksctl anywhereCLI installed- SSH access to all control plane and etcd nodes
Configuration File
Create a YAML configuration file that specifies the cluster details and SSH access information. Example configuration file:
clusterName: my-cluster
os: ubuntu  # Options: ubuntu, rhel, bottlerocket
controlPlane:
  nodes:
  - 192.168.1.10
  - 192.168.1.11
  - 192.168.1.12
  ssh:
    sshKey: /path/to/private/key
    sshUser: ssh-user
etcd:
  nodes:
  - 192.168.1.20
  - 192.168.1.21
  - 192.168.1.22
  ssh:
    sshKey: /path/to/private/key
    sshUser: ssh-user
Configuration Fields
clusterName (required)
Name of the EKS Anywhere cluster.
os (required)
Operating system of the nodes. Permitted values: ubuntu, rhel, bottlerocket.
controlPlane.nodes (optional)
List of control plane node IPs. Node IPs can be omitted if the cluster is accessible.
controlPlane.ssh.sshKey (required)
Path to SSH private key for control plane nodes.
controlPlane.ssh.sshUser (required)
SSH user for control plane nodes.
etcd (optional)
Required only if the cluster uses external etcd nodes.
etcd.nodes (optional)
List of external etcd node IPs. Node IPs can be omitted if the cluster is accessible.
etcd.ssh.sshKey (required if using external etcd)
Path to SSH private key for etcd nodes. Required only if the cluster uses external etcd nodes.
etcd.ssh.sshUser (required if using external etcd)
SSH user for etcd nodes. Required only if the cluster uses external etcd nodes.
Using Password-Protected SSH Keys
If your SSH keys are password protected, you can use environment variables to provide the passphrases instead of including them in the configuration file:
EKSA_SSH_KEY_PASSPHRASE_CP: Passphrase for the control plane SSH keyEKSA_SSH_KEY_PASSPHRASE_ETCD: Passphrase for the etcd SSH key
When using these environment variables, you can leave the sshKey field empty in your configuration file.
Steps to Renew Certificates
-
Create the configuration file as described above (e.g.,
cert-renewal-config.yaml). -
Run the certificate renewal command:
eksctl anywhere renew certificates -f cert-renewal-config.yaml
You can set the log level verbosity using the -v or --verbosity flag:
eksctl anywhere renew certificates -f cert-renewal-config.yaml -v 9
You can also specify which component’s certificates to renew using the --component flag:
# Renew only control plane certificates
eksctl anywhere renew certificates -f cert-renewal-config.yaml --component control-plane

# Renew only etcd certificates
eksctl anywhere renew certificates -f cert-renewal-config.yaml --component etcd
This is useful when you want to renew certificates for only specific components rather than all components at once.
Renew certificates for a cluster with accessible nodes
For clusters that are accessible via kubectl, follow these steps:
-
Set the KUBECONFIG environment variable:
export KUBECONFIG=mgmt/mgmt-eks-a-cluster.kubeconfig -
Create a simplified configuration file without node IPs:
clusterName: my-cluster os: ubuntu controlPlane: ssh: sshKey: /path/to/private/key sshUser: ssh-user etcd: ssh: sshKey: /path/to/private/key sshUser: ssh-user -
Run the certificate renewal command:
eksctl anywhere renew certificates -f cert-renewal-config.yaml
What the command does
The eksctl anywhere renew certificates command automates the certificate renewal process by:
- Connecting to each node via SSH
- Backing up existing certificates
- For external etcd nodes:
- Regenerating etcd certificates
- Verifying etcd health
- For control plane nodes:
- Renewing all kubeadm certificates
- Restarting static pods
- Updating external etcd key cert (if present)
- Verifying API server health
- Verifying overall cluster health
10.3 - Script to renew cluster certificates
Note
While this script-based approach is supported, the recommended method
for certificate renewal is using the eksctl anywhere renew certificates command.
Get more information on EKS Anywhere cluster certificates from Monitoring Certificate Expiration
This script automates:
- Certificate renewal for etcd and control plane nodes
- Cleanup of temporary files if certificates are renewed and cluster is healthy
Prerequisites
- Admin machine with:
kubectl,yq,jq,scp,ssh, andsudoinstalled
- SSH access to all control plane and etcd nodes
Steps
- Setup environment variable:
export KUBECONFIG=<path-to-management-cluster-kubeconfig>
- Prepare a
keys-config.yamlfile
Add node and private key information of your control plane and/or external etcd to a file, such as keys-config.yaml:
clusterName: <cluster-name>
controlPlane:
  nodes:
  - <control-plane-1-ip>
  - <control-plane-2-ip>
  - <control-plane-3-ip>
  sshKey: <complete-path-to-private-ssh-key>
  sshUser: <ssh-user>
etcd:
  nodes:
  - <external-etcd-1-ip>
  - <external-etcd-2-ip>
  - <external-etcd-3-ip>
  sshKey: <complete-path-to-private-ssh-key>
  sshUser: <ssh-user>
- Download the Script
```bash
curl -O https://raw.githubusercontent.com/aws/eks-anywhere/refs/heads/main/scripts/renew_certificates.sh
chmod +x renew_certificates.sh
``````bash
curl -O https://raw.githubusercontent.com/aws/eks-anywhere/refs/heads/main/scripts/renew_certificates_bottlerocket.sh
chmod +x renew_certificates_bottlerocket.sh
```- Run the Script as a
sudouser
sudo ./renew_certificates.sh -f keys-config.yaml
What the Script Does
- Backs up:
- All etcd certificates (in case of external etcd)
- Control plane certificates
- Renews external etcd certificates
- Updates the Kubernetes secret
apiserver-etcd-clientif api server is reachable - Renews all kubeadm certificates
- Restarts static control plane pods
- Cleans up temporary certs and backup folders (only if certificates are renewed successfully and cluster is healthy)
10.4 - Manual steps to renew certificates
Note
While these manual steps renew the certificates, the recommended method
for certificate renewal is using the eksctl anywhere renew certificates command.
Certificates for external etcd and control plane nodes expire after 1 year in EKS Anywhere. This page shows the process for manually rotating certificates.
Get more information on EKS Anywhere cluster certificates from Monitoring Certificate Expiration
The following table lists the cluster certificate files:
| etcd node | control plane node |
|---|---|
| apiserver-etcd-client | apiserver-etcd-client |
| ca | ca |
| etcdctl-etcd-client | front-proxy-ca |
| peer | sa |
| server | etcd/ca.crt |
| apiserver-kubelet-client | |
| apiserver | |
| front-proxy-client |
NOTE: You can rotate certificates by following the steps given below. You cannot rotate the
cacertificate because it is the root certificate. Note that the commands used for Bottlerocket nodes are different than those for Ubuntu and RHEL nodes.
External etcd nodes
If your cluster is using external etcd nodes, you need to renew the etcd node certificates first.
Note
You can check for external etcd nodes by running the following command:
kubectl get etcdadmcluster -A
- SSH into each etcd node and run the following commands. Etcd automatically detects the new certificates and deprecates its old certificates.
# backup certs
cd /etc/etcd
sudo cp -r pki pki.bak
sudo rm pki/*
sudo cp pki.bak/ca.* pki

# run certificates join phase to regenerate the deleted certificates
sudo etcdadm join phase certificates http://eks-a-etcd-dumb-url
# you would be in the admin container when you ssh to the Bottlerocket machine
# open a root shell
sudo sheltie
# pull the image
IMAGE_ID=$(apiclient get | apiclient exec admin jq -r '.settings["host-containers"]["kubeadm-bootstrap"].source')
ctr image pull ${IMAGE_ID}
# backup certs
cd /var/lib/etcd
cp -r pki pki.bak
rm pki/*
cp pki.bak/ca.* pki
# recreate certificates
ctr run \
--mount type=bind,src=/var/lib/etcd/pki,dst=/etc/etcd/pki,options=rbind:rw \
--net-host \
--rm \
${IMAGE_ID} tmp-cert-renew \
/opt/bin/etcdadm join phase certificates http://eks-a-etcd-dumb-url --init-system kubelet- Verify your etcd node is running correctly
sudo etcdctl --cacert=/etc/etcd/pki/ca.crt --cert=/etc/etcd/pki/etcdctl-etcd-client.crt --key=/etc/etcd/pki/etcdctl-etcd-client.key member listETCD_CONTAINER_ID=$(ctr -n k8s.io c ls | grep -w "etcd-io" | cut -d " " -f1 | tail -1)
ctr -n k8s.io t exec -t --exec-id etcd ${ETCD_CONTAINER_ID} etcdctl \
--cacert=/var/lib/etcd/pki/ca.crt \
--cert=/var/lib/etcd/pki/server.crt \
--key=/var/lib/etcd/pki/server.key \
member list- If the above command fails due to multiple etcd containers existing, then navigate to
/var/log/containers/etcdand confirm which container was running during the issue timeframe (this container would be the ‘stale’ container). Delete this older etcd once you have renewed the certs and the new etcd container will be able to enter a functioning state. If you don’t do this, the two etcd containers will stay indefinitely and the etcd will not recover.
-
Repeat the above steps for all etcd nodes.
-
Save the
apiserver-etcd-clientcrtandkeyfile from one of the etcd nodes. They need to be updated in the following secret in management cluster. You will also need them when renewing the certificates on control plane nodes.
kubectl create secret generic ${cluster-name}-apiserver-etcd-client --from-file=tls.crt=./apiserver-etcd-client.crt --from-file=tls.key=./apiserver-etcd-client.key --type=cluster.x-k8s.io/secret -n eksa-system --dry-run=client -o yaml | kubectl apply -f -
Note
On Bottlerocket control plane nodes, thecertificate filename of apiserver-etcd-client is server-etcd-client.crt instead of apiserver-etcd-client.crt.
Control plane nodes
When there are no external etcd nodes, you only need to rotate the certificates for control plane nodes, as etcd certificates are managed by kubeadm when there are no external etcd nodes.
- SSH into each control plane node and run the following commands.
sudo kubeadm certs renew all# you would be in the admin container when you ssh to the Bottlerocket machine
# open root shell
sudo sheltie
# pull the image
IMAGE_ID=$(apiclient get | apiclient exec admin jq -r '.settings["host-containers"]["kubeadm-bootstrap"].source')
ctr image pull ${IMAGE_ID}
# renew certs
# you may see missing etcd certs error, which is expected if you have external etcd nodes
ctr run \
--mount type=bind,src=/var/lib/kubeadm,dst=/var/lib/kubeadm,options=rbind:rw \
--mount type=bind,src=/var/lib/kubeadm,dst=/etc/kubernetes,options=rbind:rw \
--rm \
${IMAGE_ID} tmp-cert-renew \
/opt/bin/kubeadm certs renew all- Verify the certificates have been rotated.
sudo kubeadm certs check-expiration# you may see missing etcd certs error, which is expected if you have external etcd nodes
ctr run \
--mount type=bind,src=/var/lib/kubeadm,dst=/var/lib/kubeadm,options=rbind:rw \
--mount type=bind,src=/var/lib/kubeadm,dst=/etc/kubernetes,options=rbind:rw \
--rm \
${IMAGE_ID} tmp-cert-renew \
/opt/bin/kubeadm certs check-expiration-
If you have external etcd nodes, manually replace the
server-etcd-client.crtandapiserver-etcd-client.keyfiles in the/etc/kubernetes/pki(or/var/lib/kubeadm/pkiin Bottlerocket) folder with the files you saved from any etcd node.- For Bottlerocket:
cp apiserver-etcd-client.key /tmp/ cp server-etcd-client.crt /tmp/ sudo sheltie cp /run/host-containerd/io.containerd.runtime.v2.task/default/admin/rootfs/tmp/apiserver-etcd-client.key /var/lib/kubeadm/pki/ cp /run/host-containerd/io.containerd.runtime.v2.task/default/admin/rootfs/tmp/server-etcd-client.crt /var/lib/kubeadm/pki/ -
Restart static control plane pods.
-
For Ubuntu and RHEL: temporarily move all manifest files from
/etc/kubernetes/manifests/and wait for 20 seconds, then move the manifests back to this file location. -
For Bottlerocket: re-enable the static pods:
# Disable static pods
apiclient get | apiclient exec admin jq -r '.settings.kubernetes["static-pods"] | keys[]' | xargs -n 1 -I {} apiclient set settings.kubernetes.static-pods.{}.enabled=false

# IMPORTANT: Wait 30 seconds to ensure all containers are fully stopped
sleep 30

# Re-enable static pods
apiclient get | apiclient exec admin jq -r '.settings.kubernetes["static-pods"] | keys[]' | xargs -n 1 -I {} apiclient set settings.kubernetes.static-pods.{}.enabled=true
Important
The 30-second sleep between disabling and re-enabling static pods is critical to prevent duplicate containers from being scheduled. Without this sleep, multiple instances of kube-apiserver, kube-scheduler, kube-controller-manager, and etcd may run simultaneously, causing cluster instability and preventing proper certificate rotation.You can verify Pods restarting by running
kubectlfrom your Admin machine. -
-
Repeat the above steps for all control plane nodes.
You can similarly use the above steps to rotate a single certificate instead of all certificates.
Kubelet
If kubeadm certs check-expiration is happy, but kubectl commands against the cluster fail with x509: certificate has expired or is not yet valid, then it’s likely that the kubelet certs did not rotate. To rotate them, SSH back into one of the control plane nodes and do the following.
# backup certs
cd /var/lib/kubelet
cp -r pki pki.bak
rm pki/*

systemctl restart kubelet
Note
When the control plane endpoint is unavailable because the API server pod is not running, the kubelet service may fail to start all static pods in the container runtime. Its logs may contain failed to connect to apiserver.
If this occurs, update kubelet-client-current.pem by running the following commands:
cat /etc/kubernetes/admin.conf | grep client-certificate-data: | sed 's/^.*: //' | base64 -d > /var/lib/kubelet/pki/kubelet-client-current.pem
cat /etc/kubernetes/admin.conf | grep client-key-data: | sed 's/^.*: //' | base64 -d >> /var/lib/kubelet/pki/kubelet-client-current.pem
systemctl restart kubelet
cat /var/lib/kubeadm/admin.conf | grep client-certificate-data: | apiclient exec admin sed 's/^.*: //' | base64 -d > /var/lib/kubelet/pki/kubelet-client-current.pem
cat /var/lib/kubeadm/admin.conf | grep client-key-data: | apiclient exec admin sed 's/^.*: //' | base64 -d >> /var/lib/kubelet/pki/kubelet-client-current.pem
systemctl restart kubelet
Worker nodes
If worker nodes are in Not Ready state and the kubelet fails to bootstrap then it’s likely that the kubelet client-cert kubelet-client-current.pem did not automatically rotate. If this rotation process fails you might see errors such as x509: certificate has expired or is not yet valid in kube-apiserver logs. To fix the issue, do the following:
-
Backup and delete
/etc/kubernetes/kubelet.conf(ignore this file for BottleRocket) and/var/lib/kubelet/pki/kubelet-client*from the failed node. -
From a working control plane node in the cluster that has /etc/kubernetes/pki/ca.key execute
kubeadm kubeconfig user --org system:nodes --client-name system:node:$NODE > kubelet.conf.$NODEmust be set to the name of the existing failed node in the cluster. Modify the resulted kubelet.conf manually to adjust the cluster name and server endpoint, or passkubeconfig user --config(modifyingkubelet.conffile can be ignored for BottleRocket). -
For Ubuntu or RHEL nodes, Copy this resulted
kubelet.confto/etc/kubernetes/kubelet.confon the failed node. Restart the kubelet (systemctl restart kubelet) on the failed node and wait for/var/lib/kubelet/pki/kubelet-client-current.pemto be recreated. Manually edit thekubelet.confto point to the rotated kubelet client certificates by replacing client-certificate-data and client-key-data with/var/lib/kubelet/pki/kubelet-client-current.pemand/var/lib/kubelet/pki/kubelet-client-current.pem. For BottleRocket, manually copy over the base64 decoded values ofclient-certificate-dataandclient-key-datainto thekubelet-client-current.pemon worker node.
kubeadm kubeconfig user --org system:nodes --client-name system:node:$NODE > kubelet.conf (from control plane node with renewed `/etc/kubernetes/pki/ca.key`)
cp kubelet.conf /etc/kubernetes/kubelet.conf (on failed worker node)
# From control plane node with renewed certs
# you would be in the admin container when you ssh to the Bottlerocket machine
# open root shell
sudo sheltie
# pull the image
IMAGE_ID=$(apiclient get | apiclient exec admin jq -r '.settings["host-containers"]["kubeadm-bootstrap"].source')
ctr image pull ${IMAGE_ID}
# set NODE value to the failed worker node name.
ctr run \
--mount type=bind,src=/var/lib/kubeadm,dst=/var/lib/kubeadm,options=rbind:rw \
--mount type=bind,src=/var/lib/kubeadm,dst=/etc/kubernetes,options=rbind:rw \
--rm \
${IMAGE_ID} tmp-cert-renew \
/opt/bin/kubeadm kubeconfig user --org system:nodes --client-name system:node:$NODE
# from the stdout base64 decode `client-certificate-data` and `client-key-data`
# copy client-cert to kubelet-client-current.pem on worker node
echo -n `<base64 decoded client-certificate-data value>` > kubelet-client-current.pem
# append client key to kubelet-client-current.pem on worker node
echo -n `<base64 decoded client-key-data value>` >> kubelet-client-current.pem- Restart the kubelet. Make sure the node becomes
Ready.
See the Kubernetes documentation for more details on manually updating kubelet client certificate.
Post Renewal
Once all the certificates are valid, verify the kcp object on the affected cluster(s) is not paused by running kubectl describe kcp -n eksa-system | grep cluster.x-k8s.io/paused. If it is paused, then this usually indicates an issue with the etcd cluster. Check the logs for pods under the etcdadm-controller-system namespace for any errors.
If the logs indicate an issue with the etcd endpoints, then you need to update spec.clusterConfiguration.etcd.endpoints in the cluster’s kubeadmconfig resource: kubectl edit kcp -n eksa-system
Example:
etcd:
   external:
     caFile: /var/lib/kubeadm/pki/etcd/ca.crt
      certFile: /var/lib/kubeadm/pki/server-etcd-client.crt
      endpoints:
      - https://xxx.xxx.xxx.xxx:2379
      - https://xxx.xxx.xxx.xxx:2379
      - https://xxx.xxx.xxx.xxx:2379
What do I do if my local kubeconfig has expired?
Your local kubeconfig, used to interact with the cluster, contains a certificate that expires after 1 year. When you rotate cluster certificates, a new kubeconfig with a new certificate is created as a Secret in the cluster. If you do not retrieve the new kubeconfig and your local kubeconfig certificate expires, you will receive the following error:
Error: Couldn't get current Server API group list: the server has asked for the client to provide credentials error: you must be logged in to the server.
This error typically occurs when the cluster certificates have been renewed or extended during the upgrade process. To resolve this issue, you need to update your local kubeconfig file with the new cluster credentials.
You can extract your new kubeconfig using the following steps.
- You can extract your new kubeconfig by SSHing to one of the Control Plane nodes, exporting kubeconfig from the secret object, and copying kubeconfig file to
/tmpdirectory, as shown here:
ssh -i <YOUR_PRIVATE_KEY> <USER_NAME>@<YOUR_CONTROLPLANE_IP> # USER_NAME should be ec2-user for bottlerocket, ubuntu for Ubuntu ControlPlane machine Operating System
export CLUSTER_NAME="<YOUR_CLUSTER_NAME_HERE>"

cat /etc/kubernetes/admin.conf
export KUBECONFIG="/etc/kubernetes/admin.conf"

kubectl get secret ${CLUSTER_NAME}-kubeconfig -n eksa-system -o yaml -o=jsonpath="{.data.value}" | base64 --decode > /tmp/user-admin.kubeconfig
# You would need to be in the admin container when you ssh to the Bottlerocket machine
# open a root shell
sudo sheltie
cat /var/lib/kubeadm/admin.conf
cat /var/lib/kubeadm/admin.conf > /run/host-containerd/io.containerd.runtime.v2.task/default/admin/rootfs/tmp/kubernetes-admin.kubeconfig
exit # exit from the sudo sheltie container
export CLUSTER_NAME="<YOUR_CLUSTER_NAME_HERE>"
export KUBECONFIG="/tmp/kubernetes-admin.kubeconfig"
kubectl get secret ${CLUSTER_NAME}-kubeconfig -n eksa-system -o yaml -o=jsonpath="{.data.value}" | base64 --decode > /tmp/user-admin.kubeconfig
exit # exit from the Control Plane Machine- From your admin machine, download the kubeconfig file from the ControlPlane node and use it to access your Kubernetes Cluster.
ssh <ADMIN_MACHINE_IP>

export CONTROLPLANE_IP="<CONTROLPLANE_IP_ADDR>"
sftp -i <keypair> <USER_NAME>@${CONTROLPLANE_IP}:/tmp/user-admin.kubeconfig . # USER_NAME should be ec2-user for bottlerocket, ubuntu for Ubuntu ControlPlane machine

ls -ltr
export KUBECONFIG="user-admin.kubeconfig"

kubectl get pods
11 - etcd backup and restore
-
External etcd backup and restore: See the External etcd backup/restore section for detailed instructions on backing up and restoring external etcd clusters.
-
Stacked etcd backup and restore: For stacked etcd topology, refer to the upstream Kubernetes documentation: Backing up an etcd cluster .
11.1 - External etcd backup and restore
Note
External ETCD topology is supported for vSphere, CloudStack, Snow and Nutanix clusters, but not yet for Bare Metal clusters.This page contains steps for backing up a cluster by taking an ETCD snapshot, and restoring the cluster from a snapshot.
Use case
EKS-Anywhere clusters use ETCD as the backing store. Taking a snapshot of ETCD backs up the entire cluster data. This can later be used to restore a cluster back to an earlier state if required.
ETCD backups can be taken prior to cluster upgrade, so if the upgrade doesn’t go as planned, you can restore from the backup.
Important
Restoring to a previous cluster state is a destructive and destablizing action to take on a running cluster. It should be considered only when all other options have been exhausted.
If you are able to retrieve data using the Kubernetes API server, then etcd is available and you should not restore using an etcd backup.
11.1.1 - Bottlerocket
Note
External etcd topology is supported for vSphere, CloudStack, Snow and Nutanix clusters, but not yet for Bare Metal clusters.This guide requires some common shell tools such as:
grepxargssshscpcut
Make sure you have these installed on your admin machine before continuing.
Admin machine environment variables setup
On your admin machine, set the following environment variables that will later come in handy
export MANAGEMENT_CLUSTER_NAME="eksa-management"     # Set this to the management cluster name
export CLUSTER_NAME="eksa-workload"                  # Set this to name of the cluster you want to backup (management or workload)
export SSH_KEY="path-to-private-ssh-key"             # Set this to the cluster's private SSH key path
export SSH_USERNAME="ec2-user"                       # Set this to the SSH username
export SNAPSHOT_PATH="/tmp/snapshot.db"              # Set this to the path where you want the etcd snapshot to be saved

export MANAGEMENT_KUBECONFIG=${MANAGEMENT_CLUSTER_NAME}/${MANAGEMENT_CLUSTER_NAME}-eks-a-cluster.kubeconfig
export CLUSTER_KUBECONFIG=${CLUSTER_NAME}/${CLUSTER_NAME}-eks-a-cluster.kubeconfig
export ETCD_ENDPOINTS=$(kubectl --kubeconfig=${MANAGEMENT_KUBECONFIG} -n eksa-system get machines --selector cluster.x-k8s.io/cluster-name=${CLUSTER_NAME},cluster.x-k8s.io/etcd-cluster=${CLUSTER_NAME}-etcd -ojsonpath='{.items[*].status.addresses[0].address}')
export CONTROL_PLANE_ENDPOINTS=($(kubectl --kubeconfig=${MANAGEMENT_KUBECONFIG} -n eksa-system get machines --selector cluster.x-k8s.io/control-plane-name=${CLUSTER_NAME} -ojsonpath='{.items[*].status.addresses[0].address}'))
Prepare etcd nodes for backup and restore
Install SCP on the etcd nodes:
echo -n ${ETCD_ENDPOINTS} | xargs -I {} -d" " ssh -o StrictHostKeyChecking=no -i ${SSH_KEY} ${SSH_USERNAME}@{} sudo yum -y install openssh-clients
Create etcd Backup
Make sure to setup the admin environment variables and prepare your ETCD nodes for backup before moving forward.
-
SSH into one of the etcd nodes
export ETCD_NODE=$(echo -n ${ETCD_ENDPOINTS} | cut -d " " -f1) ssh -i ${SSH_KEY} ${SSH_USERNAME}@${ETCD_NODE} -
Drop into Bottlerocket’s root shell
sudo sheltie -
Set these environment variables
# get the container ID corresponding to etcd pod export ETCD_CONTAINER_ID=$(ctr -n k8s.io c ls | grep -w "etcd-io" | head -1 | cut -d " " -f1) # get the etcd endpoint export ETCD_ENDPOINT=$(cat /etc/kubernetes/manifests/etcd | grep -wA1 ETCD_ADVERTISE_CLIENT_URLS | tail -1 | grep -oE '[^ ]+$') -
Create the etcd snapshot
    ctr -n k8s.io t exec -t --exec-id etcd ${ETCD_CONTAINER_ID} etcdctl \
        --endpoints=${ETCD_ENDPOINT} \
        --cacert=/var/lib/etcd/pki/ca.crt \
        --cert=/var/lib/etcd/pki/server.crt \
        --key=/var/lib/etcd/pki/server.key \
        snapshot save /var/lib/etcd/data/etcd-backup.db
ctr -n k8s.io t exec -t --exec-id etcd ${ETCD_CONTAINER_ID} etcdctl \ --endpoints=${ETCD_ENDPOINT} \ --cacert=/var/lib/etcd/pki/ca.crt \ --cert=/var/lib/etcd/pki/server.crt \ --key=/var/lib/etcd/pki/server.key \ snapshot save /var/lib/etcd/data/etcd-backup.db -
Move the snapshot to another directory and set proper permissions
mv /var/lib/etcd/data/etcd-backup.db /run/host-containerd/io.containerd.runtime.v2.task/default/admin/rootfs/home/ec2-user/snapshot.db chown 1000 /run/host-containerd/io.containerd.runtime.v2.task/default/admin/rootfs/home/ec2-user/snapshot.db -
Exit out of etcd node. You will have to type
exittwice to get back to the admin machineexit exit -
Copy over the snapshot from the etcd node
scp -i ${SSH_KEY} ${SSH_USERNAME}@${ETCD_NODE}:/home/ec2-user/snapshot.db ${SNAPSHOT_PATH}
You should now have the etcd snapshot in your current working directory.
Restore etcd from Backup
Make sure to setup the admin environment variables and prepare your etcd nodes for restore before moving forward.
-
Pause cluster reconciliation
Before starting the process of restoring etcd, you have to pause some cluster reconciliation objects so EKS Anywhere doesn’t try to perform any operations on the cluster while you restore the etcd snapshot.
kubectl annotate clusters.anywhere.eks.amazonaws.com $CLUSTER_NAME anywhere.eks.amazonaws.com/paused=true --kubeconfig=$MANAGEMENT_KUBECONFIG kubectl patch clusters.cluster.x-k8s.io $CLUSTER_NAME --type merge -p '{"spec":{"paused": true}}' -n eksa-system --kubeconfig=$MANAGEMENT_KUBECONFIG -
Stop control plane core components
You also need to stop the control plane core components so the Kubernetes API server doesn’t try to communicate with etcd while you perform etcd operations.
- You can use this command to get the control plane node IPs which you can use to SSH
echo -n ${CONTROL_PLANE_ENDPOINTS[@]} | xargs -I {} -d " " echo "{}"- SSH into the node and stop the core components. You must do this for each control plane node.
# SSH into the control plane node using the IPs printed in previous command ssh -i ${SSH_KEY} ${SSH_USERNAME}@<Control Plane IP from previous command> # drop into bottlerocket root shell sudo sheltie # create a temporary directory and move the static manifests to it mkdir -p /tmp/temp-manifests mv /etc/kubernetes/manifests/* /tmp/temp-manifests- Exit out of the Bottlerocket node
# exit from bottlerocket's root shell
exit

# exit from bottlerocket node
exit
Repeat these steps for each control plane node.
-
Copy the backed-up etcd snapshot to all the etcd nodes
echo -n ${ETCD_ENDPOINTS} | xargs -I {} -d" " scp -o StrictHostKeyChecking=no -i ${SSH_KEY} ${SNAPSHOT_PATH} ${SSH_USERNAME}@{}:/home/ec2-user -
Perform the etcd restore
For this step, you have to SSH into each etcd node and run the restore command.
- Get etcd nodes IPs for SSH’ing into the nodes
# This should print out all the etcd IPs
echo -n ${ETCD_ENDPOINTS} | xargs -I {} -d " " echo "{}"
# SSH into the etcd node using the IPs printed in previous command ssh -i ${SSH_KEY} ${SSH_USERNAME}@<etcd IP from previous command> # drop into bottlerocket\'s root shell sudo sheltie # copy over the etcd snapshot to the appropriate location cp /run/host-containerd/io.containerd.runtime.v2.task/default/admin/rootfs/home/ec2-user/snapshot.db /var/lib/etcd/data/etcd-snapshot.db # setup the etcd environment export ETCD_NAME=$(cat /etc/kubernetes/manifests/etcd | grep -wA1 ETCD_NAME | tail -1 | grep -oE '[^ ]+$') export ETCD_INITIAL_ADVERTISE_PEER_URLS=$(cat /etc/kubernetes/manifests/etcd | grep -wA1 ETCD_INITIAL_ADVERTISE_PEER_URLS | tail -1 | grep -oE '[^ ]+$') export ETCD_INITIAL_CLUSTER=$(cat /etc/kubernetes/manifests/etcd | grep -wA1 ETCD_INITIAL_CLUSTER | tail -1 | grep -oE '[^ ]+$') export INITIAL_CLUSTER_TOKEN="etcd-cluster-1" # get the container ID corresponding to etcd pod export ETCD_CONTAINER_ID=$(ctr -n k8s.io c ls | grep -w "etcd-io" | head -1 | cut -d " " -f1)# run the restore command ctr -n k8s.io t exec -t --exec-id etcd ${ETCD_CONTAINER_ID} etcdctl \ snapshot restore /var/lib/etcd/data/etcd-snapshot.db \ --name=${ETCD_NAME} \ --initial-cluster=${ETCD_INITIAL_CLUSTER} \ --initial-cluster-token=${INITIAL_CLUSTER_TOKEN} \ --initial-advertise-peer-urls=${ETCD_INITIAL_ADVERTISE_PEER_URLS} \ --cacert=/var/lib/etcd/pki/ca.crt \ --cert=/var/lib/etcd/pki/server.crt \ --key=/var/lib/etcd/pki/server.key# run the restore command ctr -n k8s.io t exec -t --exec-id etcd ${ETCD_CONTAINER_ID} etcdctl \ snapshot restore /var/lib/etcd/data/etcd-snapshot.db \ --name=${ETCD_NAME} \ --initial-cluster=${ETCD_INITIAL_CLUSTER} \ --initial-cluster-token=${INITIAL_CLUSTER_TOKEN} \ --initial-advertise-peer-urls=${ETCD_INITIAL_ADVERTISE_PEER_URLS} \ --cacert=/var/lib/etcd/pki/ca.crt \ --cert=/var/lib/etcd/pki/server.crt \ --key=/var/lib/etcd/pki/server.key# move the etcd data files out of the container to a temporary location mkdir -p /tmp/etcd-files $(ctr -n k8s.io snapshot mounts /tmp/etcd-files/ ${ETCD_CONTAINER_ID}) mv /tmp/etcd-files/${ETCD_NAME}.etcd /tmp/ # stop the etcd pod mkdir -p /tmp/temp-manifests mv /etc/kubernetes/manifests/* /tmp/temp-manifests # backup the previous etcd data files mv /var/lib/etcd/data/member /var/lib/etcd/data/member.backup # copy over the new etcd data files to the data directory mv /tmp/${ETCD_NAME}.etcd/member /var/lib/etcd/data/ # copy the WAL folder for the cluster member data before the restore to the data/member directory cp -r /var/lib/etcd/data/member.backup/wal /var/lib/etcd/data/member # re-start the etcd pod mv /tmp/temp-manifests/* /etc/kubernetes/manifests/- Cleanup temporary files and folders
# clean up all the temporary files umount /tmp/etcd-files rm -rf /tmp/temp-manifests /tmp/${ETCD_NAME}.etcd /tmp/etcd-files/ /var/lib/etcd/data/etcd-snapshot.db- Exit out of the Bottlerocket node
# exit from bottlerocket's root shell
exit

# exit from bottlerocket node
exit
Repeat this step for each etcd node.
-
Restart control plane core components
- You can use this command to get the control plane node IPs which you can use to SSH
echo -n ${CONTROL_PLANE_ENDPOINTS[@]} | xargs -I {} -d " " echo "{}"- SSH into the node and restart the core components. You must do this for each control plane node.
# SSH into the control plane node using the IPs printed in previous command ssh -i ${SSH_KEY} ${SSH_USERNAME}@<Control Plane IP from previous command> # drop into bottlerocket root shell sudo sheltie # move the static manifests back to the right directory mv /tmp/temp-manifests/* /etc/kubernetes/manifests/- Exit out of the Bottlerocket node
# exit from bottlerocket's root shell
exit

# exit from bottlerocket node
exit
Repeat these steps for each control plane node.
-
Unpause the cluster reconcilers
Once the etcd restore is complete, you can resume the cluster reconcilers.
kubectl annotate clusters.anywhere.eks.amazonaws.com $CLUSTER_NAME anywhere.eks.amazonaws.com/paused- --kubeconfig=$MANAGEMENT_KUBECONFIG

kubectl patch clusters.cluster.x-k8s.io $CLUSTER_NAME --type merge -p '{"spec":{"paused": false}}' -n eksa-system --kubeconfig=$MANAGEMENT_KUBECONFIG
At this point you should have the etcd cluster restored to snapshot. To verify, you can run the following commands:
kubectl --kubeconfig=${CLUSTER_KUBECONFIG} get nodes

kubectl --kubeconfig=${CLUSTER_KUBECONFIG} get pods -A
You may also need to restart some deployments/daemonsets manually if they are stuck in an unhealthy state.
11.1.2 - Ubuntu and RHEL
Note
External etcd topology is supported for vSphere, CloudStack, Snow and Nutanix clusters, but not yet for Bare Metal clusters.This page contains steps for backing up a cluster by taking an etcd snapshot, and restoring the cluster from a snapshot. These steps are for an EKS Anywhere cluster provisioned using the external etcd topology (selected by default) with Ubuntu OS.
Use case
EKS-Anywhere clusters use etcd as the backing store. Taking a snapshot of etcd backs up the entire cluster data. This can later be used to restore a cluster back to an earlier state if required. Etcd backups can be taken prior to cluster upgrade, so if the upgrade doesn’t go as planned you can restore from the backup.
Backup
Etcd offers a built-in snapshot mechanism. You can take a snapshot using the etcdctl snapshot save or etcdutl snapshot save command by following the steps given below.
Note
The following commands use ec2-user as the username. For EKS Anywhere on vSphere, Bare Metal, and Snow, the default username is ec2-user. For EKS Anywhere on Apache CloudStack, the default username is capc. For EKS Anywhere on Nutanix, the default username is eksa. The default username cannot be changed.- Login to any one of the etcd VMs
ssh -i $PRIV_KEY ec2-user@$ETCD_VM_IP
- Run the etcdctl or etcdutl command to take a snapshot with the following steps
    sudo su
    source /etc/etcd/etcdctl.env
    etcdctl snapshot save snapshot.db
    chown ec2-user snapshot.db
sudo su etcdutl snapshot save snapshot.db chown ec2-user snapshot.db
- Exit the VM. Copy the snapshot from the VM to your local/admin setup where you can save snapshots in a secure place. Before running scp, make sure you don’t already have a snapshot file saved by the same name locally.
scp -i $PRIV_KEY ec2-user@$ETCD_VM_IP:/home/ec2-user/snapshot.db .
NOTE: This snapshot file contains all information stored in the cluster, so make sure you save it securely (encrypt it).
Restore
Restoring etcd is a 2-part process. The first part is restoring etcd using the snapshot, creating a new data-dir for etcd. The second part is replacing the current etcd data-dir with the one generated after restore. During etcd data-dir replacement, we cannot have any kube-apiserver instances running in the cluster. So we will first stop all instances of kube-apiserver and other controlplane components using the following steps for every controlplane VM:
Pausing Etcdadm cluster and control plane machine health check reconcile
During restore, it is required to pause the Etcdadm controller reconcile and the control plane machine healths checks for the target cluster (whether it is management or workload cluster). To do that, you need to add a cluster.x-k8s.io/paused annotation to the target cluster’s etcdadmclusters and machinehealthchecks resources. For example,
kubectl annotate clusters.anywhere.eks.amazonaws.com $CLUSTER_NAME anywhere.eks.amazonaws.com/paused=true --kubeconfig mgmt-cluster.kubeconfig

kubectl patch clusters.cluster.x-k8s.io $CLUSTER_NAME --type merge -p '{"spec":{"paused": true}}' -n eksa-system --kubeconfig mgmt-cluster.kubeconfig
Stopping the controlplane components
- Login to a controlplane VM
ssh -i $PRIV_KEY ec2-user@$CONTROLPLANE_VM_IP
- Stop controlplane components by moving the static pod manifests under a temp directory:
sudo su
mkdir temp-manifests
mv /etc/kubernetes/manifests/*.yaml temp-manifests
- Repeat these steps for all other controlplane VMs
After this you can restore etcd from a saved snapshot using the snapshot save command following the steps given below.
Restoring from the snapshot
- The snapshot file should be made available in every etcd VM of the cluster. You can copy it to each etcd VM using this command:
scp -i $PRIV_KEY snapshot.db ec2-user@$ETCD_VM_IP:/home/ec2-user
- To run the etcdctl or etcdutl snapshot restore command, you need to provide the following configuration parameters:
- name: This is the name of the etcd member. The value of this parameter should match the value used while starting the member. This can be obtained by running:
sudo su
export ETCD_NAME=$(cat /etc/etcd/etcd.env | grep ETCD_NAME | awk -F'=' '{print $2}')
- initial-advertise-peer-urls: This is the advertise peer URL with which this etcd member was configured. It should be the exact value with which this etcd member was started. This can be obtained by running:
export ETCD_INITIAL_ADVERTISE_PEER_URLS=$(cat /etc/etcd/etcd.env | grep ETCD_INITIAL_ADVERTISE_PEER_URLS | awk -F'=' '{print $2}')
- initial-cluster: This should be a comma-separated mapping of etcd member name and its peer URL. For this, get the
ETCD_NAMEandETCD_INITIAL_ADVERTISE_PEER_URLSvalues for each member and join them. And then use this exact value for all etcd VMs. For example, for a 3 member etcd cluster this is what the value would look like (The command below cannot be run directly without substituting the required variables and is meant to be an example)
export ETCD_INITIAL_CLUSTER=${ETCD_NAME_1}=${ETCD_INITIAL_ADVERTISE_PEER_URLS_1},${ETCD_NAME_2}=${ETCD_INITIAL_ADVERTISE_PEER_URLS_2},${ETCD_NAME_3}=${ETCD_INITIAL_ADVERTISE_PEER_URLS_3}
- initial-cluster-token: Set this to a unique value and use the same value for all etcd members of the cluster. It can be any value such as
etcd-cluster-1as long as it hasn’t been used before.
- Gather the required env vars for the restore command
cat <<EOF >> restore.env
export ETCD_NAME=$(cat /etc/etcd/etcd.env | grep ETCD_NAME | awk -F'=' '{print $2}')
export ETCD_INITIAL_ADVERTISE_PEER_URLS=$(cat /etc/etcd/etcd.env | grep ETCD_INITIAL_ADVERTISE_PEER_URLS | awk -F'=' '{print $2}')
EOF

cat /etc/etcd/etcdctl.env >> restore.env
-
Make sure you form the correct
ETCD_INITIAL_CLUSTERvalue using all etcd members, and set it as an env var in the restore.env file created in the above step. -
Once you have obtained all the right values, run the following commands to restore etcd replacing the required values:
    sudo su
    source restore.env
    etcdctl snapshot restore snapshot.db \
        --name=${ETCD_NAME} \
        --initial-cluster=${ETCD_INITIAL_CLUSTER} \
        --initial-cluster-token=etcd-cluster-1 \
        --initial-advertise-peer-urls=${ETCD_INITIAL_ADVERTISE_PEER_URLS}
sudo su source restore.env etcdutl snapshot restore snapshot.db \ --name=${ETCD_NAME} \ --initial-cluster=${ETCD_INITIAL_CLUSTER} \ --initial-cluster-token=etcd-cluster-1 \ --initial-advertise-peer-urls=${ETCD_INITIAL_ADVERTISE_PEER_URLS} -
This is going to create a new data-dir for the restored contents under a new directory
{ETCD_NAME}.etcd. To start using this, restart etcd with the new data-dir with the following steps:
systemctl stop etcd.service
mv /var/lib/etcd/member /var/lib/etcd/member.bak
mv ${ETCD_NAME}.etcd/member /var/lib/etcd/
- Perform this directory swap on all etcd VMs, and then start etcd again on those VMs
systemctl start etcd.service
NOTE: Until the etcd process is started on all VMs, it might appear stuck on the VMs where it was started first, but this should be temporary.
Starting the controlplane components
- Login to a controlplane VM
ssh -i $PRIV_KEY ec2-user@$CONTROLPLANE_VM_IP
- Start the controlplane components by moving back the static pod manifests from under the temp directory to the /etc/kubernetes/manifests directory:
mv temp-manifests/*.yaml /etc/kubernetes/manifests
- Repeat these steps for all other controlplane VMs
- It may take a few minutes for the kube-apiserver and the other components to get restarted. After this you should be able to access all objects present in the cluster at the time the backup was taken.
Resuming Etcdadm cluster and control plane machine health checks reconcile
Resume Etcdadm cluster reconcile and control plane machine health checks for the target cluster by removing the cluster.x-k8s.io/paused annotation in the target cluster’s resource. For example,
kubectl annotate clusters.anywhere.eks.amazonaws.com $CLUSTER_NAME anywhere.eks.amazonaws.com/paused- --kubeconfig mgmt-cluster.kubeconfig

kubectl patch clusters.cluster.x-k8s.io $CLUSTER_NAME --type merge -p '{"spec":{"paused": false}}' -n eksa-system --kubeconfig mgmt-cluster.kubeconfig
12 - Reliability
This section covers features and best practices for maintaining reliable EKS Anywhere cluster operations and upgrades.
Reliability Features
EKS Anywhere includes mechanisms to help ensure operational reliability:
- Admission Webhook Protection: Prevents custom admission webhooks from interfering with system operations and cluster upgrades
- Cluster Validation: Pre-flight checks identify potential issues before cluster creation or upgrades
- Support Bundle Collection: Diagnostic data collection for troubleshooting
Best Practices
For reliable cluster operations:
- Enable admission webhook protection for production clusters
- Keep clusters up-to-date with the latest EKS Anywhere releases
- Monitor cluster health and resource utilization
- Test upgrades in non-production environments before production
- Maintain backup and disaster recovery procedures
Related Documentation
12.1 - Admission Webhook Protection
Custom admission webhooks installed in Kubernetes clusters can interfere with cluster upgrade operations and normal cluster functioning. EKS Anywhere provides an admission webhook protection mechanism to prevent webhook interference with system operations.
Overview
The admission webhook protection feature uses the upstream EKS-Distro admission webhook exclusion mechanism that AWS EKS uses to protect system operations during cluster upgrades and normal operations. When enabled, custom admission webhooks are prevented from intercepting operations on specific system resources.
Faulty or misconfigured admission webhooks can block cluster upgrades, disrupt networking components such as Cilium, or prevent cluster self-healing by targeting control plane resources. This feature protects critical operations without modifying existing webhook configurations.
Note
This feature is only available for Kubernetes version 1.31 and later. It requires kubeadm v1beta4 API support for configuring API server environment variables.Configuration
Enable admission webhook protection by adding the skipAdmissionForSystemResources field to your cluster specification:
apiVersion: anywhere.eks.amazonaws.com/v1alpha1
kind: Cluster
metadata:
  name: my-cluster
spec:
  controlPlaneConfiguration:
    skipAdmissionForSystemResources: true
    count: 3
    endpoint:
      host: "198.51.100.10"
    machineGroupRef:
      kind: VSphereMachineConfig
      name: my-cluster-cp
  kubernetesVersion: "1.33"
Default Behavior
- Current default:
nilorfalse(opt-in - feature disabled by default) - Recommendation: Enable this feature for all production clusters to protect critical system operations
Requirements
- Kubernetes version: 1.31 or later (requires kubeadm v1beta4 API for
extraEnvssupport) - Cluster lifecycle: Can be enabled during cluster creation or via cluster upgrade
- Supported providers: All EKS Anywhere providers
How It Works
When enabled, the feature configures the Kubernetes API server with exclusion rules that bypass custom webhook processing for specific critical operations.
Technical Implementation
-
Exclusion Rules File: Deploys
/etc/kubernetes/admission-plugin-exclusion-rules.jsonto control plane nodes containing targeted exclusion rules -
API Server Configuration: Sets environment variable
EKS_PATCH_EXCLUSION_RULES_FILE=/etc/kubernetes/admission-plugin-exclusion-rules.json -
Upstream Patch: The EKS-Distro Kubernetes distribution includes an admission webhook exclusion patch that reads these rules and bypasses custom webhook processing for matching operations
Protected Resources
The exclusion rules protect specific critical operations based on resource type, namespace, name patterns, and requesting user identity:
Control Plane Operations
- Leader election leases: kube-controller-manager, kube-scheduler, cilium-operator, cert-manager in kube-system namespace
- ServiceAccount operations: Token requests and ServiceAccount management by kube-controller-manager
- Node leases: All node heartbeat leases in kube-node-lease namespace
RBAC and API Registration
- Cluster-level RBAC: ClusterRoles and ClusterRoleBindings modified by system:apiserver
- Namespace-level RBAC: Roles and RoleBindings in kube-system and kube-public by system:apiserver
- APIService registrations: Core Kubernetes API group registrations by system:apiserver
Critical Networking Components
- Cilium: DaemonSet and operator deployments
- CoreDNS: Deployment operations
- kube-proxy: DaemonSet operations
Flow Control Resources
- FlowSchema: Flow control schema by system:apiserver
- PriorityLevelConfiguration: Priority level configuration by system:apiserver
System Pods
- DaemonSet Pods: Pods in kube-system
- ReplicaSet Pods: Pods in kube-system
For the complete list of exclusion rules, see the admission-plugin-exclusion-rules.json file in the repository.
Enabling the Feature
New Cluster Creation
Add the configuration when creating a new cluster:
eksctl anywhere create cluster -f cluster.yaml
Where cluster.yaml includes:
spec:
  controlPlaneConfiguration:
    skipAdmissionForSystemResources: true
Existing Cluster Upgrade
Enable the feature by upgrading an existing cluster:
- Edit your cluster specification to add the field:
spec:
  controlPlaneConfiguration:
    skipAdmissionForSystemResources: true
- Apply the upgrade:
eksctl anywhere upgrade cluster -f cluster.yaml
The feature will be activated during the control plane upgrade process.
Disabling the Feature
To disable the feature, set the field to false and perform a cluster upgrade:
spec:
  controlPlaneConfiguration:
    skipAdmissionForSystemResources: false
The API server environment variable and exclusion rules file configuration will be removed during the next cluster reconciliation.
Impact on Custom Webhooks
What Changes
- Custom webhooks will not be invoked for operations on protected system resources
- Webhook processing continues normally for all other resources
- No modifications are made to webhook configurations themselves
What Doesn’t Change
- Custom webhooks continue to process application workloads
- Webhook configurations remain unchanged
- Custom business logic and validation continues for non-system resources
Example Scenario
Consider a ValidatingWebhookConfiguration that targets all DaemonSets with failurePolicy: Fail:
apiVersion: admissionregistration.k8s.io/v1
kind: ValidatingWebhookConfiguration
metadata:
  name: custom-webhook
webhooks:
- name: validate.example.com
  failurePolicy: Fail
  rules:
  - apiGroups: ["apps"]
    apiVersions: ["v1"]
    operations: ["UPDATE"]
    resources: ["daemonsets"]
With admission webhook protection disabled:
- Updates to Cilium DaemonSet are blocked if webhook service is unavailable or rejects the request
- Cluster upgrades may fail if Cilium cannot be updated
With admission webhook protection enabled:
- Updates to Cilium DaemonSet bypass the webhook (protected system resource)
- Cluster upgrades proceed successfully
- Updates to your application DaemonSets still invoke the webhook normally
Troubleshooting
Verifying Feature Activation
Check if the feature is active on control plane nodes:
kubectl get kubeadmcontrolplane -n eksa-system <cluster-name> -o yaml
Look for these configurations:
spec:
  kubeadmConfigSpec:
    clusterConfiguration:
      apiServer:
        extraEnvs:
        - name: EKS_PATCH_EXCLUSION_RULES_FILE
          value: /etc/kubernetes/admission-plugin-exclusion-rules.json
        extraVolumes:
        - name: admission-exclusion-rules
          hostPath: /etc/kubernetes/admission-plugin-exclusion-rules.json
          mountPath: /etc/kubernetes/admission-plugin-exclusion-rules.json
          pathType: File
          readOnly: true
    files:
    - path: /etc/kubernetes/admission-plugin-exclusion-rules.json
      owner: root:root
Common Issues
Issue: Feature not taking effect after upgrade
- Solution: Verify the Kubernetes version is 1.31+. Check kubeadm config for extraEnvs support.
Issue: Webhook still blocking system operations
- Solution: Verify the resource is in the protected list. Check API server logs for exclusion rule processing.
Issue: Application webhooks not working
- Solution: Verify webhooks are correctly configured for non-system resources. Protected resources are limited to specific system components.
Best Practices
-
Enable for production clusters: We recommend enabling this feature for all production clusters to prevent upgrade failures
-
Test in non-production first: When enabling on existing clusters, test the upgrade in a non-production environment first
-
Review webhook configurations: Audit existing webhooks to ensure they don’t unnecessarily target system resources
-
Use appropriate failurePolicy: Set webhooks to
Ignorefor non-critical validations to avoid blocking operations -
Scope webhooks appropriately: Use namespace and object selectors to limit webhook scope to intended resources
Related Resources
13 - Support
13.1 - Purchase EKS Anywhere Enterprise Subscriptions
You can purchase EKS Anywhere Enterprise Subscriptions with the Amazon EKS console, API, or AWS CLI. When you purchase a subscription, you can choose a 1-year term or a 3-year term, and you are billed monthly throughout the term. You can configure your subscription to automatically renew at the end of the term, and you can cancel your subscription within the first 7 days of purchase at no charge. When the status of your subscription is ACTIVE, the subscription term starts, licenses are available for your EKS Anywhere clusters, and the AWS account you used to create the subscription has access to Amazon EKS Anywhere Curated Packages.
For pricing, see the EKS Anywhere Pricing Page.
For more information on subscriptions, see Overview of EKS Anywhere Enterprise Subscriptions.
Create Subscriptions
NOTE: When you purchase a subscription, you have a 7-day grace period to cancel by creating a case at AWS Support Center. After the 7-day grace period, if you do not cancel, your AWS account is invoiced for the subscription charges. If you use your subscription to file an AWS Support case to receive support for your EKS Anywhere clusters, then the subscription can not be cancelled or refunded, since you have leveraged support as part of the subscription.
NOTE: It is recommended to create subscriptions with the AWS account that will be used to operate the EKS Anywhere clusters. EKS Anywhere subscriptions and the licenses associated with them cannot currently be shared with other AWS accounts via AWS Resource Access Manager (RAM).
Prerequisites
- Before you create a subscription, you must onboard to use AWS License Manager. See the AWS License Manager documentation for instructions.
- Only auto renewal and tags can be changed after subscription creation. Other attributes such as the subscription name, number of licenses, or term length cannot be modified after subscription creation.
- You can purchase subscriptions in all AWS Regions, except the Asia Pacific (Thailand), Mexico (Central), AWS GovCloud (US) Regions, and the China Regions.
- An individual subscription can have up to 100 licenses.
- An individual account can have up to 10 subscriptions.
- You can create a single subscription at a time.
AWS Management Console
- Open the Amazon EKS console at https://console.aws.amazon.com/eks/home#/eks-anywhere.
- Click the Create subscription button on the right side of the screen.
- On the Specify subscription details page, select an offer (1 year term or 3 year term).
- Configure the following fields:
- Name - a name for your subscription. It must be unique in your AWS account in the AWS Region you’re creating the subscription in. The name can contain only alphanumeric characters (case-sensitive), hyphens, and underscores. It must start with an alphabetic character and can’t be longer than 100 characters. This value cannot be changed after creating the subscription.
- Number of licenses - the number of licenses to include in the subscription. This value cannot be changed after creating the subscription.
- Auto renewal - if enabled, the subscription will automatically renew at the end of the term.
- (Optional) Configure tags. A tag is a label that you assign to an EKS Anywhere subscription. Each tag consists of a key and an optional value. You can use tags to search and filter your resources.
- Click Next.
- On the Review and purchase page, confirm the specifications for your subscription are correct.
- Click Purchase on the bottom right hand side of the screen to purchase your subscription.
After the subscription is created, the next step is to apply the licenses to your EKS Anywhere clusters. Reference the License cluster page for instructions.
AWS CLI
To install or update the AWS CLI, reference the AWS documentation. If you already have the AWS CLI installed, update to the latest version of the CLI before running the following commands.
Create your subscription with the following command. Before running the command, make the following replacements:
- Replace
region-codewith the AWS Region that will host your subscription (for exampleus-west-2). It is recommended to create your subscription in the AWS Region closest to your on-premises deployment. - Replace
my-subscriptionwith a name for your subscription. It must be unique in your AWS account in the AWS Region you’re creating the subscription in. The name can contain only alphanumeric characters (case-sensitive), hyphens, and underscores. It must start with an alphabetic character and can’t be longer than 100 characters. - Replace
license-quantity1with the number of licenses to include in the subscription. - Replace
term'unit=MONTHS,duration=12'with your preferred term length. Valid options fordurationare12and36. The only acceptedunitisMONTHS. - Optionally, replace
tags'environment=prod'with your preferred tags for your subscription. - Optionally, enable auto renewal with the
--auto-renewflag. Subscriptions will not auto renew by default.
aws eks create-eks-anywhere-subscription \
  --region 'region-code' \
  --name 'my-subscription' \
  --license-quantity 1 \
  --term 'unit=MONTHS,duration=12' \
  --tags 'environment=prod' \
  --no-auto-renew
Expand for sample command output
{
    "subscription": {
        "id": "e29fd0d2-d8a8-4ed4-be54-c6c0dd0f7964",
        "arn": "arn:aws:eks:us-west-2:<account-id>:eks-anywhere-subscription/e29fd0d2-d8a8-4ed4-be54-c6c0dd0f7964",
        "name": "my-subscription",
        "createdAt": "2023-10-10T08:33:36.869000-05:00",
        "effectiveDate": "2023-10-10T08:33:36.869000-05:00",
        "expirationDate": "2024-10-10T08:33:36.869000-05:00",
        "licenseQuantity": 1,
        "licenseType": "CLUSTER",
        "term": {
            "duration": 12,
            "unit": "MONTHS"
        },
        "status": "CREATING",
        "packageRegistry": "<packages-registry>.dkr.ecr.<region>.amazonaws.com",
        "autoRenew": false,
        "licenseArns": [],
        "licenses": [],
        "tags": {
            "environment": "prod"
        }
    }
}
It may take several minutes for the subscription to become ACTIVE. You can query the status of your subscription with the following command. Replace my-subscription-id with the id of your subscription. Do not proceed to license your EKS Anywhere clusters until the output of the command returns ACTIVE.
aws eks describe-eks-anywhere-subscription \
  --region 'region-code' \
  --id 'my-subscription-id' \
  --query 'subscription.status'
After the subscription is created, the next step is to apply the licenses to your EKS Anywhere clusters. Reference the License cluster page for instructions.
View and Update Subscriptions
After you create a subscription, you can only update the auto renewal and tags configurations.
AWS Management Console
- Open the Amazon EKS console at https://console.aws.amazon.com/eks/home#/eks-anywhere.
- Navigate to the Active Subscriptions or Inactive Subscriptions tab.
- Optionally, choose the selection button for your EKS Anywhere subscription and click the Change auto renewal button to change your auto renewal setting.
- Click the link of your EKS Anywhere subscription name to view details including subscription start and end dates, associated licenses, and tags.
- Optionally, edit tags by clicking the Manage Tags button.
AWS CLI
List EKS Anywhere subscriptions
- Replace
region-codewith the AWS Region that hosts your subscription(s) (for exampleus-west-2).
aws eks list-eks-anywhere-subscriptions --region 'region-code'
Expand for sample command output
{
    "subscriptions": [
        {
            "id": "e29fd0d2-d8a8-4ed4-be54-c6c0dd0f7964",
            "arn": "arn:aws:eks:<region>:<account-id>:eks-anywhere-subscription/e29fd0d2-d8a8-4ed4-be54-c6c0dd0f7964",
            "name": "my-subscription",
            "createdAt": "2023-10-10T08:33:36.869000-05:00",
            "effectiveDate": "2023-10-10T08:33:36.869000-05:00",
            "expirationDate": "2024-10-10T08:33:36.869000-05:00",
            "licenseQuantity": 1,
            "licenseType": "CLUSTER",
            "term": {
                "duration": 12,
                "unit": "MONTHS"
            },
            "status": "ACTIVE",
            "packageRegistry": "<account-id>.dkr.ecr.<region>.amazonaws.com",
            "autoRenew": false,
            "licenseArns": [
                "arn:aws:license-manager::<account-id>:license:l-4f36acf12e6d491484812927b327c066"
            ],
            "licenses": [
                {
                    "id": "<license-id-string>",
                    "token": "<license-token-string>"
                }
            ],
            "tags": {
                "environment": "prod"
            }
        }
    ]
}
Describe EKS Anywhere subscriptions
- Replace
region-codewith the AWS Region that hosts your subscription (for exampleus-west-2). - Replace
my-subscription-idwith theidfor your subscription (for examplee29fd0d2-d8a8-4ed4-be54-c6c0dd0f7964). - Replace
my-subscriptionwith thenamefor your subscription.
Get subscription details for a single subscription.
aws eks describe-eks-anywhere-subscription \
  --region 'region-code' \
  --id 'my-subscription-id'
Expand for sample command output
{
    "subscription": {
        "id": "e29fd0d2-d8a8-4ed4-be54-c6c0dd0f7964",
        "arn": "arn:aws:eks:<region>:<account-id>:eks-anywhere-subscription/e29fd0d2-d8a8-4ed4-be54-c6c0dd0f7964",
        "name": "my-subscription",
        "createdAt": "2023-10-10T08:33:36.869000-05:00",
        "effectiveDate": "2023-10-10T08:33:36.869000-05:00",
        "expirationDate": "2024-10-10T08:33:36.869000-05:00",
        "licenseQuantity": 1,
        "licenseType": "CLUSTER",
        "term": {
            "duration": 12,
            "unit": "MONTHS"
        },
        "status": "ACTIVE",
        "packageRegistry": "<packages-registry>.dkr.ecr.<region>.amazonaws.com",
        "autoRenew": false,
        "licenseArns": [
            "arn:aws:license-manager::<account-id>:license:l-4f36acf12e6d491484812927b327c066"
        ],
        "licenses": [
            {
                "id": "<license-id-string>",
                "token": "<license-token-string>"
            }
        ],
        "tags": {
            "environment": "prod"
        }
    }
}
Get subscription id with subscription name.
aws eks list-eks-anywhere-subscriptions \
  --region 'region-code' \
  --query 'subscriptions[?name==`my-subscription`].id'
Get subscription arn with subscription name.
aws eks list-eks-anywhere-subscriptions \
  --region 'region-code' \
  --query 'subscriptions[?name==`my-subscription`].arn'
Update EKS Anywhere subscriptions
- Replace
region-codewith the AWS Region that hosts your subscription (for exampleus-west-2). - Replace
my-subscription-idwith theidfor your subscription (for examplee29fd0d2-d8a8-4ed4-be54-c6c0dd0f7964).
Disable auto renewal
aws eks update-eks-anywhere-subscription \
  --region 'region-code' \
  --id 'my-subscription-id' \
  --no-auto-renew
Expand for sample command output
{
    "subscription": {
        "id": "e29fd0d2-d8a8-4ed4-be54-c6c0dd0f7964",
        "arn": "arn:aws:eks:<region>:<account-id>:eks-anywhere-subscription/e29fd0d2-d8a8-4ed4-be54-c6c0dd0f7964",
        "name": "my-subscription",
        "createdAt": "2023-10-10T08:33:36.869000-05:00",
        "effectiveDate": "2023-10-10T08:33:36.869000-05:00",
        "expirationDate": "2024-10-10T08:33:36.869000-05:00",
        "licenseQuantity": 1,
        "licenseType": "CLUSTER",
        "term": {
            "duration": 12,
            "unit": "MONTHS"
        },
        "status": "ACTIVE",
        "packageRegistry": "<packages-registry>.dkr.ecr.<region>.amazonaws.com",
        "autoRenew": false,
        "licenseArns": [
            "arn:aws:license-manager::<account-id>:license:l-4f36acf12e6d491484812927b327c066"
        ],
        "licenses": [
            {
                "id": "<license-id-string>",
                "token": "<license-token-string>"
            }
        ],
        "tags": {
            "environment": "prod"
        }
    }
}
Enable auto renewal
aws eks update-eks-anywhere-subscription \
  --region 'region-code' \
  --id 'my-subscription-id' \
  --auto-renew
Expand for sample command output
{
    "subscription": {
        "id": "e29fd0d2-d8a8-4ed4-be54-c6c0dd0f7964",
        "arn": "arn:aws:eks:<region>:<account-id>:eks-anywhere-subscription/e29fd0d2-d8a8-4ed4-be54-c6c0dd0f7964",
        "name": "my-subscription",
        "createdAt": "2023-10-10T08:33:36.869000-05:00",
        "effectiveDate": "2023-10-10T08:33:36.869000-05:00",
        "expirationDate": "2024-10-10T08:33:36.869000-05:00",
        "licenseQuantity": 1,
        "licenseType": "CLUSTER",
        "term": {
            "duration": 12,
            "unit": "MONTHS"
        },
        "status": "ACTIVE",
        "packageRegistry": "<packages-registry>.dkr.ecr.<region>.amazonaws.com",
        "autoRenew": true,
        "licenseArns": [
            "arn:aws:license-manager::<account-id>:license:l-4f36acf12e6d491484812927b327c066"
        ],
        "licenses": [
            {
                "id": "<license-id-string>",
                "token": "<license-token-string>"
            }
        ],
        "tags": {
            "environment": "prod"
        }
    }
}
Update tags
aws eks tag-resource \
  --region 'region-code' \
  --resource-arn 'my-subscription-arn' \
  --tags 'geo=boston'
Delete Subscriptions
NOTE: Only inactive subscriptions can be deleted. Deleting inactive subscriptions removes them from the AWS Management Console view and API responses. To delete any Active Subscriptions, please create a Support Case with AWS Support team.
AWS Management Console
- Open the Amazon EKS console at https://console.aws.amazon.com/eks/home#/eks-anywhere.
- Click the Inactive Subscriptions tab.
- Choose the name of the EKS Anywhere subscription to delete and click the Delete subscription.
- On the delete subscription confirmation screen, choose Delete.
AWS CLI
- Replace
region-codewith the AWS Region that hosts your subscription (for exampleus-west-2). - Replace
my-subscription-idwith theidfor your subscription (for examplee29fd0d2-d8a8-4ed4-be54-c6c0dd0f7964).
aws eks delete-eks-anywhere-subscription \
  --region 'region-code' \
  --id 'my-subscription-id'
Expand for sample command output
{
    "subscription": {
        "id": "e29fd0d2-d8a8-4ed4-be54-c6c0dd0f7964",
        "arn": "arn:aws:eks:<region>:<account-id>:eks-anywhere-subscription/e29fd0d2-d8a8-4ed4-be54-c6c0dd0f7964",
        "name": "my-subscription",
        "createdAt": "2023-10-10T08:33:36.869000-05:00",
        "effectiveDate": "2023-10-10T08:33:36.869000-05:00",
        "expirationDate": "2024-10-10T08:33:36.869000-05:00",
        "licenseQuantity": 1,
        "licenseType": "CLUSTER",
        "term": {
            "duration": 12,
            "unit": "MONTHS"
        },
        "status": "DELETING",
        "packageRegistry": "<packages-registry>.dkr.ecr.<region>.amazonaws.com",
        "autoRenew": false,
        "licenseArns": [
            "arn:aws:license-manager::<account-id>:license:l-4f36acf12e6d491484812927b327c066"
        ],
        "licenses": [
            {
                "id": "<license-id-string>",
                "token": "<license-token-string>"
            }
        ],
        "tags": {
            "environment": "prod"
        }
    }
}
13.2 - License EKS Anywhere cluster
When you purchase an EKS Anywhere Enterprise Subscription, licenses are created in the AWS Region and account you used to purchase the subscription. After purchasing your subscription, you can view your licenses, accept the license grants, and apply the license IDs or license tokens to your EKS Anywhere clusters.
Get license ID string or license token
The two key parts of the license are the license ID string and the license token. In EKS Anywhere versions v0.21.x and below, the license ID string is applied as a Kubernetes Secret to EKS Anywhere clusters and is used for AWS Support cases to validate the cluster is eligible for support. The license token was introduced in EKS Anywhere version v0.22.0 and all existing EKS Anywhere subscriptions have been updated with a license token for each license. The license token is applied in the EKS Anywhere cluster specification.
You can use either the license ID string or the license token when you create AWS Support cases for your EKS Anywhere clusters. To use extended support for Kubernetes versions in EKS Anywhere, available for EKS Anywhere versions v0.22.0 and above, your clusters must have a valid and unexpired license token to be able to create and upgrade clusters using the Kubernetes extended support versions.
AWS Management Console
You can view the licenses for your subscription in the EKS Anywhere section of the EKS console by clicking on the Name of your active subscription. The licenses panel is shown on the Subscription details page and contains the license ID string and the license token for each license associated with your subscription.
If you are applying a license to an EKS Anywhere cluster using EKS Anywhere version v0.22.0 or above, copy the license token and proceed to Apply license to EKS Anywhere cluster.
If you are applying a license to an EKS Anywhere cluster using EKS Anywhere version v0.21.x or below, copy the license ID string and proceed to Apply license to EKS Anywhere cluster.
AWS CLI
Use the following command to get the license ID strings and license tokens for each license associated with a subscription. Note, the command must be run with the same account that created the subscription.
- Replace
region-codewith the AWS Region that hosts your subscription (for exampleus-west-2). - Replace
my-subscriptionin the--querystring with thenamefor your subscription.
aws eks list-eks-anywhere-subscriptions \
  --region 'region-code' \
  --query 'subscriptions[?name==`my-subscription`].licenses[*]'
If you are applying a license to an EKS Anywhere cluster using EKS Anywhere version v0.22.0 or above, copy the license token and proceed to Apply license to EKS Anywhere cluster.
An example of the license token in the response is shown below in the token field.
[
    [
        {
            "id": "l-58dc5e15eb12396b86e5724db1a710d9",
            "token": "eyJhbGciOiJFUzI1NiIsInR5cCI6IkpXVCJ9.eyJsaWNlbnNlSWQiOiJsLTU4ZGM1ABC1ZWI5ODQ5NmI4NmU1NzI0ZGIxYTcxMGQ5IiwibGljZW5zZVZlcnNpb24iOiIxIiwiYmVnaW5WYWxpZGl0eSI6IjIwMjUtMDItMDhUMDA6MDY6MzYuMDAwWiIsImVuZFZhbGlkaXR5IjoiMjAyNi0wMi0wOVQwMDowNjozNi4wMDBaIiwic3Vic2NyaXB0aW9uSWQiOiI0YjMwNmM3Mi1kZmRmLTRlMWUtODQ1OS0wMWU2MWVkOGM1NGM6NWY5MjhiZTQiLCJzdWJzY3JpcHRpb25OYW1lIjoibXktdGVzdC1zdWJzY3JpcHRpb24iLCJhY2NvdW50SWQiOiI2NTkzNTYzOTg0MDQiLCJyZWdpb24iOiJ1cy13ZXN0LTIifQ.72Hiz4RqdNMQnObLTI0gCxT7vj1WBMNU8vvD2v0gbGl2Tas5VT30R-7GXCE6x73G613V6o12kqcnQM6DCwzeSg"
        }
    ]
]
If you are applying a license to an EKS Anywhere cluster using EKS Anywhere version v0.21.x or below, copy the license ID string and proceed to Apply license to EKS Anywhere cluster.
An example of the license ID string in the response is shown below in the id field.
[
    [
        {
            "id": "l-58dc5e15eb12396b86e5724db1a710d9",
            "token": "eyJhbGciOiJFUzI1NiIsInR5cCI6IkpXVCJ9.eyJsaWNlbnNlSWQiOiJsLTU4ZGM1ABC1ZWI5ODQ5NmI4NmU1NzI0ZGIxYTcxMGQ5IiwibGljZW5zZVZlcnNpb24iOiIxIiwiYmVnaW5WYWxpZGl0eSI6IjIwMjUtMDItMDhUMDA6MDY6MzYuMDAwWiIsImVuZFZhbGlkaXR5IjoiMjAyNi0wMi0wOVQwMDowNjozNi4wMDBaIiwic3Vic2NyaXB0aW9uSWQiOiI0YjMwNmM3Mi1kZmRmLTRlMWUtODQ1OS0wMWU2MWVkOGM1NGM6NWY5MjhiZTQiLCJzdWJzY3JpcHRpb25OYW1lIjoibXktdGVzdC1zdWJzY3JpcHRpb24iLCJhY2NvdW50SWQiOiI2NTkzNTYzOTg0MDQiLCJyZWdpb24iOiJ1cy13ZXN0LTIifQ.72Hiz4RqdNMQnObLTI0gCxT7vj1WBMNU8vvD2v0gbGl2Tas5VT30R-7GXCE6x73G613V6o12kqcnQM6DCwzeSg"
        }
    ]
]
Apply license to EKS Anywhere cluster
A license can only be bound to one EKS Anywhere cluster at a time, and you can only receive support for your EKS Anywhere cluster if it has a valid and active license. You can only create or update EKS Anywhere clusters with extended support for Kubernetes versions if there is a valid and active license token available for the cluster. Extended support for Kubernetes versions is available in EKS Anywhere versions v0.22.0 and above.
Apply license to EKS Anywhere cluster with version v0.22.0 or above
You can apply a license token to an EKS Anywhere cluster during or after cluster creation for standalone, management, and workload clusters. License tokens are configured in the EKS Anywhere cluster specification in the spec.licenseToken field. An example of a license token configuration in the EKS Anywhere cluster specification is shown below.
apiVersion: anywhere.eks.amazonaws.com/v1alpha1
kind: Cluster
metadata:
  name: my-cluster
spec:
  kubernetesVersion: "1.28"
  licenseToken: "eyJsaWNlbnNlSWQiOiJsLTU4ZGM1ABC1ZWI5ODQ5NmI4NmU1NzI0ZGIxYTcxMGQ5IiwibGljZW5zZVZlcnNpb24iOiIxIiwiYmVnaW5WYWxpZGl0eSI6IjIwMjUtMDItMDhUMDA6MDY6MzYuMDAwWiIsImVuZFZhbGlkaXR5IjoiMjAyNi0wMi0wOVQwMDowNjozNi4wMDBaIiwic3Vic2NyaXB0aW9uSWQiOiI0YjMwNmM3Mi1kZmRmLTRlMWUtODQ1OS0wMWU2MWVkOGM1NGM6NWY5MjhiZTQiLCJzdWJzY3JpcHRpb25OYW1lIjoibXktdGVzdC1zdWJzY3JpcHRpb24iLCJhY2NvdW50SWQiOiI2NTkzNTYzOTg0MDQiLCJyZWdpb24iOiJ1cy13ZXN0LTIifQ.72Hiz4RqdNMQnObLTI0gCxT7vj1WBMNU8vvD2v0gbGl2Tas5VT30R-7GXCE6x73G613V6o12kqcnQM6DCwzeSg"
  ...
To apply the license token to your cluster, run the eksctl anywhere create or eksctl anywhere upgrade command, or use Kubernetes API-compatible tooling for workload clusters.
eksctl anywhere CLI
New cluster
eksctl anywhere create cluster -f my-cluster.yaml --kubeconfig my-cluster.kubeconfig
Existing cluster
eksctl anywhere upgrade cluster -f my-cluster.yaml --kubeconfig my-cluster.kubeconfig
Kubernetes API-compatible tooling
kubectl apply -f my-cluster.yaml --kubeconfig my-cluster.kubeconfig
Apply license to EKS Anywhere cluster with version v0.21.x or below
You can apply a license ID string to an EKS Anywhere cluster during or after cluster creation for standalone or management clusters. For workload clusters, you must apply the license after cluster creation. In the examples below, the <license-id-string> is the license ID string, for example l-58dc5e15eb12396b86e5724db1a710d9.
To apply a license during standalone or management cluster creation, export the EKSA_LICENSE environment variable before running the eksctl anywhere create cluster command.
export EKSA_LICENSE='<license-id-string>'
To apply a license to an existing cluster, apply the following Secret to your cluster, replacing <license-id-string> with your license ID string.
kubectl apply -f - <<EOF
apiVersion: v1
kind: Secret
metadata:
  name: eksa-license
  namespace: eksa-system
stringData:
  license: "<license-id-string>"
type: Opaque
EOF
AWS CLI commands to view license details
Get license details for all licenses with the AWS CLI
- Replace
region-codewith the AWS Region that hosts your subscription (for exampleus-west-2).
aws license-manager list-received-licenses \
  --region 'region-code' \
  --filter 'Name=IssuerName,Values=Amazon EKS Anywhere'
Get license details with the AWS CLI
- Replace
region-codewith the AWS Region that hosts your subscription (for exampleus-west-2). - Replace
my-license-arnwith the license ARN returned from the previous command.
aws license-manager get-license \
  --region 'region-code' \
  --license-arn 'my-license-arn'
Expand for sample command output
{
    "License": {
        "LicenseArn": "arn:aws:license-manager::<account-id>:license:l-4f36acf12e6d491484812927b327c066",
        "LicenseName": "EKS Anywhere license for subscription my-subscription",
        "ProductName": "Amazon EKS Anywhere",
        "ProductSKU": "EKS Anywhere e29fd0d2-d8a8-4ed4-be54-c6c0dd0f7964:9444bd0d",
        "Issuer": {
            "Name": "Amazon EKS Anywhere",
            "KeyFingerprint": "aws:<account-id>:Amazon EKS Anywhere:issuer-fingerprint"
        },
        "HomeRegion": "<region>",
        "Status": "AVAILABLE",
        "Validity": {
            "Begin": "2023-10-10T13:33:36.000Z",
            "End": "2024-10-11T13:33:36.000Z"
        },
        "Beneficiary": "<account-id>",
        "Entitlements": [
            {
                "Name": "EKS Anywhere for e29fd0d2-d8a8-4ed4-be54-c6c0dd0f7964",
                "MaxCount": 1,
                "Overage": false,
                "Unit": "Count",
                "AllowCheckIn": false
            }
        ],
        "ConsumptionConfiguration": {
            "RenewType": "None",
            "BorrowConfiguration": {
                "AllowEarlyCheckIn": true,
                "MaxTimeToLiveInMinutes": 527040
            }
        },
        "CreateTime": "1696945150",
        "Version": "1"
    }
}
13.3 - Share access to EKS Anywhere Curated Packages
When an EKS Anywhere Enterprise Subscription is created, the AWS account that created the subscription is granted access to EKS Anywhere Curated Packages in the AWS Region where the subscription is created. To enable access to EKS Anywhere Curated Packages for other AWS accounts in your organization, follow the instructions below. The instructions below use 111111111111 as the source account, and 999999999999 as the destination account.
1. Save EKS Anywhere Curated Packages registry account for your subscription
In this step, you will get the Amazon ECR packages registry account associated with your subscription. Run the following command with the account that created the subscription and save the 12-digit account ID from the output string.
- Replace
region-codewith the AWS Region that hosts your subscription (for exampleus-west-2). - Replace
my-subscription-idwith theidfor your subscription (for examplee29fd0d2-d8a8-4ed4-be54-c6c0dd0f7964).
aws eks describe-eks-anywhere-subscription \
  --region 'region-code' \
  --id 'my-subscription-id' \
  --query 'subscription.packageRegistry'
The output has the following structure: “<packages-account-id> for the next step.
Alternatively, you can use the following table to identify the packages registry account for the AWS Region hosting your subscription.
Expand for packages registry to AWS Region table
| AWS Region | Packages Registry Account |
|---|---|
| us-west-2 | 346438352937 |
| us-west-1 | 440460740297 |
| us-east-1 | 331113665574 |
| us-east-2 | 297090588151 |
| ap-east-1 | 804323328300 |
| ap-northeast-1 | 143143237519 |
| ap-northeast-2 | 447311122189 |
| ap-south-1 | 357015164304 |
| ap-south-2 | 388483641499 |
| ap-southeast-1 | 654894141437 |
| ap-southeast-2 | 299286866837 |
| ap-southeast-3 | 703305448174 |
| ap-southeast-4 | 106475008004 |
| ap-southeast-5 | 396913739932 |
| af-south-1 | 783635962247 |
| ca-central-1 | 064352486547 |
| ca-west-1 | 571600859530 |
| eu-central-1 | 364992945014 |
| eu-central-2 | 551422459769 |
| eu-north-1 | 826441621985 |
| eu-south-1 | 787863792200 |
| eu-south-2 | 127214161500 |
| eu-west-1 | 090204409458 |
| eu-west-2 | 371148654473 |
| eu-west-3 | 282646289008 |
| il-central-1 | 131750224677 |
| me-central-1 | 454241080883 |
| me-south-1 | 158698011868 |
| sa-east-1 | 517745584577 |
2. Create an IAM Policy with ECR Login and Read permissions
Run the following with the account that created the subscription (in this example 111111111111).
- Open the IAM console
- In the navigation pane, choose Policies and then choose Create policy
- On the Specify permissions page, select JSON
- Paste the following permission specification into the Policy editor. Replace
<packages-account-id>in the permission specification with the account you saved in the previous step.
{
  "Version": "2012-10-17",
  "Statement": [
    {
      "Sid": "ECRRead",
      "Effect": "Allow",
      "Action": [
        "ecr:DescribeImageScanFindings",
        "ecr:GetDownloadUrlForLayer",
        "ecr:DescribeRegistry",
        "ecr:DescribePullThroughCacheRules",
        "ecr:DescribeImageReplicationStatus",
        "ecr:ListTagsForResource",
        "ecr:ListImages",
        "ecr:BatchGetImage",
        "ecr:DescribeImages",
        "ecr:DescribeRepositories",
        "ecr:BatchCheckLayerAvailability"
      ],
      "Resource": "arn:aws:ecr:*:<packages-account-id>:repository/*"
    },
    {
      "Sid": "ECRLogin",
      "Effect": "Allow",
      "Action": [
        "ecr:GetAuthorizationToken"
      ],
      "Resource": "*"
    }
  ]
}
- Choose Next
- On the Review and create page, enter a Policy name such as
curated-packages-policy - Choose Create policy
3. Create an IAM role with permissions for EKS Anywhere Curated Packages
Run the following with the account that created the subscription.
- Open the IAM console
- In the navigation pane, choose Roles and then choose Create role
- On the Select trusted entity page, choose Custom trust policy as the Trusted entity type. Add the following trust policy, replacing
999999999999with the AWS account receiving permissions. This policy enables account999999999999to assume the role.
{
  "Version": "2012-10-17",
  "Statement": [
    {
      "Effect": "Allow",
      "Principal": {
        "AWS": "arn:aws:iam::999999999999:root"
      },
      "Action": "sts:AssumeRole"
    }
  ]
}
- Choose Next
- On the Add permissions page, search and select the policy you created in the previous step (for example
curated-packages-policy). - Choose Next
- On the Name, review, and create page, enter a Role name such as
curated-packages-role - Choose Create role
4. Create an IAM user with permissions to assume the IAM role from the source account
Run the following with the account that is receiving access to curated packages (in this example 999999999999) .
Create a policy to assume the IAM role
- Open the IAM console
- In the navigation pane, choose Policies and then choose Create policy
- On the Specify permissions page, select JSON
- Paste the following permission specification into the Policy editor. Replace
111111111111with the account used to create the subscription, andcurated-packages-rolewith the name of the role you created in the previous step.
{
  "Version": "2012-10-17",
  "Statement": {
    "Effect": "Allow",
    "Action": "sts:AssumeRole",
    "Resource": "arn:aws:iam::111111111111:role/curated-packages-role"
  }
}
- Choose Next
- On the Review and create page, enter a Policy name such as
curated-packages-assume-role-policy - Choose Create policy
Create an IAM user to assume the IAM role
- Open the IAM console
- In the navigation pane, choose Users and then choose Create user
- Enter a User name such as
curated-packages-user - Choose Next
- On the Set permissions page, choose Attach policies directly, and search and select the assume role policy you created above.
- Choose Next
- On the Review and create page, choose Create user
5. Generate access and secret key for IAM user
Run the following with the account that is receiving access to curated packages.
- Open the IAM console
- In the navigation pane, choose Users and the user you created in the previous step.
- On the users detail page in the top Summary section, choose Create access key under Access key 1
- On the Access key best practices & alternatives page, select Command Line Interface (CLI)
- Confirm that you understand the recommendation and want to proceed to create an access key. Choose Next.
- On the Set description tag page, choose Create access key
- On the Retrieve access keys page, copy the Access key and Secret access key to a safe location.
- Choose Done
6. Create an AWS config file for IAM user
Run the following with the account that is receiving access to curated packages.
Create an AWS config file with the assumed role and the access/secret key you generated in the previous step. Replace the values in the example below based on your configuration.
- Replace
region-codewith the AWS Region that hosts your subscription (for exampleus-west-2). - Replace
role-arnwith the role you created in Step 3 - Replace
aws_access_key_idandaws_secret_access_keythat you created in Step 5
[default]
source_profile=curated-packages-user
role_arn=arn:aws:iam::111111111111:role/curated-packages-role
region=region-code

[profile curated-packages-user]
aws_access_key_id=AKIAIOSFODNN7EXAMPLE
aws_secret_access_key=wJalrXUtnFEMI/K7MDENG/bPxRfiCYEXAMPLEKEY
7. Add the AWS config to your EKS Anywhere cluster
Run the following with the account that is receiving access to curated packages.
New Clusters
For new standalone or management clusters, pass the AWS config file path that you created in the previous step as the EKSA_AWS_CONFIG_FILE environment variable. The EKS Anywhere CLI detects the environment variable when you run eksctl anywhere create cluster. Note, the credentials are used by the Curated Packages Controller, which should only run on standalone or management clusters.
Existing Clusters
For existing standalone or management clusters, the AWS config information will be passed as a Kubernetes Secret. You need to generate the base64 encoded string from the AWS config file and then pass the encoded string in the config field of the aws-secret Secret in the eksa-packages namespace.
Encode the AWS config file. Replace <aws-config-file> with the name of the file you created in the previous step.
cat <aws-config-file> | base64
Create a yaml specification called aws-secret.yaml, replacing <encoded-aws-config-file> with the encoded output from the previous step.
apiVersion: v1
kind: Secret
metadata:
  name: aws-secret
  namespace: eksa-packages
type: Opaque
data:
  AWS_ACCESS_KEY_ID: ""
  AWS_SECRET_ACCESS_KEY: ""
  REGION: ""
  config: <encoded-aws-config-file>
Apply the Secret to your standalone or management cluster.
kubectl apply -f aws-secret.yaml
13.4 - Generate an EKS Anywhere support bundle
This guide covers the use of the EKS Anywhere Support Bundle for troubleshooting and support. This allows you to gather cluster information, save it to your administrative machine, and perform analysis of the results.
EKS Anywhere leverages troubleshoot.sh to collect and analyze Kubernetes cluster logs, cluster resource information, and other relevant debugging information.
EKS Anywhere has two Support Bundle commands:
eksctl anywhere generate support-bundle will generate a support bundle for your cluster,
collecting relevant information, archiving it locally, and performing analysis of the results.
eksctl anywhere generate support-bundle-config will generate a support bundle config yaml file for you to customize.
Do not add personally identifiable information (PII) or other confidential or sensitive information to your support bundle. If you provide the support bundle to get support from AWS, it will be accessible to other AWS services, including AWS Support.
Collecting a Support Bundle and running analyzers
eksctl anywhere generate support-bundle
generate support-bundle will allow you to quickly collect relevant logs and cluster resources and save them locally in an archive file.
This archive can then be used to aid in further troubleshooting and debugging.
If you provide a cluster configuration file containing your cluster spec using the -f flag,
generate support-bundle will customize the auto-generated support bundle collectors and analyzers
to match the state of your cluster.
If you provide a support bundle configuration file using the --bundle-config flag,
for example one generated with generate support-bundle-config,
generate support-bundle will use the provided configuration when collecting information from your cluster and analyzing the results.
If you want to generate support bundle in an airgapped environment, the --bundles-manifest flag must be set to the local path
of your eks-a bundles manifest yaml file.
Flags:
      --audit-logs             Include the latest api server audit log file in the support bundle
      --bundle-config string   Bundle Config file to use when generating support bundle
  -f, --filename string        Filename that contains EKS-A cluster configuration
  -h, --help                   Help for support-bundle
      --since string           Collect pod logs in the latest duration like 5s, 2m, or 3h.
      --since-time string      Collect pod logs after a specific datetime(RFC3339) like 2021-06-28T15:04:05Z
  -w, --w-config string        Kubeconfig file to use when creating support bundle for a workload cluster
      --bundles-manifest       Bundles manifest to use when generating support bundle (required for generating support bundle in airgap environment)
Collecting and analyzing a bundle
You only need to run a single command to generate a support bundle, collect information and analyze the output:
eksctl anywhere generate support-bundle -f my-cluster.yaml
This command will collect the information from your cluster and run an analysis of the collected information.
The collected information will be saved to your local disk in an archive which can be used for debugging and obtaining additional in-depth support.
The analysis will be printed to your console.
Collect phase:
$ ./bin/eksctl anywhere generate support-bundle -f ./testcluster100.yaml
 ⏳ Collecting support bundle from cluster, this can take a while...
Analysis phase:
- URI: ""
isFail: false
isPass: true
isWarn: false
title: gitopsconfigs.anywhere.eks.amazonaws.com
message: gitopsconfigs.anywhere.eks.amazonaws.com is present on the cluster
- URI: ""
isFail: false
isPass: true
isWarn: false
title: vspheredatacenterconfigs.anywhere.eks.amazonaws.com
message: vspheredatacenterconfigs.anywhere.eks.amazonaws.com is present on the cluster
- URI: ""
isFail: false
isPass: true
isWarn: false
title: vspheremachineconfigs.anywhere.eks.amazonaws.com
message: vspheremachineconfigs.anywhere.eks.amazonaws.com is present on the cluster
- URI: ""
isFail: false
isPass: true
isWarn: false
title: capv-controller-manager Status
message: capv-controller-manager is running.
- URI: ""
isFail: false
isPass: true
isWarn: false
title: capv-controller-manager Status
message: capv-controller-manager is running.
- URI: ""
isFail: false
isPass: true
isWarn: false
title: coredns Status
message: coredns is running.
- URI: ""
isFail: false
isPass: true
isWarn: false
title: cert-manager-webhook Status
message: cert-manager-webhook is running.
- URI: ""
isFail: false
isPass: true
isWarn: false
title: cert-manager-cainjector Status
message: cert-manager-cainjector is running.
- URI: ""
isFail: false
isPass: true
isWarn: false
title: cert-manager Status
message: cert-manager is running.
- URI: ""
isFail: false
isPass: true
isWarn: false
title: capi-kubeadm-control-plane-controller-manager Status
message: capi-kubeadm-control-plane-controller-manager is running.
- URI: ""
isFail: false
isPass: true
isWarn: false
title: capi-kubeadm-bootstrap-controller-manager Status
message: capi-kubeadm-bootstrap-controller-manager is running.
- URI: ""
isFail: false
isPass: true
isWarn: false
title: capi-controller-manager Status
message: capi-controller-manager is running.
- URI: ""
isFail: false
isPass: true
isWarn: false
title: capi-controller-manager Status
message: capi-controller-manager is running.
- URI: ""
isFail: false
isPass: true
isWarn: false
title: capi-kubeadm-control-plane-controller-manager Status
message: capi-kubeadm-control-plane-controller-manager is running.
- URI: ""
isFail: false
isPass: true
isWarn: false
title: capi-kubeadm-control-plane-controller-manager Status
message: capi-kubeadm-control-plane-controller-manager is running.
- URI: ""
isFail: false
isPass: true
isWarn: false
title: capi-kubeadm-bootstrap-controller-manager Status
message: capi-kubeadm-bootstrap-controller-manager is running.
- URI: ""
isFail: false
isPass: true
isWarn: false
title: clusters.anywhere.eks.amazonaws.com
message: clusters.anywhere.eks.amazonaws.com is present on the cluster
- URI: ""
isFail: false
isPass: true
isWarn: false
title: bundles.anywhere.eks.amazonaws.com
message: bundles.anywhere.eks.amazonaws.com is present on the cluster
Archive phase:
Support bundle archive created {"path": "support-bundle-2023-08-11T18_17_29.tar.gz"}
Generating a custom Support Bundle configuration for your EKS Anywhere Cluster
EKS Anywhere will automatically generate a support bundle based on your cluster configuration; however, if you’d like to customize the support bundle to collect specific information, you can generate your own support bundle configuration yaml for EKS Anywhere to run on your cluster.
eksctl anywhere generate support-bundle-config will generate a default support bundle configuration and print it as yaml.
eksctl anywhere generate support-bundle-config -f myCluster.yaml will generate a support bundle configuration customized to your cluster and print it as yaml.
To run a customized support bundle configuration yaml file on your cluster,
save this output to a file and run the command eksctl anywhere generate support-bundle using the flag --bundle-config.
eksctl anywhere generate support-bundle-config
Flags:
-f, --filename string Filename that contains EKS-A cluster configuration
-h, --help Help for support-bundle-config
13.5 -
{
"subscription": {
"id": "e29fd0d2-d8a8-4ed4-be54-c6c0dd0f7964",
"arn": "arn:aws:eks:us-west-2:<account-id>:eks-anywhere-subscription/e29fd0d2-d8a8-4ed4-be54-c6c0dd0f7964",
"name": "my-subscription",
"createdAt": "2023-10-10T08:33:36.869000-05:00",
"effectiveDate": "2023-10-10T08:33:36.869000-05:00",
"expirationDate": "2024-10-10T08:33:36.869000-05:00",
"licenseQuantity": 1,
"licenseType": "CLUSTER",
"term": {
"duration": 12,
"unit": "MONTHS"
},
"status": "CREATING",
"packageRegistry": "<packages-registry>.dkr.ecr.<region>.amazonaws.com",
"autoRenew": false,
"licenseArns": [],
"licenses": [],
"tags": {
"environment": "prod"
}
}
}
13.6 -
{
"subscription": {
"id": "e29fd0d2-d8a8-4ed4-be54-c6c0dd0f7964",
"arn": "arn:aws:eks:<region>:<account-id>:eks-anywhere-subscription/e29fd0d2-d8a8-4ed4-be54-c6c0dd0f7964",
"name": "my-subscription",
"createdAt": "2023-10-10T08:33:36.869000-05:00",
"effectiveDate": "2023-10-10T08:33:36.869000-05:00",
"expirationDate": "2024-10-10T08:33:36.869000-05:00",
"licenseQuantity": 1,
"licenseType": "CLUSTER",
"term": {
"duration": 12,
"unit": "MONTHS"
},
"status": "DELETING",
"packageRegistry": "<packages-registry>.dkr.ecr.<region>.amazonaws.com",
"autoRenew": false,
"licenseArns": [
"arn:aws:license-manager::<account-id>:license:l-4f36acf12e6d491484812927b327c066"
],
"licenses": [
{
"id": "<license-id-string>",
"token": "<license-token-string>"
}
],
"tags": {
"environment": "prod"
}
}
}
13.7 -
{
"subscription": {
"id": "e29fd0d2-d8a8-4ed4-be54-c6c0dd0f7964",
"arn": "arn:aws:eks:<region>:<account-id>:eks-anywhere-subscription/e29fd0d2-d8a8-4ed4-be54-c6c0dd0f7964",
"name": "my-subscription",
"createdAt": "2023-10-10T08:33:36.869000-05:00",
"effectiveDate": "2023-10-10T08:33:36.869000-05:00",
"expirationDate": "2024-10-10T08:33:36.869000-05:00",
"licenseQuantity": 1,
"licenseType": "CLUSTER",
"term": {
"duration": 12,
"unit": "MONTHS"
},
"status": "ACTIVE",
"packageRegistry": "<packages-registry>.dkr.ecr.<region>.amazonaws.com",
"autoRenew": false,
"licenseArns": [
"arn:aws:license-manager::<account-id>:license:l-4f36acf12e6d491484812927b327c066"
],
"licenses": [
{
"id": "<license-id-string>",
"token": "<license-token-string>"
}
],
"tags": {
"environment": "prod"
}
}
}
13.8 -
{
"License": {
"LicenseArn": "arn:aws:license-manager::<account-id>:license:l-4f36acf12e6d491484812927b327c066",
"LicenseName": "EKS Anywhere license for subscription my-subscription",
"ProductName": "Amazon EKS Anywhere",
"ProductSKU": "EKS Anywhere e29fd0d2-d8a8-4ed4-be54-c6c0dd0f7964:9444bd0d",
"Issuer": {
"Name": "Amazon EKS Anywhere",
"KeyFingerprint": "aws:<account-id>:Amazon EKS Anywhere:issuer-fingerprint"
},
"HomeRegion": "<region>",
"Status": "AVAILABLE",
"Validity": {
"Begin": "2023-10-10T13:33:36.000Z",
"End": "2024-10-11T13:33:36.000Z"
},
"Beneficiary": "<account-id>",
"Entitlements": [
{
"Name": "EKS Anywhere for e29fd0d2-d8a8-4ed4-be54-c6c0dd0f7964",
"MaxCount": 1,
"Overage": false,
"Unit": "Count",
"AllowCheckIn": false
}
],
"ConsumptionConfiguration": {
"RenewType": "None",
"BorrowConfiguration": {
"AllowEarlyCheckIn": true,
"MaxTimeToLiveInMinutes": 527040
}
},
"CreateTime": "1696945150",
"Version": "1"
}
}
13.9 -
{
"subscriptions": [
{
"id": "e29fd0d2-d8a8-4ed4-be54-c6c0dd0f7964",
"arn": "arn:aws:eks:<region>:<account-id>:eks-anywhere-subscription/e29fd0d2-d8a8-4ed4-be54-c6c0dd0f7964",
"name": "my-subscription",
"createdAt": "2023-10-10T08:33:36.869000-05:00",
"effectiveDate": "2023-10-10T08:33:36.869000-05:00",
"expirationDate": "2024-10-10T08:33:36.869000-05:00",
"licenseQuantity": 1,
"licenseType": "CLUSTER",
"term": {
"duration": 12,
"unit": "MONTHS"
},
"status": "ACTIVE",
"packageRegistry": "<account-id>.dkr.ecr.<region>.amazonaws.com",
"autoRenew": false,
"licenseArns": [
"arn:aws:license-manager::<account-id>:license:l-4f36acf12e6d491484812927b327c066"
],
"licenses": [
{
"id": "<license-id-string>",
"token": "<license-token-string>"
}
],
"tags": {
"environment": "prod"
}
}
]
}
13.10 -
| AWS Region | Packages Registry Account |
|---|---|
| us-west-2 | 346438352937 |
| us-west-1 | 440460740297 |
| us-east-1 | 331113665574 |
| us-east-2 | 297090588151 |
| ap-east-1 | 804323328300 |
| ap-northeast-1 | 143143237519 |
| ap-northeast-2 | 447311122189 |
| ap-south-1 | 357015164304 |
| ap-south-2 | 388483641499 |
| ap-southeast-1 | 654894141437 |
| ap-southeast-2 | 299286866837 |
| ap-southeast-3 | 703305448174 |
| ap-southeast-4 | 106475008004 |
| ap-southeast-5 | 396913739932 |
| af-south-1 | 783635962247 |
| ca-central-1 | 064352486547 |
| ca-west-1 | 571600859530 |
| eu-central-1 | 364992945014 |
| eu-central-2 | 551422459769 |
| eu-north-1 | 826441621985 |
| eu-south-1 | 787863792200 |
| eu-south-2 | 127214161500 |
| eu-west-1 | 090204409458 |
| eu-west-2 | 371148654473 |
| eu-west-3 | 282646289008 |
| il-central-1 | 131750224677 |
| me-central-1 | 454241080883 |
| me-south-1 | 158698011868 |
| sa-east-1 | 517745584577 |
13.11 -
{
"subscription": {
"id": "e29fd0d2-d8a8-4ed4-be54-c6c0dd0f7964",
"arn": "arn:aws:eks:<region>:<account-id>:eks-anywhere-subscription/e29fd0d2-d8a8-4ed4-be54-c6c0dd0f7964",
"name": "my-subscription",
"createdAt": "2023-10-10T08:33:36.869000-05:00",
"effectiveDate": "2023-10-10T08:33:36.869000-05:00",
"expirationDate": "2024-10-10T08:33:36.869000-05:00",
"licenseQuantity": 1,
"licenseType": "CLUSTER",
"term": {
"duration": 12,
"unit": "MONTHS"
},
"status": "ACTIVE",
"packageRegistry": "<packages-registry>.dkr.ecr.<region>.amazonaws.com",
"autoRenew": false,
"licenseArns": [
"arn:aws:license-manager::<account-id>:license:l-4f36acf12e6d491484812927b327c066"
],
"licenses": [
{
"id": "<license-id-string>",
"token": "<license-token-string>"
}
],
"tags": {
"environment": "prod"
}
}
}
13.12 -
{
"subscription": {
"id": "e29fd0d2-d8a8-4ed4-be54-c6c0dd0f7964",
"arn": "arn:aws:eks:<region>:<account-id>:eks-anywhere-subscription/e29fd0d2-d8a8-4ed4-be54-c6c0dd0f7964",
"name": "my-subscription",
"createdAt": "2023-10-10T08:33:36.869000-05:00",
"effectiveDate": "2023-10-10T08:33:36.869000-05:00",
"expirationDate": "2024-10-10T08:33:36.869000-05:00",
"licenseQuantity": 1,
"licenseType": "CLUSTER",
"term": {
"duration": 12,
"unit": "MONTHS"
},
"status": "ACTIVE",
"packageRegistry": "<packages-registry>.dkr.ecr.<region>.amazonaws.com",
"autoRenew": true,
"licenseArns": [
"arn:aws:license-manager::<account-id>:license:l-4f36acf12e6d491484812927b327c066"
],
"licenses": [
{
"id": "<license-id-string>",
"token": "<license-token-string>"
}
],
"tags": {
"environment": "prod"
}
}
}
14 - Manage cluster with GitOps
GitOps Support (optional)
EKS Anywhere supports a GitOps workflow for the management of your cluster.
When you create a cluster with GitOps enabled, EKS Anywhere will automatically commit your cluster configuration to the provided GitHub repository and install a GitOps toolkit on your cluster which watches that committed configuration file. You can then manage the scale of the cluster by making changes to the version controlled cluster configuration file and committing the changes. Once a change has been detected by the GitOps controller running in your cluster, the scale of the cluster will be adjusted to match the committed configuration file.
If you’d like to learn more about GitOps, and the associated best practices, check out this introduction from Weaveworks .
NOTE: Installing a GitOps controller can be done during cluster creation or through upgrade. In the event that GitOps installation fails, EKS Anywhere cluster creation will continue.
Supported Cluster Properties
Currently, you can manage a subset of cluster properties with GitOps:
Management Cluster
Cluster:
workerNodeGroupConfigurations.countworkerNodeGroupConfigurations.machineGroupRef.name
WorkerNodes VSphereMachineConfig:
datastorediskGiBfoldermemoryMiBnumCPUsresourcePooltemplateusers
Workload Cluster
Cluster:
kubernetesVersioncontrolPlaneConfiguration.countcontrolPlaneConfiguration.machineGroupRef.nameworkerNodeGroupConfigurations.countworkerNodeGroupConfigurations.machineGroupRef.nameidentityProviderRefs(Only forkind:OIDCConfig,kind:AWSIamConfigis immutable)
ControlPlane / Etcd / WorkerNodes VSphereMachineConfig:
datastorediskGiBfoldermemoryMiBnumCPUsresourcePooltemplateusers
OIDCConfig:
clientIDgroupsClaimgroupsPrefixissuerUrlrequiredClaims.claimrequiredClaims.valueusernameClaimusernamePrefix
Any other changes to the cluster configuration in the git repository will be ignored. If an immutable field has been changed in a Git repository, there are two ways to find the error message:
- If a notification webhook is set up, check the error message in notification channel.
- Check the Flux Kustomization Controller log:
kubectl logs -f -n flux-system kustomize-controller-******for error message containing text similar toInvalid value: 1: field is immutable
Getting Started with EKS Anywhere GitOps with Github
In order to use GitOps to manage cluster scaling, you need a couple of things:
- A GitHub account
- A cluster configuration file with a
GitOpsConfig, referenced with agitOpsRefin your Cluster spec - A Personal Access Token (PAT) for the GitHub account , with permissions to create, clone, and push to a repo
Create a GitHub Personal Access Token
Create a Personal Access Token (PAT)
to access your provided GitHub repository.
It must be scoped for all repo permissions.
NOTE: GitOps configuration only works with hosted github.com and will not work on a self-hosted GitHub Enterprise instances.
This PAT should have at least the following permissions:
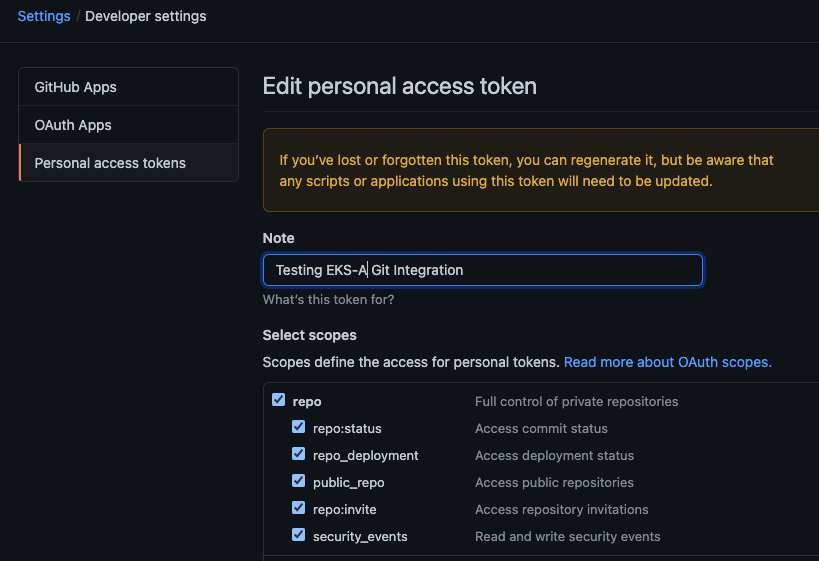
NOTE: The PAT must belong to the
ownerof therepositoryor, if using an organization as theowner, the creator of thePATmust have repo permission in that organization.
You need to set your PAT as the environment variable $EKSA_GITHUB_TOKEN to use it during cluster creation:
export EKSA_GITHUB_TOKEN=ghp_MyValidPersonalAccessTokenWithRepoPermissions
Create GitOps configuration repo
If you have an existing repo you can set that as your repository name in the configuration.
If you specify a repo in your FluxConfig which does not exist EKS Anywhere will create it for you.
If you would like to create a new repo you can click here
to create a new repo.
If your repository contains multiple cluster specification files, store them in sub-folders and specify the configuration path in your cluster specification.
In order to accommodate the management cluster feature, the CLI will now structure the repo directory following a new convention:
clusters
└── management-cluster
├── flux-system
│ └── ...
├── management-cluster
│ └── eksa-system
│ └── eksa-cluster.yaml
│ └── kustomization.yaml
├── workload-cluster-1
│ └── eksa-system
│ └── eksa-cluster.yaml
└── workload-cluster-2
└── eksa-system
└── eksa-cluster.yaml
By default, Flux kustomization reconciles at the management cluster’s root level (./clusters/management-cluster), so both the management cluster and all the workload clusters it manages are synced.
Example GitOps cluster configuration for Github
apiVersion: anywhere.eks.amazonaws.com/v1alpha1
kind: Cluster
metadata:
name: mynewgitopscluster
spec:
... # collapsed cluster spec fields
# Below added for gitops support
gitOpsRef:
kind: FluxConfig
name: my-cluster-name
---
apiVersion: anywhere.eks.amazonaws.com/v1alpha1
kind: FluxConfig
metadata:
name: my-cluster-name
spec:
github:
personal: true
repository: mygithubrepository
owner: mygithubusername
Create a GitOps enabled cluster
Generate your cluster configuration and add the GitOps configuration. For a full spec reference see the Cluster Spec reference .
NOTE: After your cluster has been created the cluster configuration will automatically be committed to your git repo.
-
Create an EKS Anywhere cluster with GitOps enabled.
CLUSTER_NAME=gitops eksctl anywhere create cluster -f ${CLUSTER_NAME}.yaml
Enable GitOps in an existing cluster
You can also install Flux and enable GitOps in an existing cluster by running the upgrade command with updated cluster configuration. For a full spec reference see the Cluster Spec reference .
-
Upgrade an EKS Anywhere cluster with GitOps enabled.
CLUSTER_NAME=gitops eksctl anywhere upgrade cluster -f ${CLUSTER_NAME}.yaml
Test GitOps controller
After your cluster has been created, you can test the GitOps controller by modifying the cluster specification.
-
Clone your git repo and modify the cluster specification. The default path for the cluster file is:
clusters/$CLUSTER_NAME/eksa-system/eksa-cluster.yaml -
Modify the
workerNodeGroupConfigurations[0].countfield with your desired changes. -
Commit the file to your git repository
git add eksa-cluster.yaml git commit -m 'Scaling nodes for test' git push origin main -
The Flux controller will automatically make the required changes.
If you updated your node count, you can use this command to see the current node state.
kubectl get nodes
Getting Started with EKS Anywhere GitOps with any Git source
You can configure EKS Anywhere to use a generic git repository as the source of truth for GitOps by providing a FluxConfig with a git configuration.
EKS Anywhere requires a valid SSH Known Hosts file and SSH Private key in order to connect to your repository and bootstrap Flux.
Create a Git repository for use by EKS Anywhere and Flux
When using the git provider, EKS Anywhere requires that the configuration repository be pre-initialized.
You may re-use an existing repo or use the same repo for multiple management clusters.
Create the repository through your git provider and initialize it with a README.md documenting the purpose of the repository.
Create a Private Key for use by EKS Anywhere and Flux
EKS Anywhere requires a private key to authenticate to your git repository, push the cluster configuration, and configure Flux for ongoing management and monitoring of that configuration. The private key should have permissions to read and write from the repository in question.
It is recommended that you create a new private key for use exclusively by EKS Anywhere.
You can use ssh-keygen to generate a new key.
ssh-keygen -t ecdsa -C "my_email@example.com"
Please consult the documentation for your git provider to determine how to add your corresponding public key; for example, if using Github enterprise, you can find the documentation for adding a public key to your github account here .
Add your private key to your SSH agent on your management machine
When using a generic git provider, EKS Anywhere requires that your management machine has a running SSH agent and the private key be added to that SSH agent.
You can start an SSH agent and add your private key by executing the following in your current session:
eval "$(ssh-agent -s)" && ssh-add $EKSA_GIT_PRIVATE_KEY
Create an SSH Known Hosts file for use by EKS Anywhere and Flux
EKS Anywhere needs an SSH known hosts file to verify the identity of the remote git host.
A path to a valid known hosts file must be provided to the EKS Anywhere command line via the environment variable EKSA_GIT_KNOWN_HOSTS.
For example, if you have a known hosts file at /home/myUser/.ssh/known_hosts that you want EKS Anywhere to use, set the environment variable EKSA_GIT_KNOWN_HOSTS to the path to that file, /home/myUser/.ssh/known_hosts.
export EKSA_GIT_KNOWN_HOSTS=/home/myUser/.ssh/known_hosts
While you can use your pre-existing SSH known hosts file, it is recommended that you generate a new known hosts file for use by EKS Anywhere that contains only the known-hosts entries required for your git host and key type.
For example, if you wanted to generate a known hosts file for a git server located at example.com with key type ecdsa, you can use the OpenSSH utility ssh-keyscan:
ssh-keyscan -t ecdsa example.com >> my_eksa_known_hosts
This will generate a known hosts file which contains only the entry necessary to verify the identity of example.com when using an ecdsa based private key file.
Example FluxConfig cluster configuration for a generic git provider
For a full spec reference see the Cluster Spec reference .
A common repositoryUrl value can be of the format ssh://git@provider.com/$REPO_OWNER/$REPO_NAME.git. This may differ from the default SSH URL given by your provider. Consider these differences between github and CodeCommit URLs:
- The github.com user interface provides an SSH URL containing a
:before the repository owner, rather than a/. Make sure to replace this:with a/, if present. - The CodeCommit SSH URL must include SSH-KEY-ID in format
ssh://<SSH-Key-ID>@git-codecommit.<region>.amazonaws.com/v1/repos/<repository>.
apiVersion: anywhere.eks.amazonaws.com/v1alpha1
kind: Cluster
metadata:
name: mynewgitopscluster
spec:
... # collapsed cluster spec fields
# Below added for gitops support
gitOpsRef:
kind: FluxConfig
name: my-cluster-name
---
apiVersion: anywhere.eks.amazonaws.com/v1alpha1
kind: FluxConfig
metadata:
name: my-cluster-name
spec:
git:
repositoryUrl: ssh://git@provider.com/myAccount/myClusterGitopsRepo.git
sshKeyAlgorithm: ecdsa
Manage separate workload clusters using Gitops
Follow these steps if you want to use your initial cluster to create and manage separate workload clusters via Gitops.
Prerequisites
-
An existing EKS Anywhere cluster with Gitops enabled. If your existing cluster does not have Gitops installed, see Enable Gitops in an existing cluster. .
-
A cluster configuration file for your new workload cluster.
Create cluster using Gitops
-
Clone your git repo and add the new cluster specification. Be sure to follow the directory structure defined here :
clusters/<management-cluster-name>/$CLUSTER_NAME/eksa-system/eksa-cluster.yamlNOTE: Specify the
namespacefor all EKS Anywhere objects when you are using GitOps to create new workload clusters (even for thedefaultnamespace, usenamespace: defaulton those objects).Ensure workload cluster object names are distinct from management cluster object names. Be sure to set the
managementClusterfield to identify the name of the management cluster.Make sure there is a
kustomization.yamlfile under the namespace directory for the management cluster. Creating a Gitops enabled management cluster witheksctlshould create thekustomization.yamlfile automatically. -
Commit the file to your git repository.
git add clusters/<management-cluster-name>/$CLUSTER_NAME/eksa-system/eksa-cluster.yaml git commit -m 'Creating new workload cluster' git push origin main -
The Flux controller will automatically make the required changes. You can list the workload clusters managed by the management cluster.
export KUBECONFIG=${PWD}/${MGMT_CLUSTER_NAME}/${MGMT_CLUSTER_NAME}-eks-a-cluster.kubeconfig kubectl get clusters -
Check the state of a cluster using
kubectlto show the cluster object with its status.The
statusfield on the cluster object field holds information about the current state of the cluster.kubectl get clusters w01 -o yamlThe cluster has been fully upgraded once the status of the
Readycondition is markedTrue. See the cluster status guide for more information. -
The kubeconfig for your new cluster is stored as a secret on the management cluster. You can get credentials and run the test application on your new workload cluster as follows:
kubectl get secret -n eksa-system w01-kubeconfig -o jsonpath='{.data.value}' | base64 —decode > w01.kubeconfig export KUBECONFIG=w01.kubeconfig kubectl apply -f "https://anywhere.eks.amazonaws.com/manifests/hello-eks-a.yaml"
Upgrade cluster using Gitops
-
To upgrade the cluster using Gitops, modify the workload cluster yaml file with the desired changes. As an example, to upgrade a cluster with version 1.34 to 1.35 you would change your spec:
apiVersion: anywhere.eks.amazonaws.com/v1alpha1 kind: Cluster metadata: name: dev namespace: default spec: controlPlaneConfiguration: count: 1 endpoint: host: "198.18.99.49" machineGroupRef: kind: VSphereMachineConfig name: dev ... kubernetesVersion: "1.35" ...NOTE: If you have a custom machine image for your nodes you may also need to update your MachineConfig with a new
template. -
Commit the file to your git repository.
git add eksa-cluster.yaml git commit -m 'Upgrading kubernetes version on new workload cluster' git push origin main
For a comprehensive list of upgradeable fields for VSphere, Snow, and Nutanix, see the upgradeable attributes section .
Delete cluster using Gitops
- To delete the cluster using Gitops, delete the workload cluster yaml file from your repository and commit those changes.
git rm eksa-cluster.yaml git commit -m 'Deleting workload cluster' git push origin main
15 - Manage cluster with Terraform
NOTE: Support for using Terraform to manage and modify an EKS Anywhere cluster is available for vSphere, Snow, Bare metal, Nutanix and CloudStack clusters.
Using Terraform to manage an EKS Anywhere Cluster (Optional)
This guide explains how you can use Terraform to manage and modify an EKS Anywhere cluster. The guide is meant for illustrative purposes and is not a definitive approach to building production systems with Terraform and EKS Anywhere.
At its heart, EKS Anywhere is a set of Kubernetes CRDs, which define an EKS Anywhere cluster,
and a controller, which moves the cluster state to match these definitions.
These CRDs, and the EKS-A controller, live on the management cluster or
on a self-managed cluster.
We can manage a subset of the fields in the EKS Anywhere CRDs with any tool that can interact with the Kubernetes API, like kubectl or, in this case, the Terraform Kubernetes provider.
In this guide, we’ll show you how to import your EKS Anywhere cluster into Terraform state and how to scale your EKS Anywhere worker nodes using the Terraform Kubernetes provider.
Prerequisites
-
An existing EKS Anywhere cluster
-
the latest version of Terraform
-
the latest version of tfk8s , a tool for converting Kubernetes manifest files to Terraform HCL
Guide
- Create an EKS-A management cluster, or a self-managed stand-alone cluster.
- if you already have an existing EKS-A cluster, skip this step.
- if you don’t already have an existing EKS-A cluster, follow the official instructions to create one
-
Set up the Terraform Kubernetes provider Make sure your KUBECONFIG environment variable is set
export KUBECONFIG=/path/to/my/kubeconfig.kubeconfigSet an environment variable with your cluster name:
export MY_EKSA_CLUSTER="myClusterName"cat << EOF > ./provider.tf provider "kubernetes" { config_path = "${KUBECONFIG}" } EOF -
Get
tfk8sand use it to convert your EKS Anywhere cluster Kubernetes manifest into Terraform HCL:- Install tfk8s
- Convert the manifest into Terraform HCL:
kubectl get cluster ${MY_EKSA_CLUSTER} -o yaml | tfk8s --strip -o ${MY_EKSA_CLUSTER}.tf -
Configure the Terraform cluster resource definition generated in step 2
- Set
metadata.generationas a computed field . Add the following to your cluster resource configuration
computed_fields = ["metadata.generation"]- Configure the field manager to force reconcile managed resources . Add the following configuration block to your cluster resource:
field_manager { force_conflicts = true }- Add the
namespaceto themetadataof the cluster - Remove the
generationfield from themetadataof the cluster - Your Terraform cluster resource should look similar to this:
computed_fields = ["metadata.generation"] field_manager { force_conflicts = true } manifest = { "apiVersion" = "anywhere.eks.amazonaws.com/v1alpha1" "kind" = "Cluster" "metadata" = { "name" = "MyClusterName" "namespace" = "default" } - Set
-
Import your EKS Anywhere cluster into terraform state:
terraform init terraform import kubernetes_manifest.cluster_${MY_EKSA_CLUSTER} "apiVersion=anywhere.eks.amazonaws.com/v1alpha1,kind=Cluster,namespace=default,name=${MY_EKSA_CLUSTER}"After you
importyour cluster, you will need to runterraform applyone time to ensure that themanifestfield of your cluster resource is in-sync. This will not change the state of your cluster, but is a required step after the initial import. Themanifestfield stores the contents of the associated kubernetes manifest, while theobjectfield stores the actual state of the resource. -
Modify Your Cluster using Terraform
- Modify the
countvalue of one of yourworkerNodeGroupConfigurations, or another mutable field, in the configuration stored in${MY_EKSA_CLUSTER}.tffile. - Check the expected diff between your cluster state and the modified local state via
terraform plan
You should see in the output that the worker node group configuration count field (or whichever field you chose to modify) will be modified by Terraform.
- Modify the
-
Now, actually change your cluster to match the local configuration:
terraform apply -
Observe the change to your cluster. For example:
kubectl get nodes
Manage separate workload clusters using Terraform
Follow these steps if you want to use your initial cluster to create and manage separate workload clusters via Terraform.
NOTE: If you choose to manage your cluster using Terraform, do not use
kubectlto edit your cluster objects as this can lead to field manager conflicts.
Prerequisites
- An existing EKS Anywhere cluster imported into Terraform state. If your existing cluster is not yet imported, see this guide. .
- A cluster configuration file for your new workload cluster.
Create cluster using Terraform
-
Create the new cluster configuration Terraform file.
tfk8s -f new-workload-cluster.yaml -o new-workload-cluster.tfNOTE: Specify the
namespacefor all EKS Anywhere objects when you are using Terraform to manage your clusters (even for thedefaultnamespace, use"namespace" = "default"on those objects).Ensure workload cluster object names are distinct from management cluster object names. Be sure to set the
managementClusterfield to identify the name of the management cluster. -
Ensure that this new Terraform workload cluster configuration exists in the same directory as the management cluster Terraform files.
my/terraform/config/path ├── management-cluster.tf ├── new-workload-cluster.tf ├── provider.tf ├── ... └── -
Verify the changes to be applied:
terraform plan -
If the plan looks as expected, apply those changes to create the new cluster resources:
terraform apply -
You can list the workload clusters managed by the management cluster.
export KUBECONFIG=${PWD}/${MGMT_CLUSTER_NAME}/${MGMT_CLUSTER_NAME}-eks-a-cluster.kubeconfig kubectl get clusters -
Check the state of a cluster using
kubectlto show the cluster object with its status.The
statusfield on the cluster object field holds information about the current state of the cluster.kubectl get clusters w01 -o yamlThe cluster has been fully upgraded once the status of the
Readycondition is markedTrue. See the cluster status guide for more information. -
The kubeconfig for your new cluster is stored as a secret on the management cluster. You can get the workload cluster credentials and run the test application on your new workload cluster as follows:
kubectl get secret -n eksa-system w01-kubeconfig -o jsonpath='{.data.value}' | base64 --decode > w01.kubeconfig export KUBECONFIG=w01.kubeconfig kubectl apply -f "https://anywhere.eks.amazonaws.com/manifests/hello-eks-a.yaml"
Upgrade cluster using Terraform
-
To upgrade a workload cluster using Terraform, modify the desired fields in the Terraform resource file. As an example, to upgrade a cluster with version 1.34 to 1.35 you would modify your Terraform cluster resource:
manifest = { "apiVersion" = "anywhere.eks.amazonaws.com/v1alpha1" "kind" = "Cluster" "metadata" = { "name" = "MyClusterName" "namespace" = "default" } "spec" = { "kubernetesVersion" = "1.35" ... ... }NOTE: If you have a custom machine image for your nodes you may also need to update your MachineConfig with a new
template. -
Apply those changes:
terraform apply
For a comprehensive list of upgradeable fields for VSphere, Snow, and Nutanix, see the upgradeable attributes section .
Delete cluster using Terraform
- To delete a workload cluster using Terraform, you will need the name of the Terraform cluster resource.
This can be found on the first line of your cluster resource definition.
terraform destroy --target kubernetes_manifest.cluster_w01
Appendix
Terraform K8s Provider https://registry.terraform.io/providers/hashicorp/kubernetes/latest/docs
16 - Reboot nodes
If you need to reboot a node in your cluster for maintenance or any other reason, performing the following steps will help prevent possible disruption of services on those nodes:
Warning
Rebooting a cluster node as described here is good for all nodes, but is critically important when rebooting a Bottlerocket node running theboots service on a Bare Metal cluster.
If it does go down while running the boots service, the Bottlerocket node will not be able to boot again until the boots service is restored on another machine. This is because Bottlerocket must get its address from a DHCP service.
- On your admin machine, set the following environment variables that will come in handy later
export CLUSTER_NAME=mgmt
export MGMT_KUBECONFIG=${CLUSTER_NAME}/${CLUSTER_NAME}-eks-a-cluster.kubeconfig
-
This ensures that there is an up-to-date cluster state available for restoration in the case that the cluster experiences issues or becomes unrecoverable during reboot.
-
Verify DHCP lease time will be longer than the maintenance time, and that IPs will be the same before and after maintenance.
This step is critical in ensuring the cluster will be healthy after reboot. If IPs are not preserved before and after reboot, the cluster may not be recoverable.
Warning
If this cannot be verified, do not proceed any further -
Pause the reconciliation of the cluster being shut down.
This ensures that the EKS Anywhere cluster controller will not reconcile on the nodes that are down and try to remediate them.
- add the paused annotation to the EKSA clusters and CAPI clusters:
kubectl annotate clusters.anywhere.eks.amazonaws.com $CLUSTER_NAME anywhere.eks.amazonaws.com/paused=true --kubeconfig=$MGMT_KUBECONFIG kubectl patch clusters.cluster.x-k8s.io $CLUSTER_NAME --type merge -p '{"spec":{"paused": true}}' -n eksa-system --kubeconfig=$MGMT_KUBECONFIG -
For all of the nodes in the cluster, perform the following steps in this order: worker nodes, control plane nodes, and etcd nodes.
-
Cordon the node so no further workloads are scheduled to run on it:
kubectl cordon <node-name> -
Drain the node of all current workloads:
kubectl drain <node-name> -
Using the appropriate method for your provider, shut down the node.
-
-
Perform system maintenance or other tasks you need to do on each node. Then boot up the node in this order: etcd nodes, control plane nodes, and worker nodes.
-
Uncordon the nodes so that they can begin receiving workloads again.
kubectl uncordon <node-name> -
Remove the paused annotations from EKS Anywhere cluster.
kubectl annotate clusters.anywhere.eks.amazonaws.com $CLUSTER_NAME anywhere.eks.amazonaws.com/paused- --kubeconfig=$MGMT_KUBECONFIG kubectl patch clusters.cluster.x-k8s.io $CLUSTER_NAME --type merge -p '{"spec":{"paused": false}}' -n eksa-system --kubeconfig=$MGMT_KUBECONFIG
17 - Cluster status
The EKS Anywhere cluster status shows information representing the actual state of the cluster vs the desired cluster specification. This is particularly useful to track the progress of cluster management operations through the cluster lifecyle feature.
Viewing an EKS Anywhere cluster status
First set the CLUSTER_NAME and KUBECONFIG environment variables.
export CLUSTER_NAME=w01
export KUBECONFIG=${CLUSTER_NAME}/${CLUSTER_NAME}-eks-a-cluster.kubeconfig
To view an EKS Anywhere cluster status, use kubectl command show the status of the cluster object.
The output should show the yaml definition of the EKS Anywhere Cluster object which has a status field.
kubectl get clusters $CLUSTER_NAME -o yaml
...
status:
conditions:
- lastTransitionTime: "2023-08-15T20:35:15Z"
status: "True"
type: Ready
- lastTransitionTime: "2023-08-15T20:35:15Z"
status: "True"
type: ControlPlaneInitialized
- lastTransitionTime: "2023-08-15T20:35:15Z"
status: "True"
type: ControlPlaneReady
- lastTransitionTime: "2023-08-15T20:35:15Z"
status: "True"
type: DefaultCNIConfigured
- lastTransitionTime: "2023-08-15T20:35:15Z"
status: "True"
type: WorkersReady
observedGeneration: 2
Cluster status attributes
The following fields may be represented on the cluster status:
status.failureMessage
Descriptive message about a fatal problem while reconciling a cluster
status.failureReason
Machine readable value about a terminal problem while reconciling the cluster set at the same time as the status.failureMessage.
status.conditions
Provides a collection of condition objects that report a high-level assessment of cluster readiness.
status.observedGeneration
This is the latest generation observed, set everytime the status is updated. If this is not the same as the cluster object’s metadata.generation, it means that the status being viewed represents an old generation of the cluster specification and is not up-to-date yet.
Cluster status conditions
Conditions provide a high-level status report representing an assessment of cluster readiness using a collection of conditions each of a particular type. The following condition types are supported:
-
ControlPlaneInitialized- reports the first control plane has been initialized and the cluster is contactable with the kubeconfig. Once this condition is markedTrue, its value never changes. -
ControlPlaneReady- reports that the condition of the current state of the control plane with respect to the desired state specified in the Cluster specification. This condition is markedTrueonce the number of control plane nodes in the cluster match the expected number of control plane nodes as defined in the cluster specifications and all the control plane nodes are up to date and ready. -
DefaultCNIConfigured- reports the configuration state of the default CNI specified in the cluster specifications. It will be marked asTrueonce the default CNI has been successfully configured on the cluster. However, if the EKS Anywhere default cilium CNI has been configured to skip upgrades in the cluster specification, then this condition will be marked asFalsewith the reasonSkipUpgradesForDefaultCNIConfigured. -
WorkersReady- reports that the condition of the current state of worker machines versus the desired state specified in the Cluster specification. This condition is markedTrueonce the following conditions are met:- For worker node groups with autoscaling configured, number of worker nodes in that group lies between the minCount and maxCount number of worker nodes as defined in the cluster specification.
- For fixed worker node groups, number of worker nodes in that group matches the expected number of worker nodes in those groups as defined in the cluster specification.
- All the worker nodes are up to date and ready.
-
Ready- reports a summary of the following conditions:ControlPlaneInitialized,ControlPlaneReady, andWorkersReady. It indicates an overall operational state of the EKS Anywhere cluster. It will be markedTrueonce the current state of the cluster has fully reached the desired state specified in the Cluster spec.
18 - Delete cluster
Deleting a workload cluster
Follow these steps to delete your EKS Anywhere cluster that is managed by a separate management cluster.
To delete a workload cluster, you will need:
- name of your workload cluster
- kubeconfig of your workload cluster
- kubeconfig of your management cluster
Run the following commands to delete the cluster:
-
Set up
CLUSTER_NAMEandKUBECONFIGenvironment variables:export CLUSTER_NAME=eksa-w01-cluster export KUBECONFIG=${CLUSTER_NAME}/${CLUSTER_NAME}-eks-a-cluster.kubeconfig export MANAGEMENT_KUBECONFIG=<path-to-management-cluster-kubeconfig> -
Run the delete command:
-
If you are running the delete command from the directory which has the cluster folder with
${CLUSTER_NAME}/${CLUSTER_NAME}-eks-a-cluster.yaml:eksctl anywhere delete cluster ${CLUSTER_NAME} --kubeconfig ${MANAGEMENT_KUBECONFIG}
Deleting a management cluster
Follow these steps to delete your management cluster.
To delete a cluster you will need:
- cluster name or cluster configuration
- kubeconfig of your cluster
Run the following commands to delete the cluster:
-
Set up
CLUSTER_NAMEandKUBECONFIGenvironment variables:export CLUSTER_NAME=mgmt export KUBECONFIG=${CLUSTER_NAME}/${CLUSTER_NAME}-eks-a-cluster.kubeconfig -
Run the delete command:
-
If you are running the delete command from the directory which has the cluster folder with
${CLUSTER_NAME}/${CLUSTER_NAME}-eks-a-cluster.yaml:eksctl anywhere delete cluster ${CLUSTER_NAME} -
Otherwise, use this command to manually specify the clusterconfig file path:
export CONFIG_FILE=<path-to-config-file> eksctl anywhere delete cluster -f ${CONFIG_FILE}
Example output:
Performing provider setup and validations
Creating management cluster
Installing cluster-api providers on management cluster
Moving cluster management from workload cluster
Deleting workload cluster
Clean up Git Repo
GitOps field not specified, clean up git repo skipped
🎉 Cluster deleted!
For vSphere, CloudStack, and Nutanix, this will delete all of the VMs that were created in your provider. For Bare Metal, the servers will be powered off if BMC information has been provided. If your workloads created external resources such as external DNS entries or load balancer endpoints you may need to delete those resources manually.
19 - Verify Cluster Images
Verify Cluster Images
Starting from v0.19.0 release, all the images used in cluster operations are signed using AWS Signer and Notation CLI. Anyone can verify signatures associated with the container images EKS Anywhere uses. Signatures are valid for two years. To verify container images, one would have to perform the following steps:
-
Install and configure the latest version of the AWS CLI. For more information, see Installing or updating the latest version of the AWS CLI in the AWS Command Line Interface User Guide.
-
Download the container-signing tools from this page by following step 3.
-
Make sure notation CLI is configured along with the AWS Signer plugin and AWS CLI. Create a JSON file with the following trust policy.
{ "version":"1.0", "trustPolicies":[ { "name":"aws-signer-tp", "registryScopes":[ "*" ], "signatureVerification":{ "level":"strict" }, "trustStores":[ "signingAuthority:aws-signer-ts" ], "trustedIdentities":[ "arn:aws:signer:us-west-2:857151390494:/signing-profiles/notationimageSigningProfileECR_rGorpoAE4o0o" ] } ] } -
Import above trust policy using:
notation policy import <json-file> -
Get the bundle of the version for which you want to verify an image:
export EKSA_RELEASE_VERSION=v0.19.0 BUNDLE_MANIFEST_URL=$(curl -sL https://anywhere-assets.eks.amazonaws.com/releases/eks-a/manifest.yaml | yq ".spec.releases[] | select(.version==\"$EKSA_RELEASE_VERSION\").bundleManifestUrl") -
Get the image you want to verify by downloading BUNDLE_MANIFEST_URL file.
-
Run the following command to verify the image signature:
notation verify <image-uri>@<sha256-image-digest>