Overview
Creating a vSphere cluster
The following diagram illustrates what happens when you start the cluster creation process.
Start creating a vSphere cluster
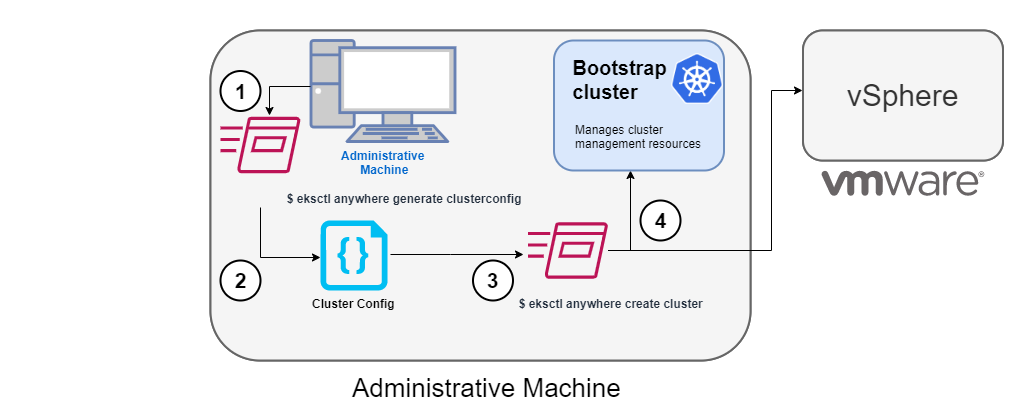
1. Generate a config file for vSphere
To this command, you identify the name of the provider (-p vsphere) and a cluster name and redirect the output to a file.
The result is a config file template that you need to modify for the specific instance of your provider.
2. Modify the config file
Using the generated cluster config file, make modifications to suit your situation. Details about this config file are contained on the vSphere Config page.
3. Launch the cluster creation
Once you have modified the cluster configuration file, use eksctl anywhere create cluster -f $CLUSTER_NAME.yaml starts the cluster creation process.
To see details on the cluster creation process, increase verbosity (-v=9 provides maximum verbosity).
4. Authenticate and create bootstrap cluster
After authenticating to vSphere and validating the assets there, the cluster creation process starts off creating a temporary Kubernetes bootstrap cluster on the Administrative machine. To begin, the cluster creation process runs a series of govc commands to check on the vSphere environment:
-
Checks that the vSphere environment is available.
-
Using the URL and credentials provided in the cluster spec files, authenticates to the vSphere provider.
-
Validates that the datacenter and the datacenter network exists.
-
Validates that the identified datastore (to store your EKS Anywhere cluster) exists, that the folder holding your EKS Anywhere cluster VMs exists, and that the resource pools containing compute resources exist. If you have multiple
VSphereMachineConfigobjects in your config file, you will see these validations repeated. -
Validates the virtual machine templates to be used for the control plane and worker nodes (such as
ubuntu-2004-kube-v1.20.7).
If all validations pass, you will see this message:
✅ Vsphere Provider setup is valid
Next, the process runs the kind command to build a single-node Kubernetes bootstrap cluster on the Administrative machine. This includes pulling the kind node image, preparing the node, writing the configuration, starting the control-plane, and installing CNI. You will see:
After this point the bootstrap cluster is installed, but not yet fully configured.
Continuing cluster creation
The following diagram illustrates the activities that occur next:
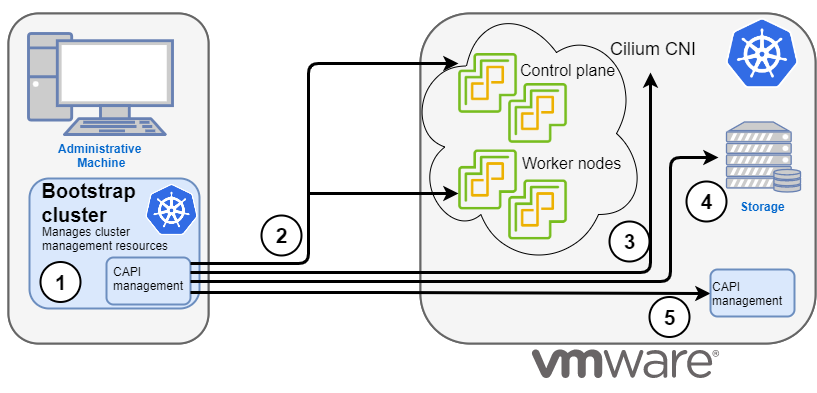
1. Add CAPI management
Cluster API (CAPI) management is added to the bootstrap cluster to direct the creation of the target cluster.
2. Set up cluster
Configure the control plane and worker nodes.
3. Add Cilium networking
Add Cilium as the CNI plugin to use for networking between the cluster services and pods.
4. Add CAPI to target cluster
Add the CAPI service to the target cluster in preparation for it to take over management of the cluster after the cluster creation is completed and the bootstrap cluster is deleted. The bootstrap cluster can then begin moving the CAPI objects over to the target cluster, so it can take over the management of itself.
With the bootstrap cluster running and configured on the Administrative machine, the creation of the target cluster begins.
It uses kubectl to apply a target cluster configuration as follows:
-
Once etcd, the control plane, and the worker nodes are ready, it applies the networking configuration to the target cluster.
-
CAPI providers are configured on the target cluster, in preparation for the target cluster to take over responsibilities for running the components needed to manage itself.
-
With CAPI running on the target cluster, CAPI objects for the target cluster are moved from the bootstrap cluster to the target cluster’s CAPI service (done internally with the
clusterctlcommand). -
Add Kubernetes CRDs and other addons that are specific to EKS Anywhere.
-
The cluster configuration is saved.
Once etcd, the control plane, and the worker nodes are ready, it applies the networking configuration to the workload cluster:
Installing networking on workload cluster
After that, the CAPI providers are configured on the workload cluster, in preparation for the workload cluster to take over responsibilities for running the components needed to manage itself:
Installing cluster-api providers on workload cluster
With CAPI running on the workload cluster, CAPI objects for the workload cluster are moved from the bootstrap cluster to the workload cluster’s CAPI service (done internally with the clusterctl command):
Moving cluster management from bootstrap to workload cluster
At this point, the cluster creation process will add Kubernetes CRDs and other addons that are specific to EKS Anywhere. That configuration is applied directly to the cluster:
Installing EKS-A custom components (CRD and controller) on workload cluster
Creating EKS-A CRDs instances on workload cluster
Installing GitOps Toolkit on workload cluster
If you did not specify GitOps support, starting the flux service is skipped:
GitOps field not specified, bootstrap flux skipped
The cluster configuration is saved:
Writing cluster config file
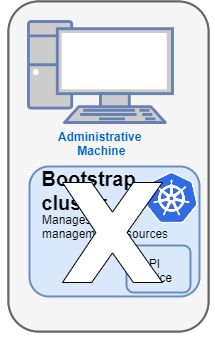
With the cluster up, and the CAPI service running on the new cluster, the bootstrap cluster is no longer needed and is deleted:
At this point, cluster creation is complete. You can now use your target cluster as either:
- A standalone cluster (to run workloads) or
- A management cluster (to optionally create one or more workload clusters)
Creating workload clusters (optional)
As described in Create separate workload clusters , you can use the cluster you just created as a management cluster to create and manage one or more workload clusters on the same vSphere provider as follows:
- Use
eksctlto generate a cluster config file for the new workload cluster. - Modify the cluster config with a new cluster name and different vSphere resources.
- Use
eksctlto create the new workload cluster from the new cluster config file and credentials from the initial management cluster.