Preparing CloudStack for EKS Anywhere
Before you can create an EKS Anywhere cluster in CloudStack, you must do some setup on your CloudStack environment. This document helps you get what you need to fulfill the prerequisites described in the Requirements and values you need for CloudStack configuration .
Set up a domain and user credentials
Either use the ROOT domain or create a new domain to deploy your EKS Anywhere cluster. One or more users are grouped under a domain. This example creates a user account for the domain with a Domain Administrator role. From the apachecloudstack console:
-
Select Domains.
-
Select Add Domain.
-
Fill in the Name for the domain (
eksain this example) and select OK. -
Select Accounts -> Add Account, then fill in the form to add a user with
DomainAdminrole, as shown in the following figure: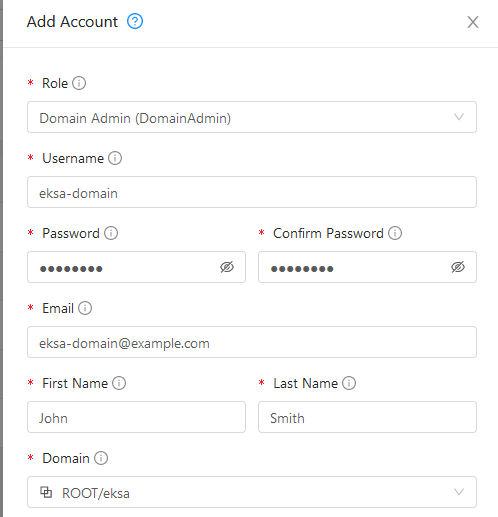
-
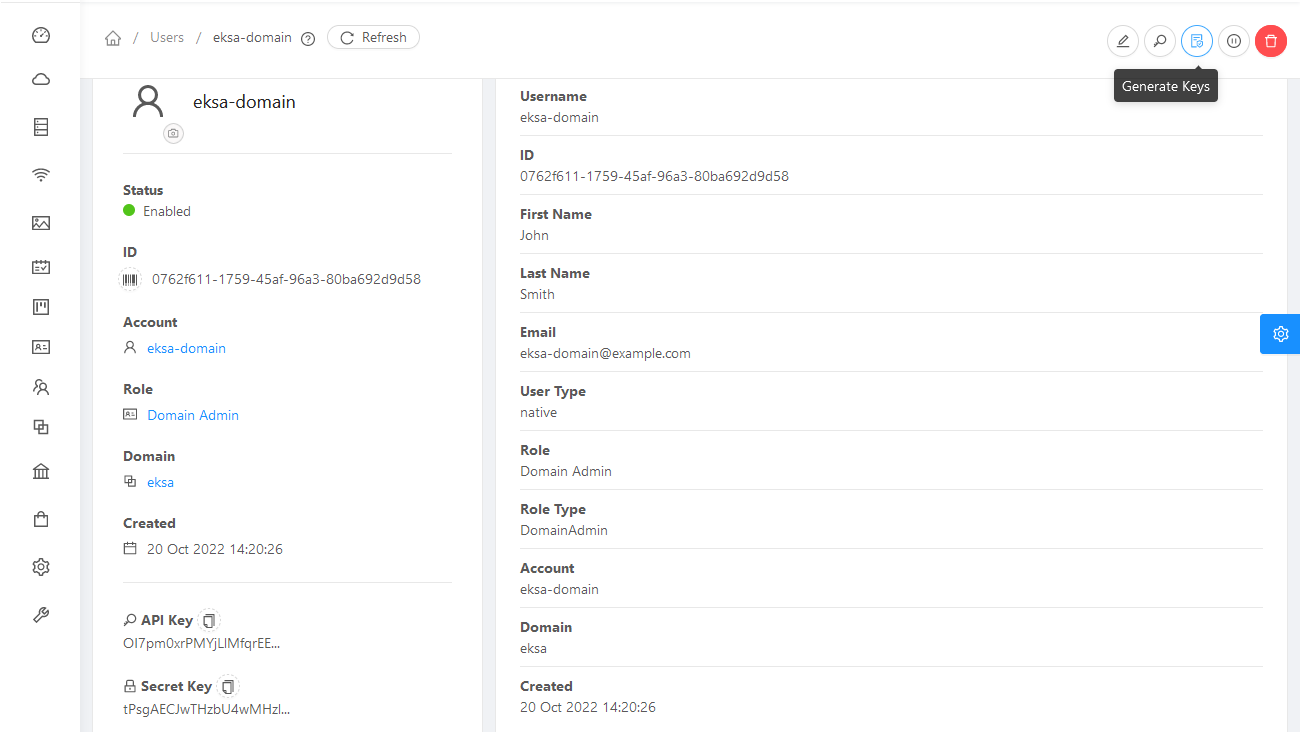
To generate API credentials for the user, select Accounts->
-> View Users -> and select the Generate Keys button. -
Select OK to confirm key generation. The API Key and Secret Key should appear as shown in the following figure:
-
Copy the API Key and Secret Key to a credentials file to use when you generate your cluster. For example:
[Global]
api-url = http://10.0.0.2:8080/client/api
api-key = OI7pm0xrPMYjLlMfqrEEj...
secret-key = tPsgAECJwTHzbU4wMH...
Import template
You need to build at least one operating system image and import it as a template to use for your cluster nodes. Currently, only Red Hat Enterprise Linux 8 images are supported. To build a RHEL-based image to use with EKS Anywhere, see Build node images .
-
Make your image accessible from you local machine or from a URL that is accessible to your CloudStack setup.
-
Select Images -> Templates, then select either Register Template from URL or Select local Template. The following figure lets you register a template from URL:
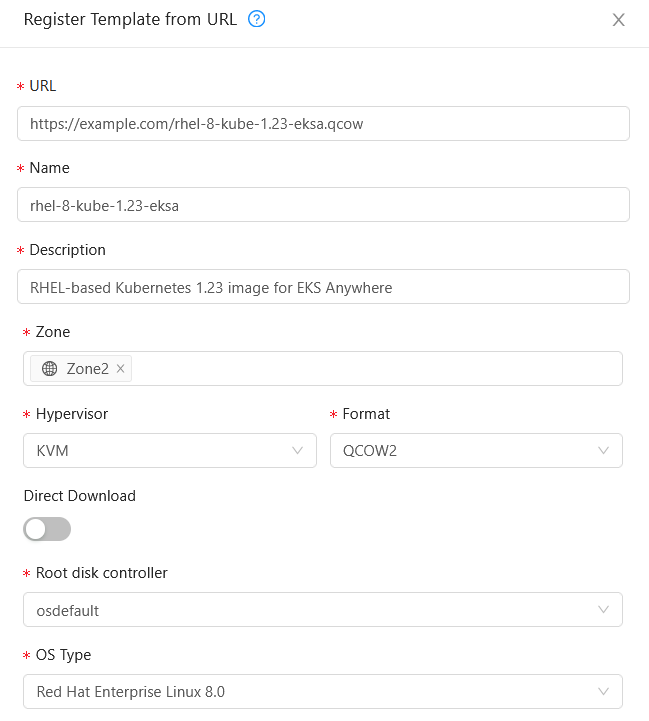
This example imports a RHEL image (QCOW2), identifies the zone from which it will be available, uses KVM as the hypervisor, uses the osdefault Root disk controller, and identifies the OS Type as Red Hat Enterprise Linux 8.0. Select OK to save the template.
-
Note the template name and zone so you can use it later when you deploy your cluster.
Create CloudStack configurations
Take a look at the following CloudStack configuration settings before creating your EKS Anywhere cluster. You will need to identify many of these assets when you create you cluster specification:
DatacenterConfig information
Here is how to get information to go into the CloudStackDatacenterConfig section of the CloudStack cluster configuration file:
-
Domain: Select Domains, then select your domain name from under the ROOT domain. Select View Users, not the user with the Domain Admin role, and consider setting limits to what each user can consume from the Resources and Configure Limits tabs.
-
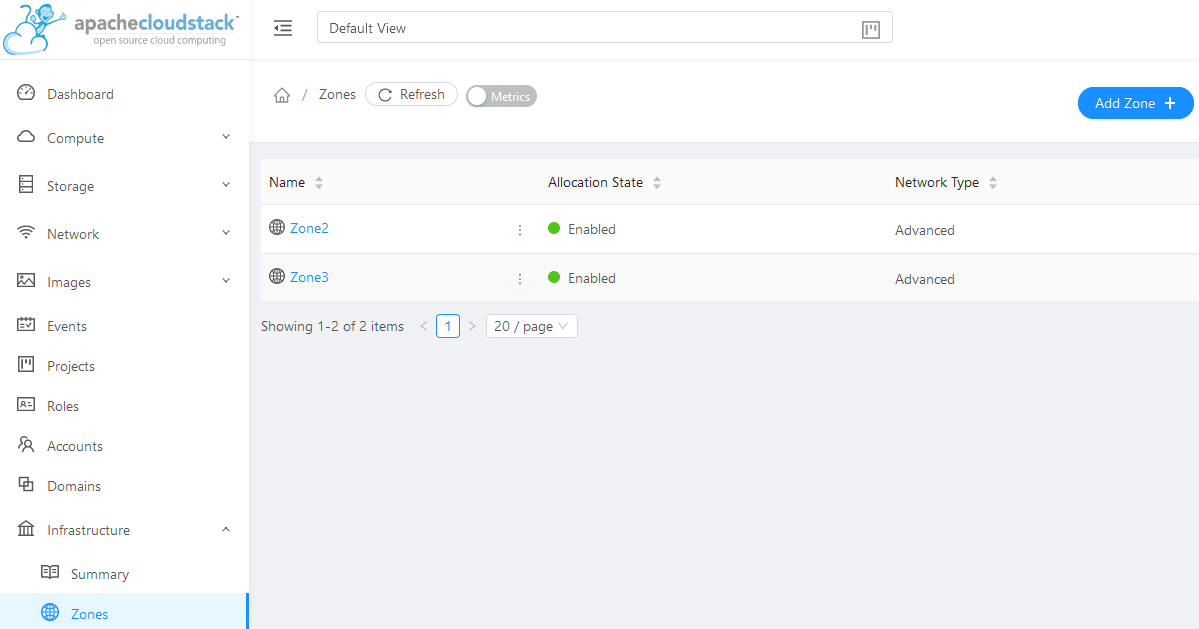
Zones: Select Infrastructure -> Zones. Find a Zone where you can deploy your cluster or create a new one.
-
Network: Select Network -> Guest networks. Choose a network to use for your cluster or create a new one.
Here is what some of that information would look like in a cluster configuration:
apiVersion: anywhere.eks.amazonaws.com/v1alpha1
kind: CloudStackDatacenterConfig
metadata:
  name: my-cluster-name-datacenter
spec:
  availabilityZones:
  - account: admin
    credentialsRef: global
    domain: eksa
    managementApiEndpoint: ""
    name: az-1
    zone:
      name: Zone2
      network:
        name: "SharedNet2"
MachineConfig information
Here is how to get information to go into CloudStackMachineConfig sections of the CloudStack cluster configuration file:
-
computeOffering: Select Service Offerings -> Compute Offerings to see a list of available combinations of CPU cores, CPU, and memory to apply to your node instances. See the following figure for an example:
-
template: Select Images -> Templates to see available operating system image templates.
-
diskOffering: Select Storage -> Volumes, the select Create Volume, if you want to create disk storage to attach to your nodes (optional). You can use this to store logs or other data you want saved outside of the nodes. When you later create the cluster configuration, you can identify things like where you want the device mounted, the type of file system, labels and other information.
-
AffinityGroupIds: Select Compute -> Affinity Groups, then select Add new affinity group (optional). By creating an affinity group, you can tell all VMs from a set of instances to either all run on different physical hosts (anti-affinity) or just run anywhere they can (affinity).
Here is what some of that information would look like in a cluster configuration:
apiVersion: anywhere.eks.amazonaws.com/v1alpha1
kind: CloudStackMachineConfig
metadata:
  name: my-cluster-name-cp
spec:
  computeOffering:
    name: "Medium Instance"
  template:
    name: "rhel9-kube-1.35-eksa"
  diskOffering:
    name: "Small"
    mountPath: "/data-small"
    device: "/dev/vdb"
    filesystem: "ext4"
    label: "data_disk"
  symlinks:
    /var/log/kubernetes: /data-small/var/log/kubernetes
  affinityGroupIds:
  - control-plane-anti-affinity