Harbor use cases
Important
To install Harbor package, please follow the installation guide.Proxy a public Amazon Elastic Container Registry (ECR) repository
This use case is to use Harbor to proxy and cache images from a public ECR repository, which helps limit the amount of requests made to a public ECR repository, avoiding consuming too much bandwidth or being throttled by the registry server.
-
Login
Log in to the Harbor web portal with the default credential as shown below
admin
Harbor12345
-
Create a registry proxy
Navigate to
Registrieson the left panel, and then click onNEW ENDPOINTbutton. ChooseDocker Registryas the Provider, and enterpublic-ecras the Name, and enterhttps://public.ecr.aws/as the Endpoint URL. Save it by clicking on OK.
-
Create a proxy project
Navigate to
Projectson the left panel and click on theNEW PROJECTbutton. Enterproxy-projectas the Project Name, checkPublic access level, and turn on Proxy Cache and choosepublic-ecrfrom the pull-down list. Save the configuration by clicking on OK.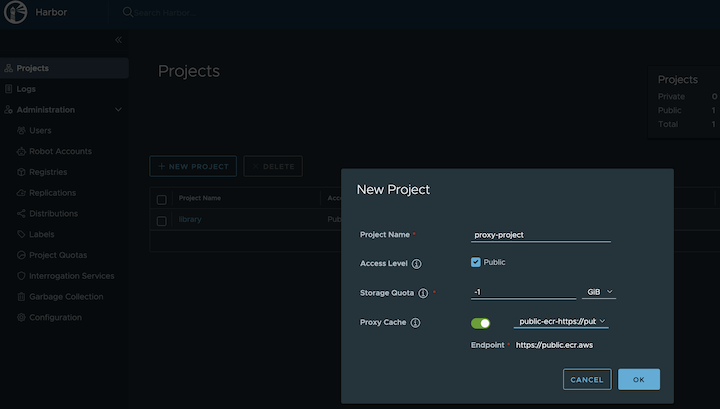
-
Pull images
Note
harbor.eksa.demo:30003should be replaced with whateverexternalURLis set to in the Harbor package YAML file.
docker pull harbor.eksa.demo:30003/proxy-project/cloudwatch-agent/cloudwatch-agent:latest
Proxy a private Amazon Elastic Container Registry (ECR) repository
This use case is to use Harbor to proxy and cache images from a private ECR repository, which helps limit the amount of requests made to a private ECR repository, avoiding consuming too much bandwidth or being throttled by the registry server.
-
Login
Log in to the Harbor web portal with the default credential as shown below
admin Harbor12345 -
Create a registry proxy
In order for Harbor to proxy a remote private ECR registry, an IAM credential with necessary permissions need to be created. Usually, it follows three steps:
-
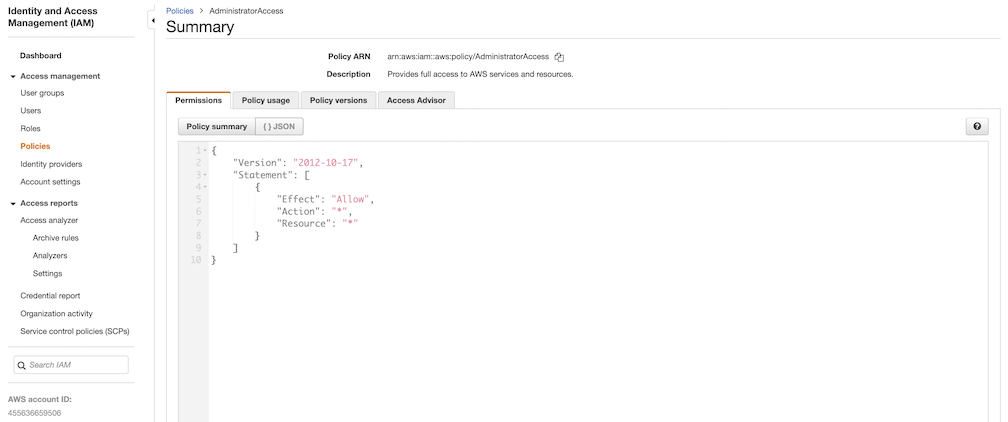
Policy
This is where you specify all necessary permissions. Please refer to private repository policies , IAM permissions for pushing an image and ECR policy examples to figure out the minimal set of required permissions.
For simplicity, the build-in policy AdministratorAccess is used here.
-
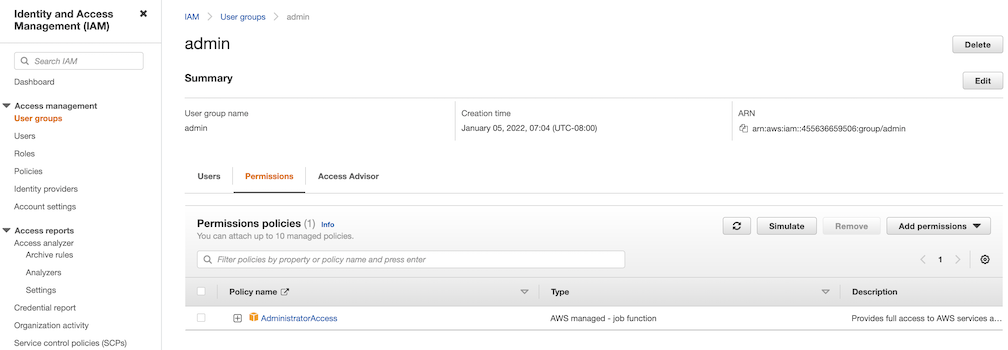
User group
This is an easy way to manage a pool of users who share the same set of permissions by attaching the policy to the group.
-
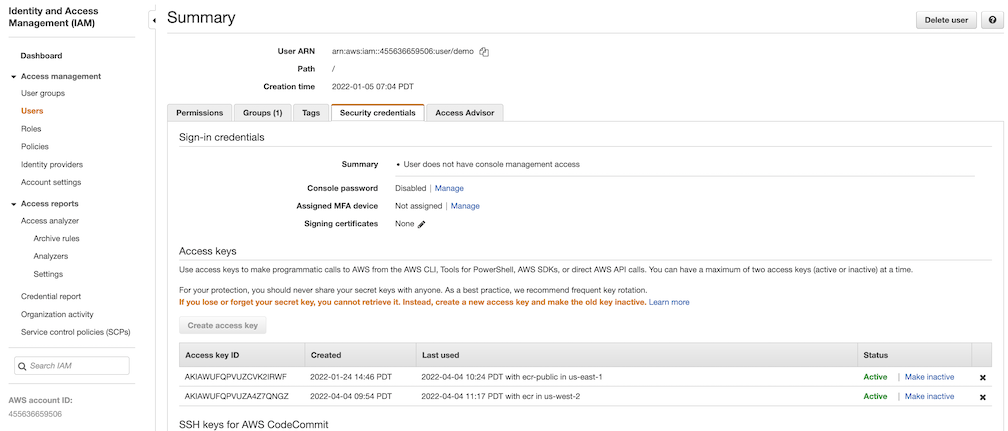
User
Create a user and add it to the user group. In addition, please navigate to Security credentials to generate an access key. Access keys consists of two parts: an access key ID and a secret access key. Please save both as they are used in the next step.
Navigate to
Registrieson the left panel, and then click onNEW ENDPOINTbutton. ChooseAws ECRas Provider, and enterprivate-ecras Name,https://[ACCOUNT NUMBER].dkr.ecr.us-west-2.amazonaws.com/as Endpoint URL, use the access key ID part of the generated access key as Access ID, and use the secret access key part of the generated access key as Access Secret. Save it by click on OK.
-
-
Create a proxy project
Navigate to
Projectson the left panel and click onNEW PROJECTbutton. Enterproxy-private-projectas Project Name, checkPublic access level, and turn on Proxy Cache and chooseprivate-ecrfrom the pull-down list. Save the configuration by clicking on OK.
-
Pull images
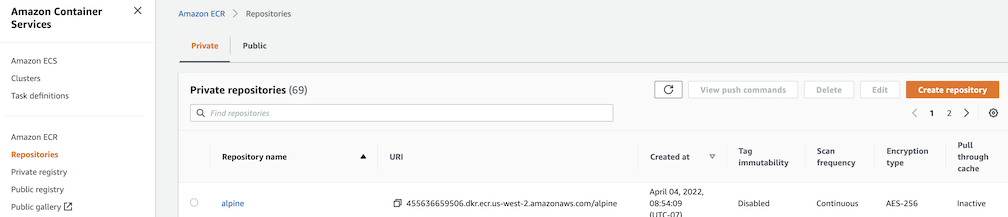
Create a repository in the target private ECR registry
Push an image to the created repository
docker pull alpine
docker tag alpine [ACCOUNT NUMBER].dkr.ecr.us-west-2.amazonaws.com/alpine:latest
docker push [ACCOUNT NUMBER].dkr.ecr.us-west-2.amazonaws.com/alpine:latest
Note
harbor.eksa.demo:30003should be replaced with whateverexternalURLis set to in the Harbor package YAML file.
docker pull harbor.eksa.demo:30003/proxy-private-project/alpine:latest
Repository replication from Harbor to a private Amazon Elastic Container Registry (ECR) repository
This use case is to use Harbor to replicate local images and charts to a private ECR repository in push mode. When a replication rule is set, all resources that match the defined filter patterns are replicated to the destination registry when the triggering condition is met.
-
Login
Log in to the Harbor web portal with the default credential as shown below
admin Harbor12345 -
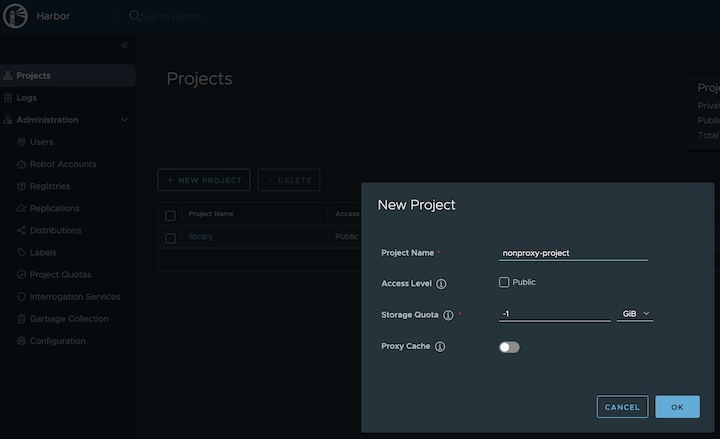
Create a nonproxy project
-
Create a registry proxy
In order for Harbor to proxy a remote private ECR registry, an IAM credential with necessary permissions need to be created. Usually, it follows three steps:
-
Policy
This is where you specify all necessary permissions. Please refer to private repository policies , IAM permissions for pushing an image and ECR policy examples to figure out the minimal set of required permissions.
For simplicity, the build-in policy AdministratorAccess is used here.
-
User group
This is an easy way to manage a pool of users who share the same set of permissions by attaching the policy to the group.
-
User
Create a user and add it to the user group. In addition, please navigate to Security credentials to generate an access key. Access keys consists of two parts: an access key ID and a secret access key. Please save both as they are used in the next step.
Navigate to
Registrieson the left panel, and then click on theNEW ENDPOINTbutton. ChooseAws ECRas the Provider, and enterprivate-ecras the Name,https://[ACCOUNT NUMBER].dkr.ecr.us-west-2.amazonaws.com/as the Endpoint URL, use the access key ID part of the generated access key as Access ID, and use the secret access key part of the generated access key as Access Secret. Save it by clicking on OK. -
-
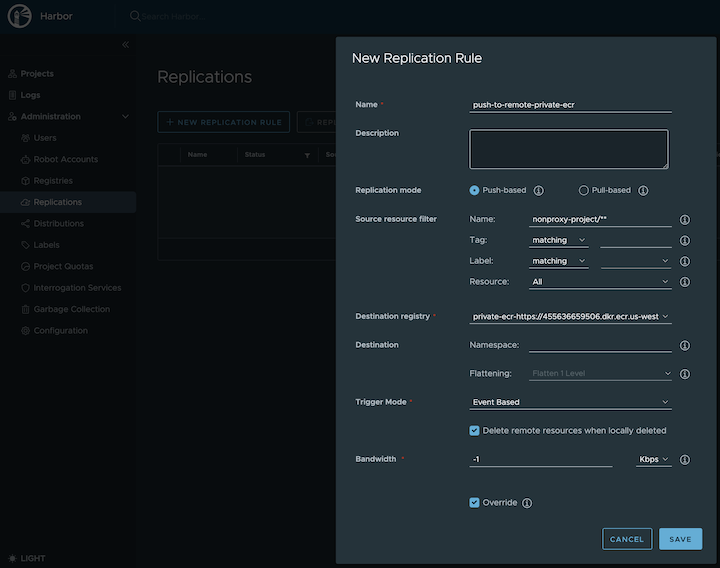
Create a replication rule
-
Prepare an image
Note
harbor.eksa.demo:30003should be replaced with whateverexternalURLis set to in the Harbor package YAML file.
docker pull alpine docker tag alpine:latest harbor.eksa.demo:30003/nonproxy-project/alpine:latest -
Authenticate with Harbor with the default credential as shown below
admin
Harbor12345
Note
harbor.eksa.demo:30003should be replaced with whateverexternalURLis set to in the Harbor package YAML file.
docker logout docker login harbor.eksa.demo:30003 -
Push images
Create a repository in the target private ECR registry
Note
harbor.eksa.demo:30003should be replaced with whateverexternalURLis set to in the Harbor package YAML file.
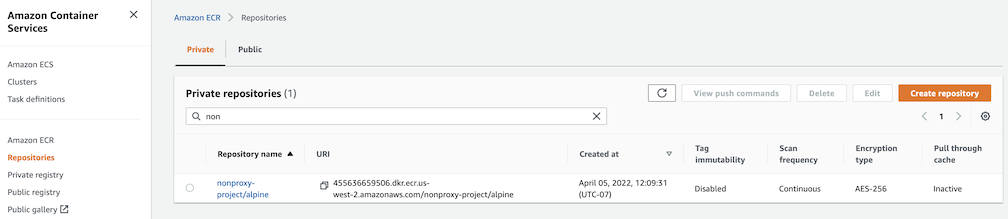
docker push harbor.eksa.demo:30003/nonproxy-project/alpine:latestThe image should appear in the target ECR repository shortly.
Set up trivy image scanner in an air-gapped environment
This use case is to manually import vulnerability database to Harbor trivy when Harbor is running in an air-gapped environment. All the following commands are assuming Harbor is running in the default namespace.
-
Configure trivy
TLS example with auto certificate generation
apiVersion: packages.eks.amazonaws.com/v1alpha1
kind: Package
metadata:
   name: my-harbor
   namespace: eksa-packages
spec:
   packageName: harbor
   config: |-
     secretKey: "use-a-secret-key"
     externalURL: https://harbor.eksa.demo:30003
     expose:
       tls:
         certSource: auto
         auto:
           commonName: "harbor.eksa.demo"
       trivy:
         skipUpdate: true
         offlineScan: true
Non-TLS example
apiVersion: packages.eks.amazonaws.com/v1alpha1
kind: Package
metadata:
   name: my-harbor
   namespace: eksa-packages
spec:
   packageName: harbor
   config: |-
     secretKey: "use-a-secret-key"
     externalURL: http://harbor.eksa.demo:30002
     expose:
       tls:
         enabled: false
     trivy:
       skipUpdate: true
       offlineScan: true
If Harbor is already running without the above trivy configurations, run the following command to update both
skipUpdateandofflineScankubectl edit statefulsets/harbor-helm-trivy -
Download the vulnerability database to your local host
Please follow oras installation instruction .
oras pull ghcr.io/aquasecurity/trivy-db:2 -a -
Upload database to trivy pod from your local host
kubectl cp db.tar.gz harbor-helm-trivy-0:/home/scanner/.cache/trivy -c trivy -
Set up database on Harbor trivy pod
kubectl exec -it harbor-helm-trivy-0 -c trivy bash
cd /home/scanner/.cache/trivy
mkdir db
mv db.tar.gz db
cd db
tar zxvf db.tar.gz